Depending on the desired functionality, adding a button to Flare’s Web outputs can be fairly easy and requires some basic JavaScript knowledge.
This blog post will outline the steps required to create a button in HTML5 output that changes text color based off of an “ID”. The JavaScript function for HTML5 and WebHelp will be provided. To create the same effect in WebHelp, use the same steps, but use the default skin and the correct script for WebHelp (below). Note, this script will not work in Chrome unless viewed from a WebServer. If you are going to test/run this script locally, run the resulting output in Internet Explorer.
Things you will need:
- A new Flare Project with an HTML5 Target and Skin
- Set an ID in a topic
- Some JavaScript (See Below) for the skin file
Topic and ID:
1. Open the topic in the text editor and add id=”foo” to the <p> tag.
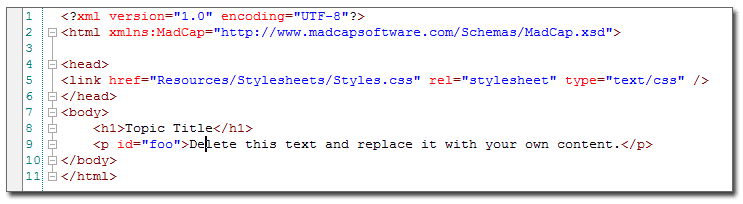
2. Save all and close the topic in the Text Editor
Skin settings:
1. In the Project Organizer, open the HTML5 Skin in the Skin Editor
2. Go to the “Toolbar” Tab
3. Click the “Add custom toolbar item” button and name the button “changeColor”
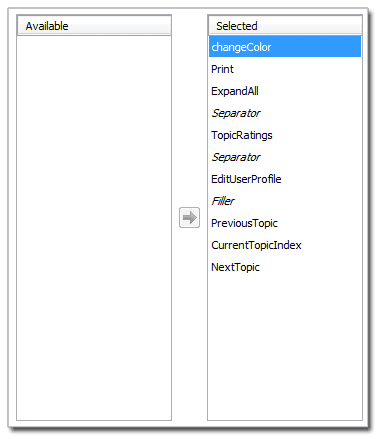
4. Click the “Add item” button to move the ‘changeColor’ button to the ‘Selected’ column
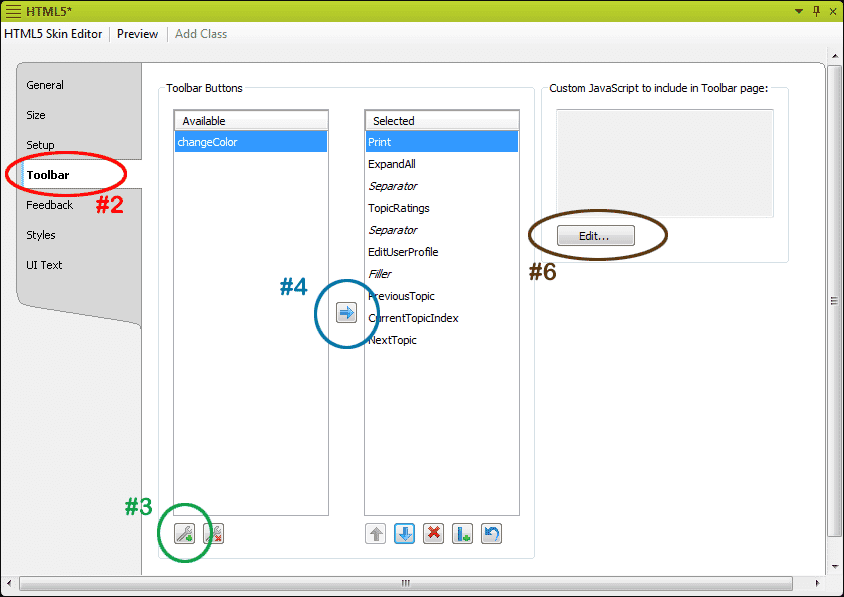
5. Your ‘Selected’ column should now look like this:
6. Now click the “Edit” button and paste this code into it:
function changeColor()
{
frames[‘topic’].document.getElementById(“foo”).style.color=”#FF0000″;
}
7. OK and Save all
8. Go to the Styles tab and the styles dialog box
9. Scroll down to the “Toolbar Button” node and expand it
10. You should see the button that you created “changeColor”, click on it
11. Click and expand the Event node and type in the “Click” area: “changeColor()”
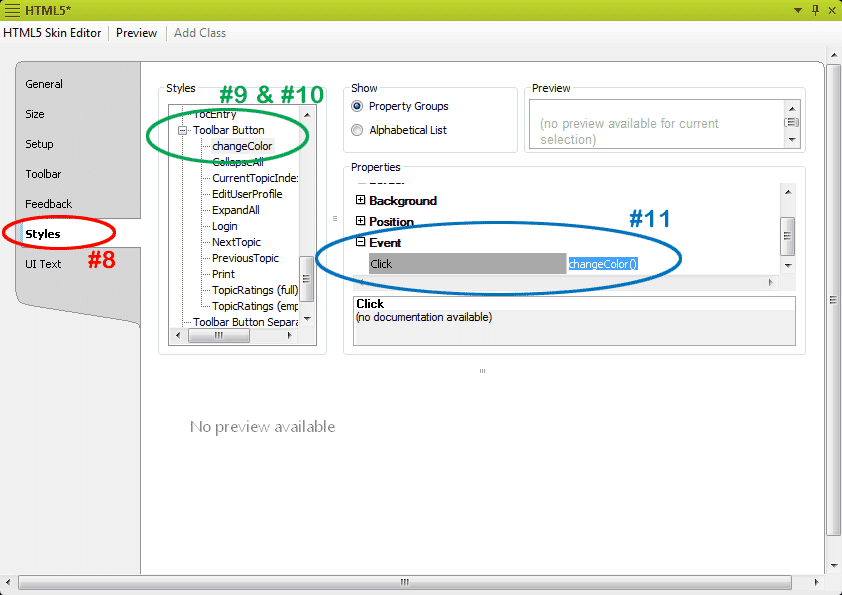
12. Save all and close the Skin
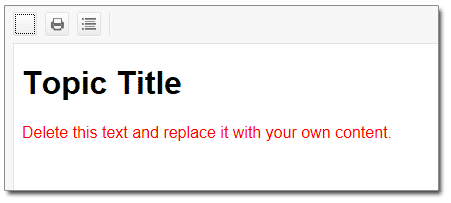
The button can now be styled to include an icon, text, different colors, etc. Just go back to the Styles Tab in the skin and edit the properties for the button as you want.
Notes:
- Make sure that the button name is all one word (no spaces) and that the casing in the script is all the same.
- Since browser security is different, be sure to test any custom script locally and on a WebServer in all browsers. As in this example, some scripts will not work locally but will function fine served up or altered security settings.
To do this for WebHelp, use the steps above, but you will be editing the Default Skin and adding the this JavaScript instead of the code given above.
function changeColor()
{
 self.frames['body'].document.getElementById("textColor").style.color="#FF0000";
}