


This guest post was written by Yaroslava Kachan. Yaroslava has been working as a tech writer for over 5 years. She is a co-founder of the tech writers community in Ukraine, organizer of workshops, lecturer, and author of articles on technical writing.
What Task Do We Solve?
Among other products, my company KMD develops an add-in for Microsoft Outlook. Outlook is available as a desktop solution and as a web solution so that users can access it in a browser. While 90% of the features and UI elements for the desktop and web solutions are aligned, about 10% still differ.
Our users can use both Outlook on the desktop or on the web depending on their taste, and we never know what a specific user prefers. The link to our documentation is hardcoded in our add-in, so I cannot create two different versions of online help for desktop and web. Constantly repeating the phrase: “If you use the desktop Outlook, do the following…. If you use the web Outlook, do the following…” this is not an elegant solution. That was my challenge.
I was looking for an elegant solution and found the article in this blog called How to Implement Live Filtering Into Your MadCap Flare Project by Daniel McLeod. I contacted Daniel to discuss the possibility of buying his scripts. However, we discovered that his solution is not universal and it is applicable only to his documentation.
Still, it was a useful finding because Daniel’s solution inspired me to create something similar for my documentation. I asked my husband and one of my colleagues who is a software developer for help, and they developed a JavaScript file applicable to my case. I was happy to discover that the solution is universal and all of you can apply it with minor modifications.
About Global Live Filtering and Topic Live Filtering
Live filtering is a functionality that makes it possible to switch between different modifications of a page. Moreover, this solution can be applied to the project level (Global live filtering) or on the topic level (Topic live filtering).
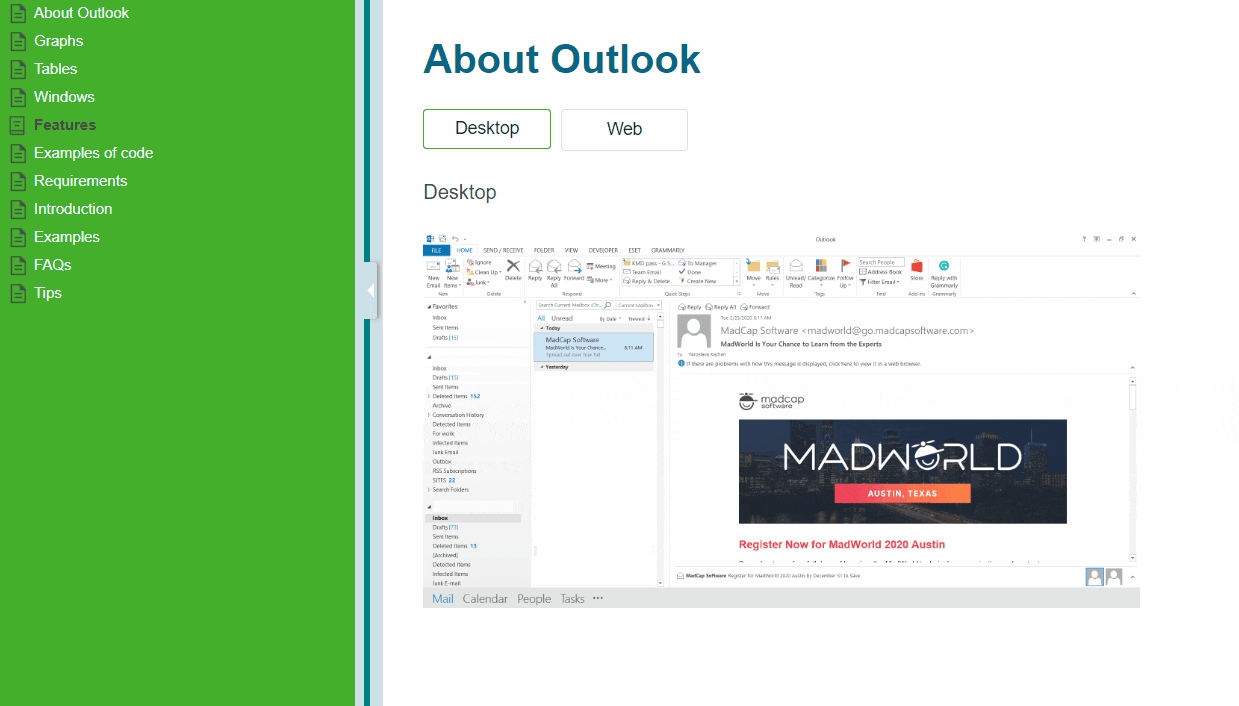
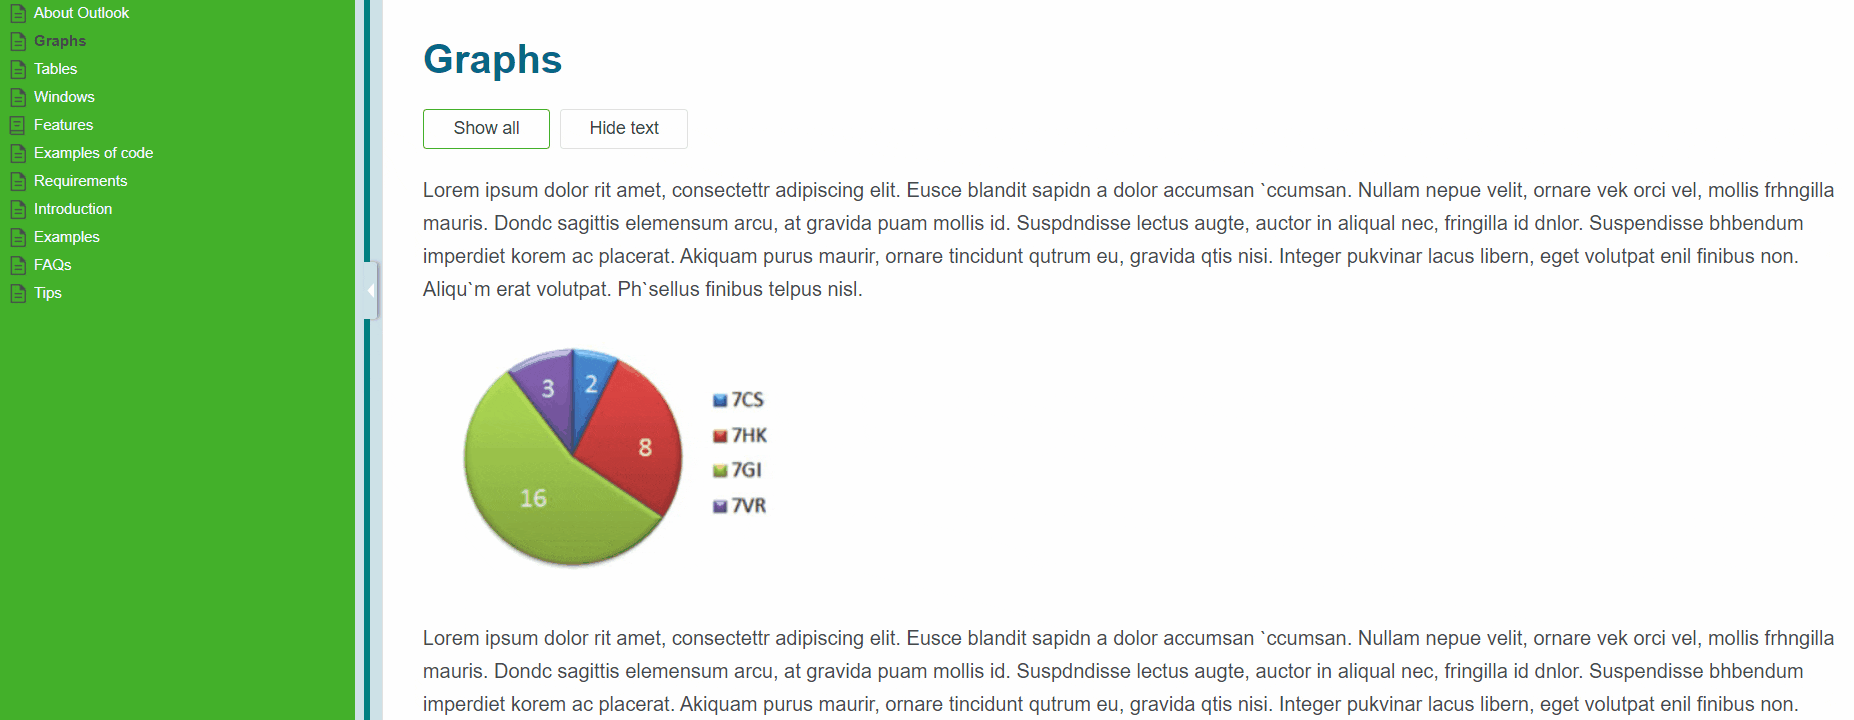
Here is an example of the Global and Topic live filtering UI:
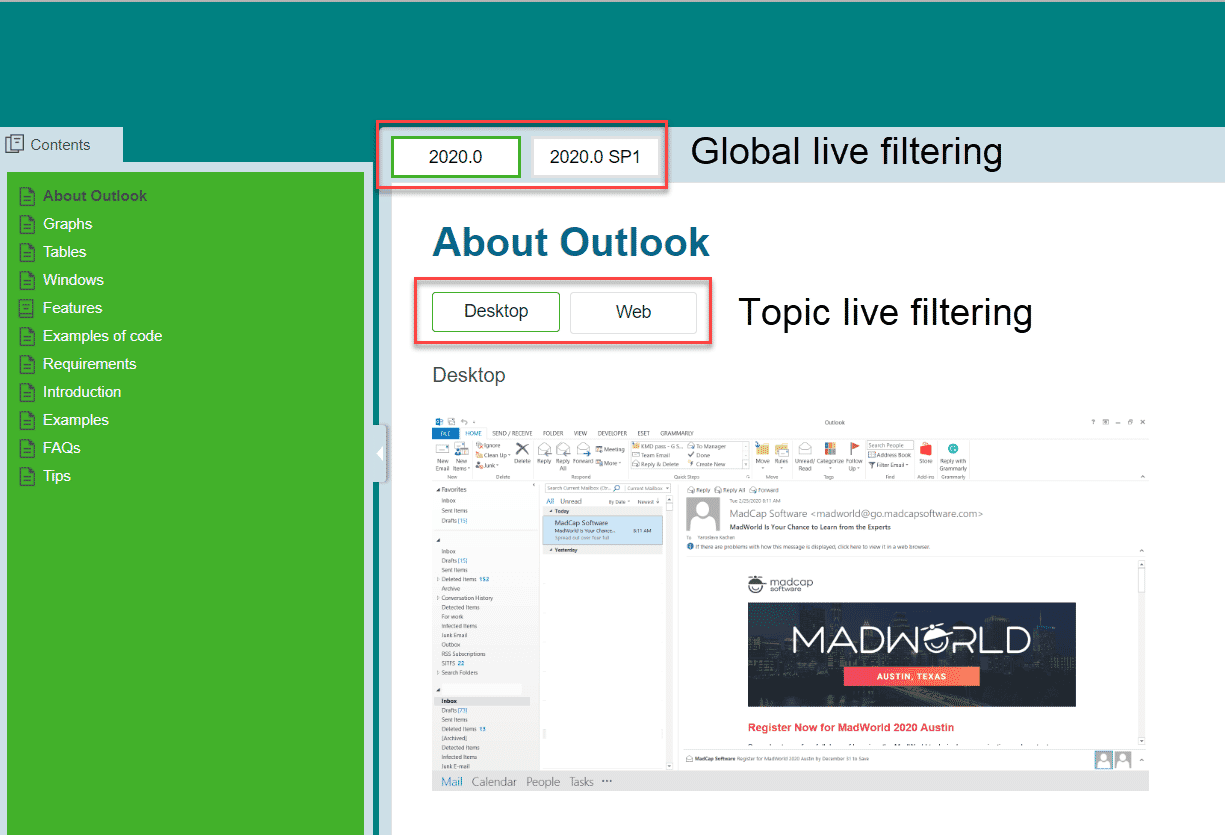
- When you apply Global live filtering, buttons will appear on the toolbar and they will affect the entire guide.
- When you apply Topic live filtering, buttons will appear in the topic and they will affect the topic only.
This diagram describes the default logic of Live filtering:
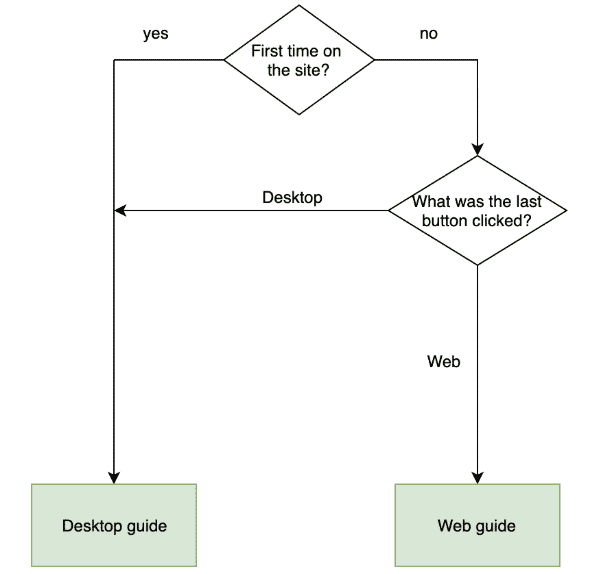
When a user opens documentation for the first time, the Desktop button is clicked by default and the user sees the documentation for desktop. If the user clicks the Web button, the system memorizes this choice and the user starts seeing the documentation for web. If the user closes the browser and then opens it later, the latest choice is stored and the user sees the documentation for the web version.
As you see, you can set the default value. In our case, it is Desktop.
Important note: While Topic live filtering applies to all three skin types (Tripane, Top navigation, and Side navigation), Global live filtering applies to the Tripane skin only.
Implementation of Global and Topic live filterings have some minor differences both in procedures and in JavaScripts. In this article, I will focus on Topic live filtering since it’s applicable to all skin types and relevant for a larger number of MadCap Flare users.
Implementation
To configure Topic live filtering, you need the JavaScript file. Please read how to obtain it at the end of this article.
You must also configure:
- A Skin file
- A CSS file
- Topic(s)
Skin
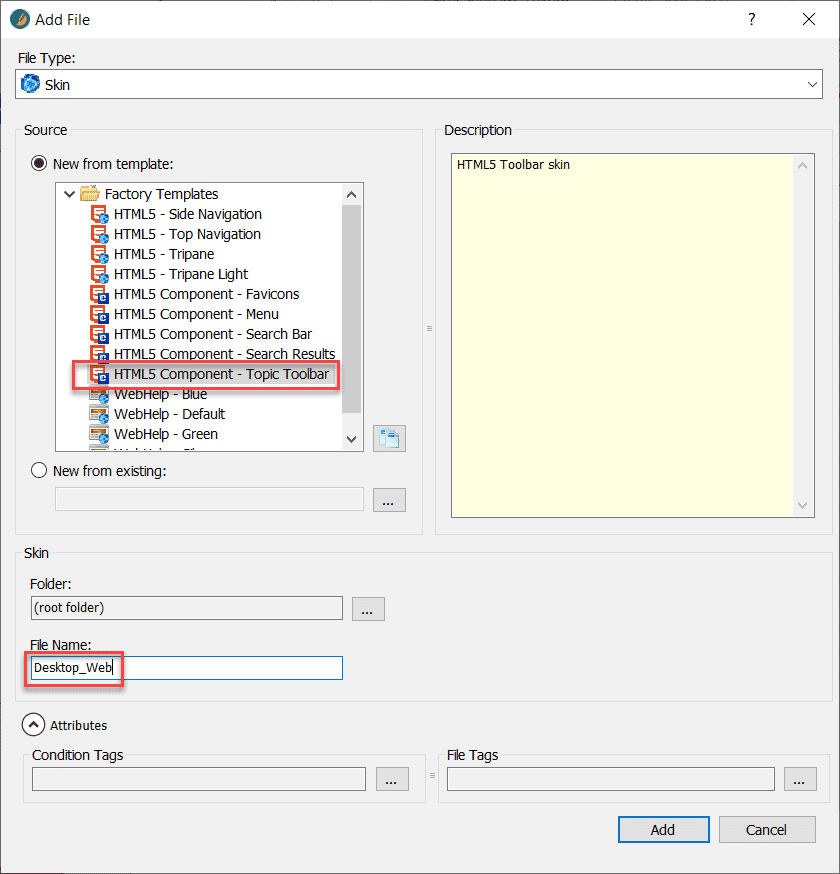
1. Create a new skin based on the HTML5 Component – Topic Toolbar template:
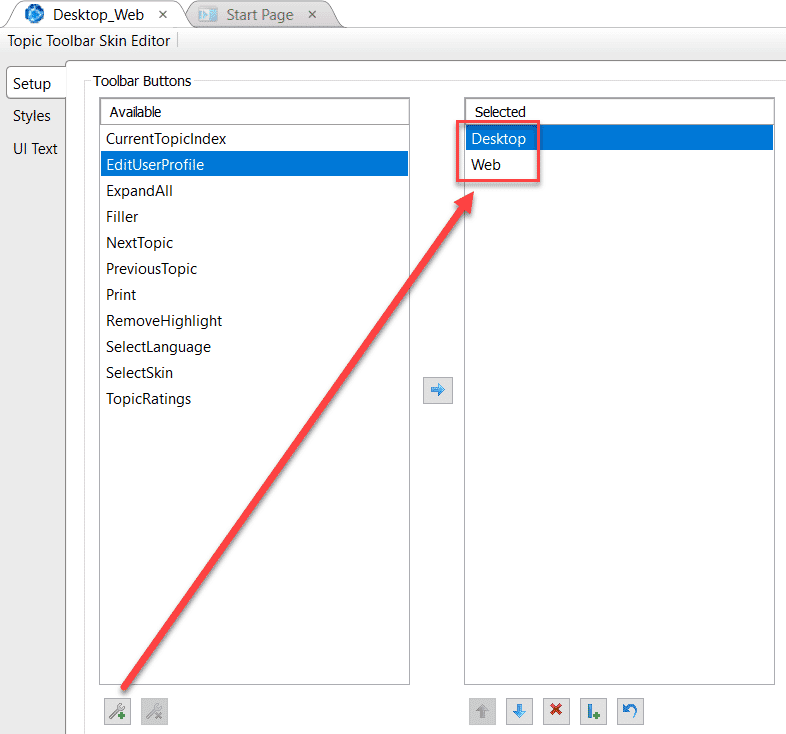
2. Create two buttons. In my example, I named the buttons Desktop and Web and used the blue arrow to move them to the Selected pane:
Note that current implementation implies that you use two buttons. However, in case you have a developer who can adjust the JavaScript file, you can add more buttons. It is also possible to use a single button as a toggle button (after some JavaScript adjustment).
The look and feel of the buttons view can be configured on the Styles tab of the skin file or in the JavaScript file.
3. On the Setup tab, upload the JavaScript file:

If you need to use two buttons, but for a different purpose, let’s say, for iOS and Android solutions of your application, then you can adjust the JavaScript file yourself. It’s not difficult. You can also set a different default value.
CSS and Classes
JavaScript “understands” CSS classes. We must create classes in the project’s CSS file to differentiate content for desktop and web. You can apply classes to any CSS object like a paragraph, list item, heading, and so on.
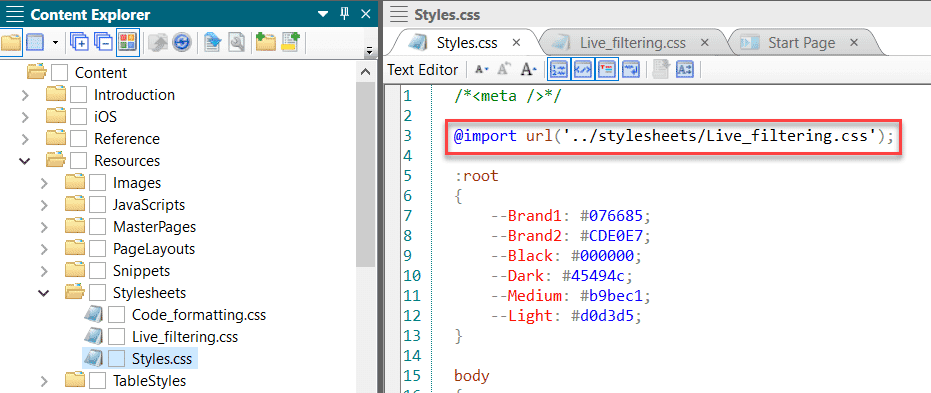
1. While not mandatory, I recommend having a separate stylesheet to make your solution more flexible. Let’s name it Live_filtering.css.
2. Reference Live_filtering.css in your main stylesheet:
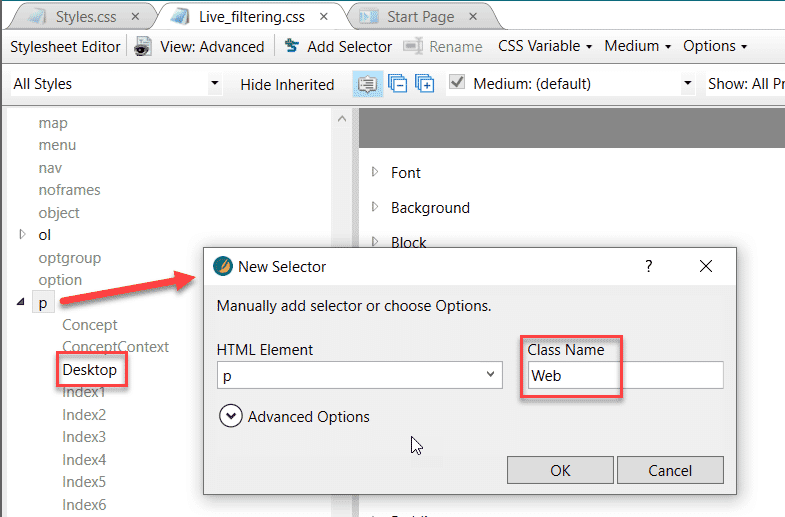
3. In the p tag, right-click, choose New Selector, and create two classes: Desktop and Web:
Topic
1. Create content for desktop and web:
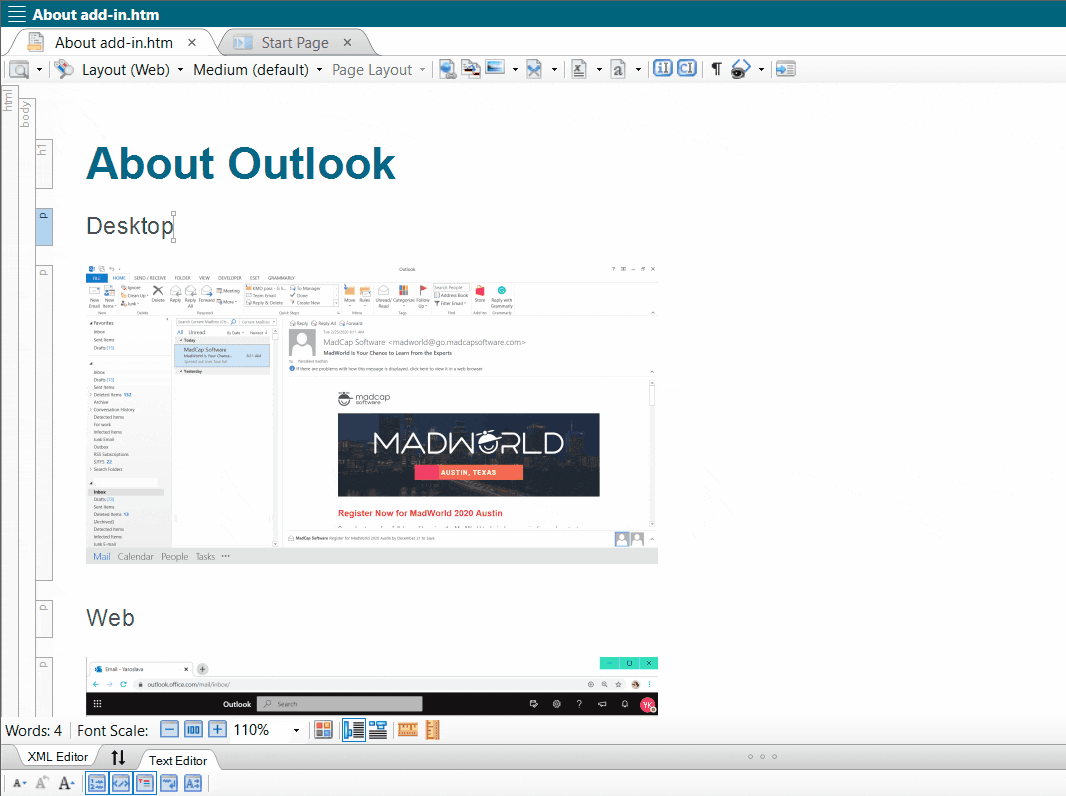
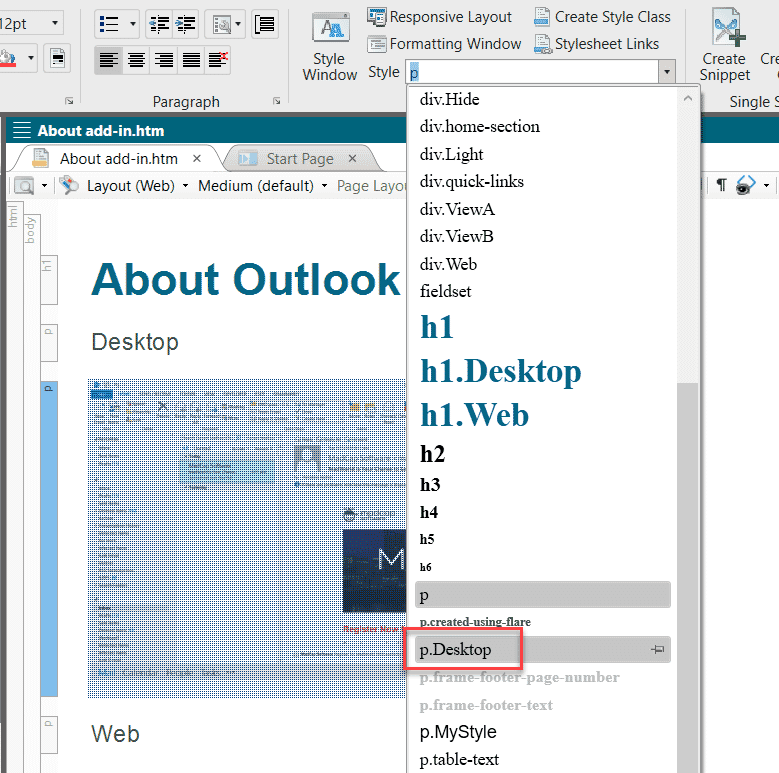
2. Mark content for desktop by using class .Desktop:
Repeat the same for web by using class .Web. To make the procedure quicker, you can also group p tags together and wrap them in a div tag. In this example, I have a div class called div.Web, and using the Group button in the Home ribbon, I can quickly wrap both p tags in this div.

3. On the Insert tab, insert a Topic Toolbar Proxy, which will act as a container for the skin component created earlier:
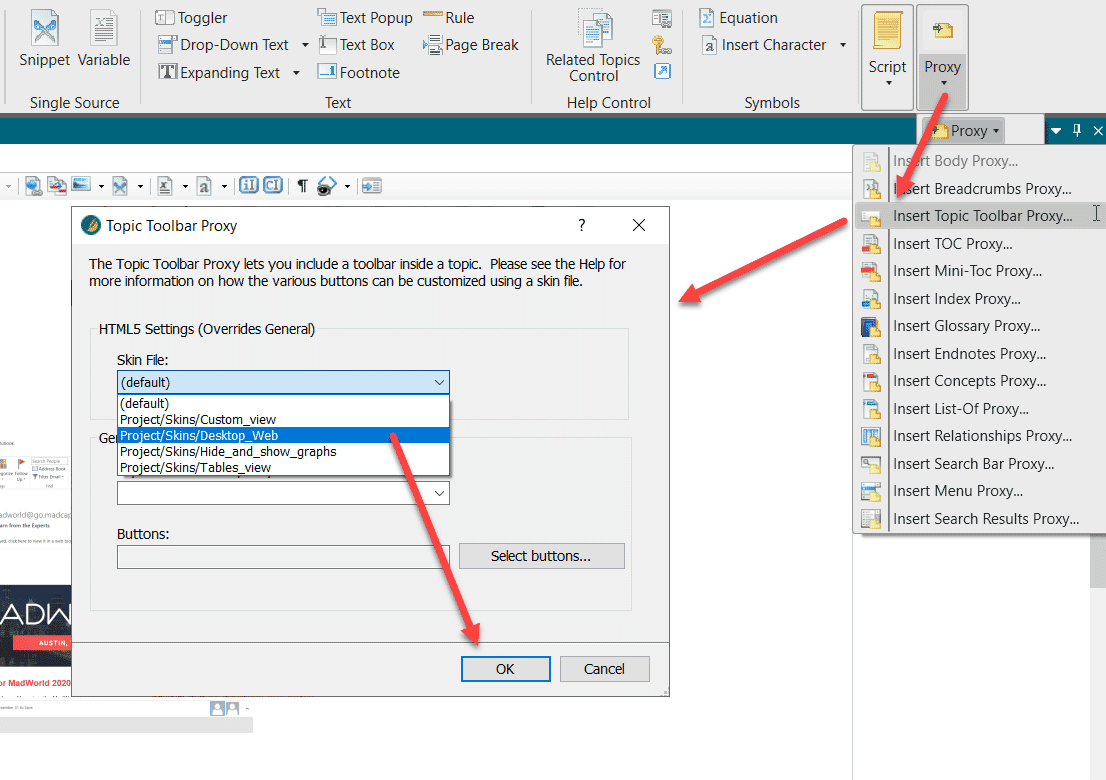
The skin will be inserted into the place where you have set your cursor. In other words, you can place buttons at any place in your topic.
4. Save the changes and build the project:
Once you learn how to configure Topic live filtering, you can adjust the JavaScript file and use it for any needs. These are some examples of usage:
Moreover, you can add different Topic live filtering skins to the same topic. As an alternative approach, you can try to use the proxy in a masterpage, to make it easier to apply to all topics.
How to Obtain the JavaScript Files?
If you enjoyed these solutions, you are welcome to purchase my Udemy course “Three powerful JavaScripts for your MadCap Flare projects”. With the course, you’ll get 5 JavaScript files that are already adjusted for different cases represented in the gif above.
In the course, I also describe step-by-step procedures of how to configure Code formatting and the Copy-to-clipboard button. These solutions were not invented by me, but I have optimized them as much as possible, so after the configuration, it will take just a few seconds to apply each of them.
I provide a 25% discount for readers of this blog. To get the coupon, please contact me via email: yasina.pochta@gmail.com.
Thank you very much for reading!


