We’ll start with the question, “What is a master page?” A master page is a file in your MadCap Flare project that lets you automatically apply certain content—such as breadcrumbs, menus, toolbars, search bars, mini-TOCs text and other content—to multiple topics in the output. Like all other files in Flare, a master page is an XML file and is traditionally stored in the Content Explorer in the Resources > Master Pages folder. However, you can store it anywhere in the Content Explorer that you like. Your project may only need one master page, or you may need more than one. For example, you may design a master page for your home landing page, and have another that is used for all other topics in your generated output.
In this post, we will review how a master page can be constructed, and a couple of ways to put them to use to help create a branded and helpful experience for your readers including custom footers and scripts.
Master Page Structure (Proxies)
You can add a proxy to a master page to let Flare know you want to include a certain type of content in the master page. A proxy acts as a container for auto-generated content or content that you have created elsewhere. When you build output, the content takes the place of that proxy. Proxies can be added to regular topics, as well as to master pages. The difference is that a proxy added to a topic will display that information in the output only once (wherever the topic occurs), but if a proxy is added to a master page, the content will show up on every topic that uses that master page. This way you can add a menu to display along the side of your content, or a search bar to display in the top corner of your topics, without needing to set up this structure in every topic.
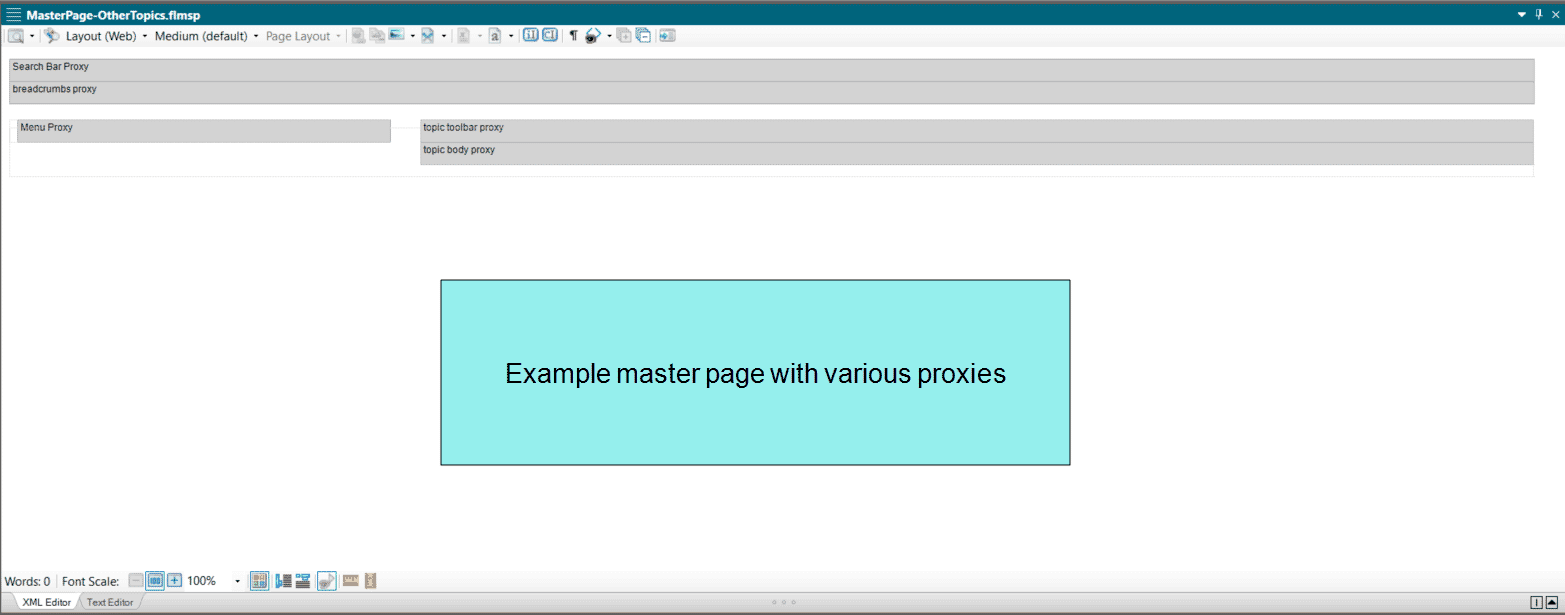
Below you’ll see a master page used to create a structured layout for an online output. The topic body proxy indicates where the topic content will reside in your output. You’ll see that we added a menu proxy and reduced the width of the topic body proxy to allow for this menu to display alongside the content. We’ve also added in a breadcrumbs proxy for navigation, a search bar proxy and a topic toolbar proxy to display buttons above our topic content.
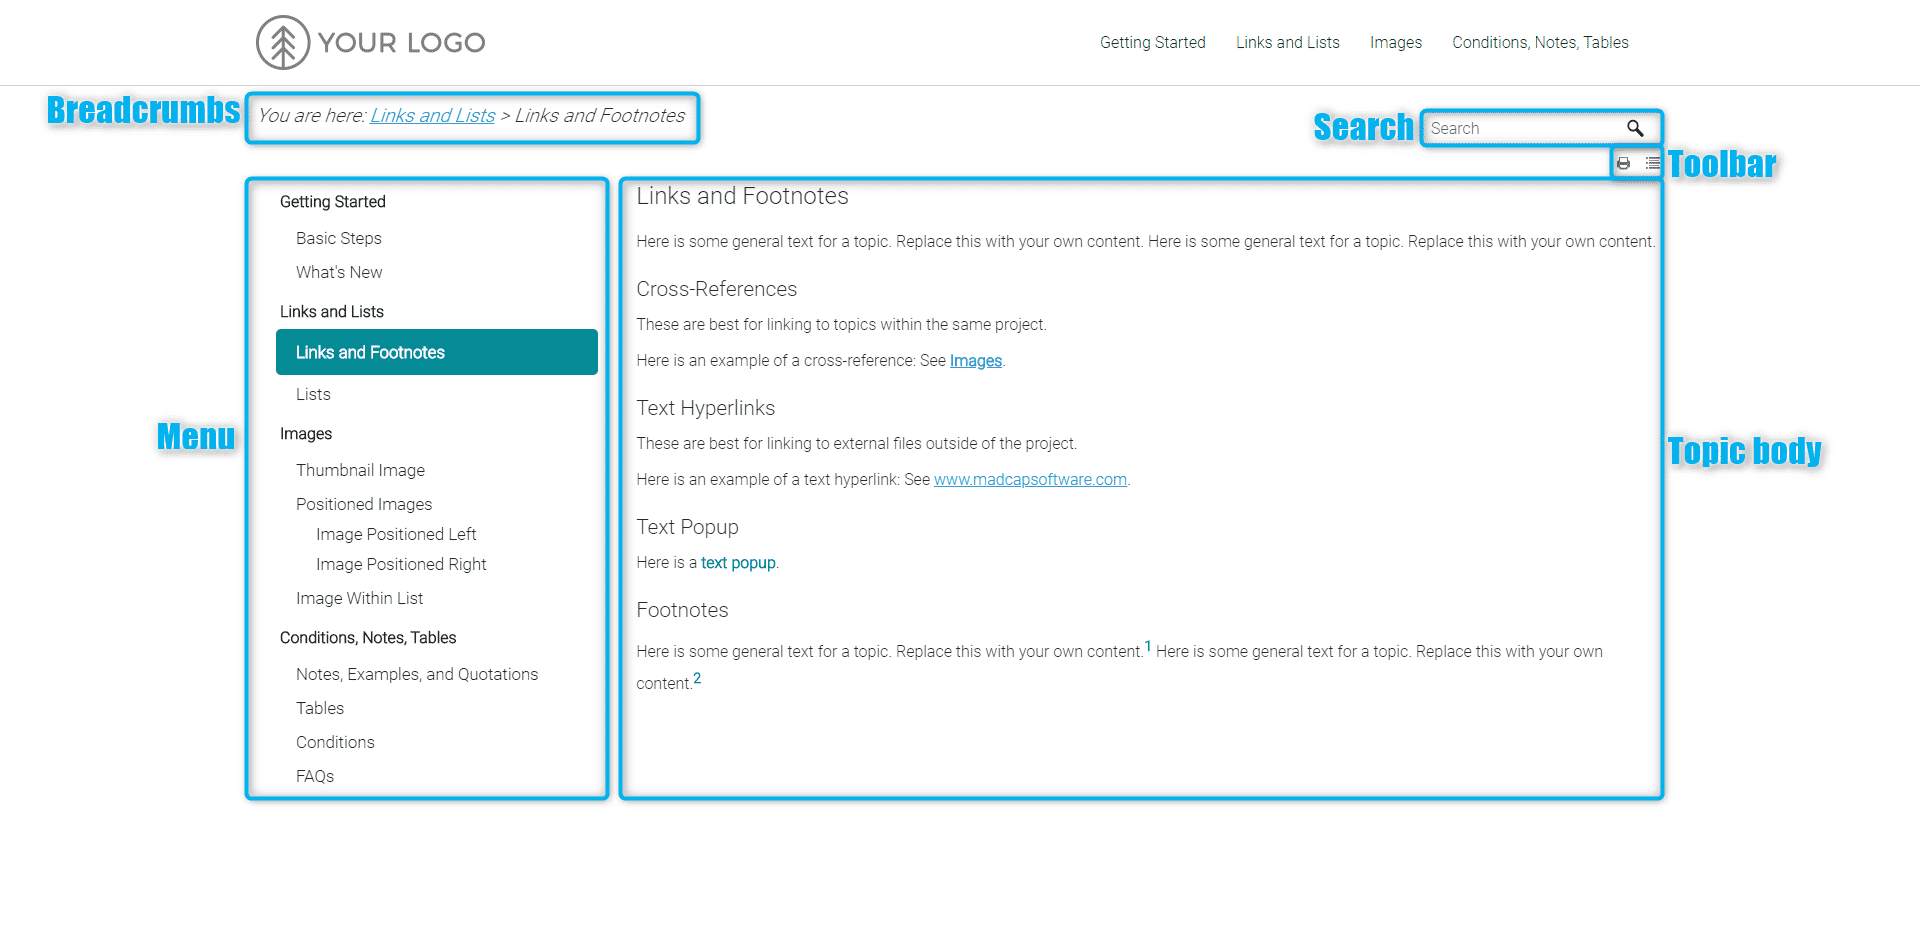
With the master page applied to the target, it will be applied to each topic in the output. Here we can see how these proxies are replaced by actual content when the target is built:
Custom Footer
You can create a custom, branded footer in your master page to display at the bottom of some or all of your topics. This footer can contain contact information, links to company social media sites, mailto links for email addresses, copyright statements and the list goes on.
Let’s say you want every topic in your online output to include a footer with contact information about your company. Rather than having to type this content or insert a snippet in every topic, you can design a master page and enter the footer content in just that one file. Then you associate the master page with any of the targets in your project. The footer is automatically included at the bottom of every topic when you build and view any of those associated targets. Plus, updating this content in the future is a snap - you only have to update the master page. Here are some examples of master pages in action where the footer is designed to look like part of the corporate website.
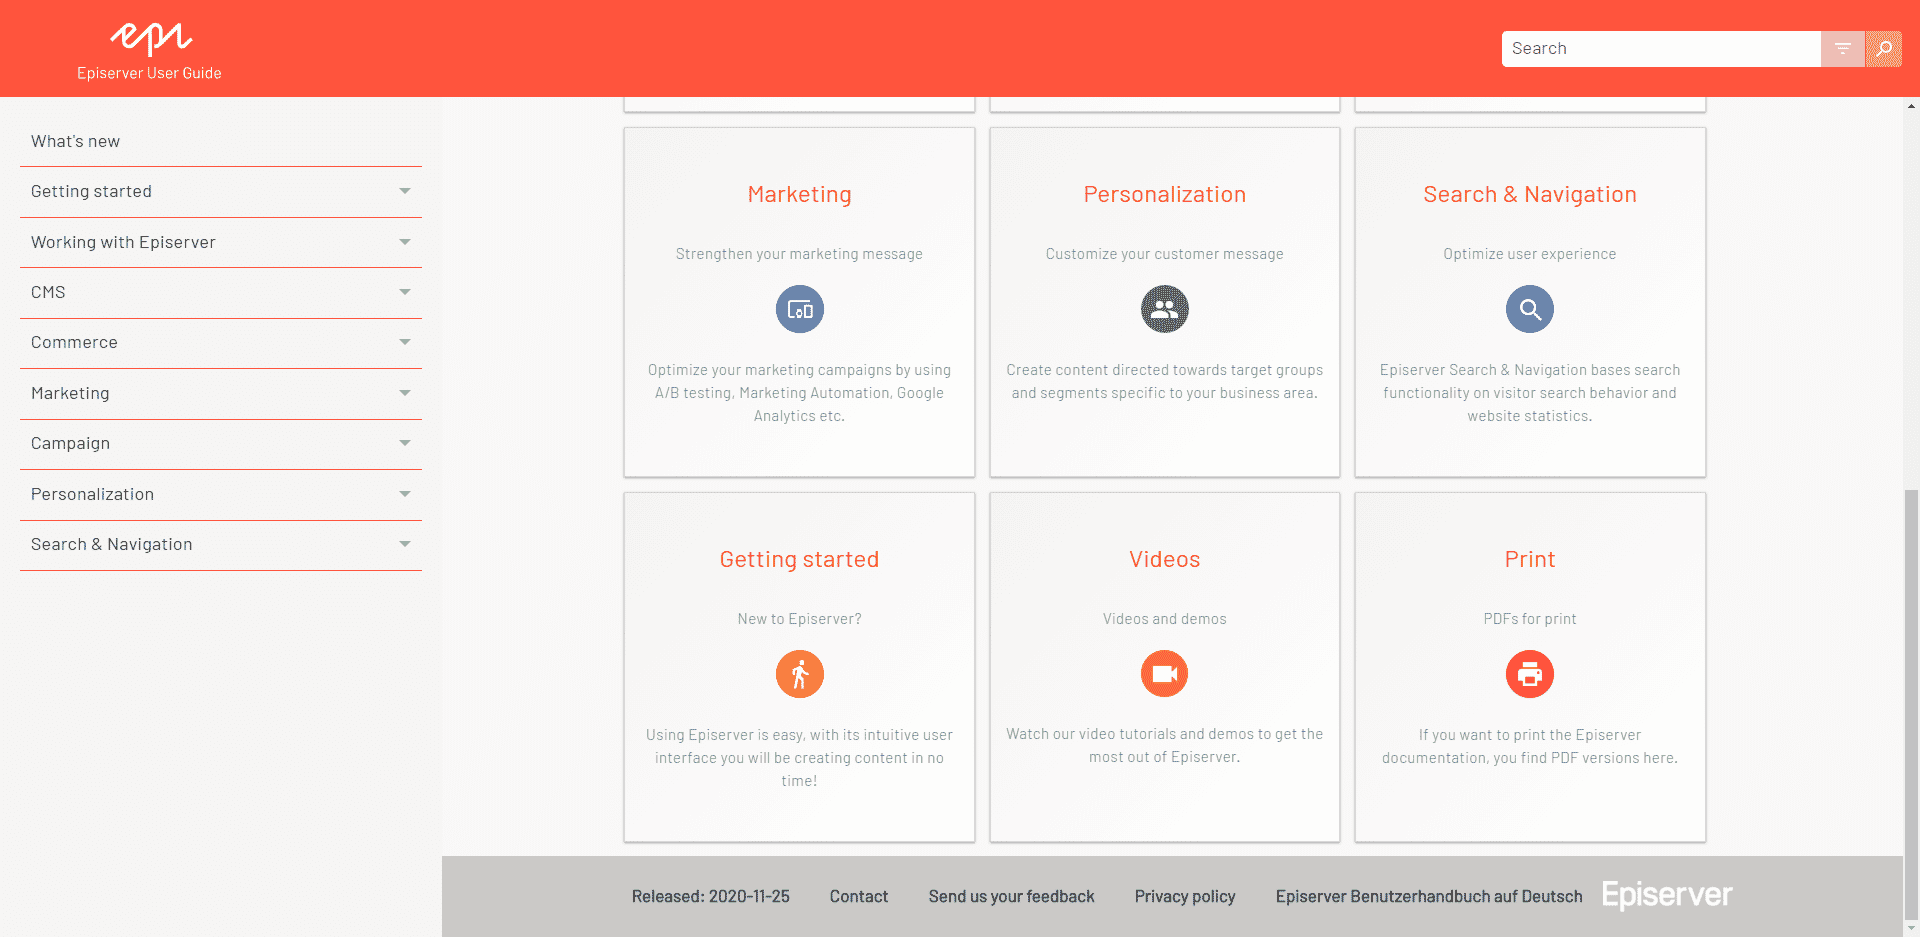
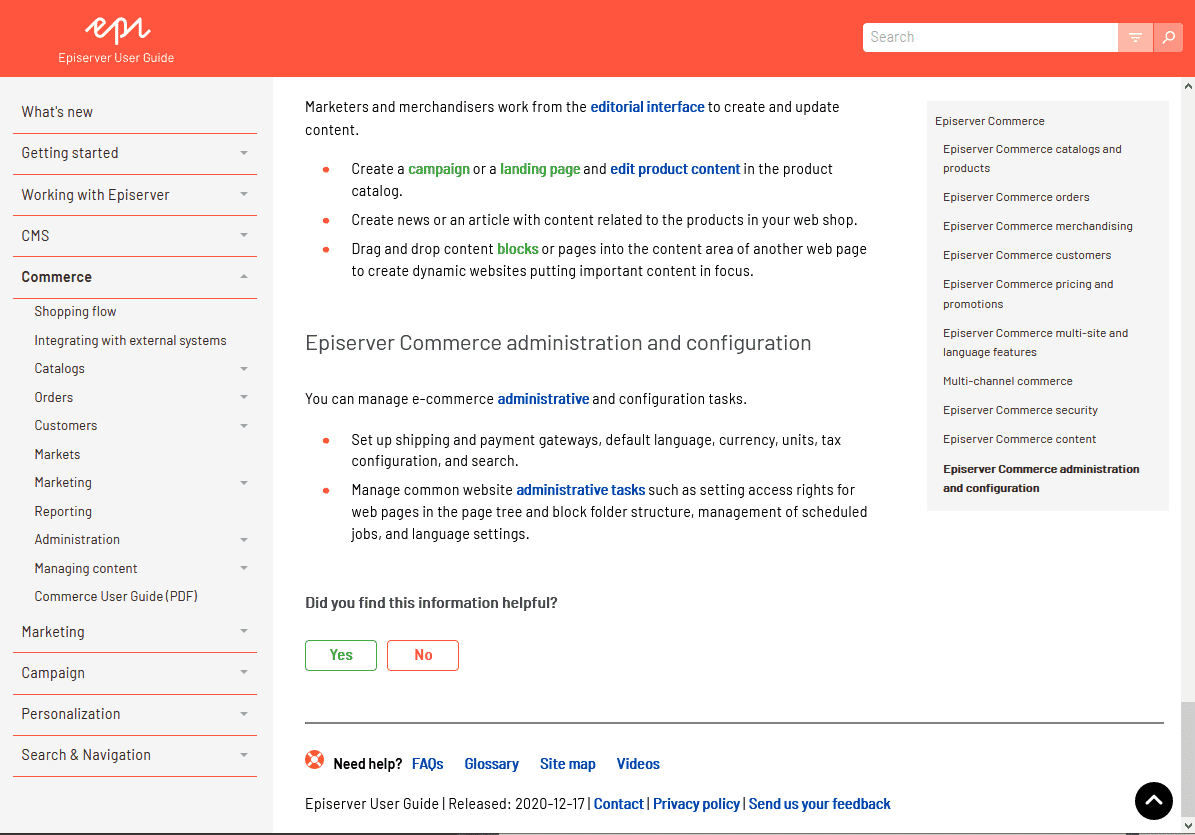
In this example, Episerver created a footer in the master page used by their landing page topic, It contains information about when the site was updated and links to other pages on their corporate website, mailto links to send feedback and links to translated versions of the site.
If you browse to other topics, you will see another master page in play. This one has a slightly different footer design to include a thumbs up/down feedback element and a handy back-to-top button. More on that below.
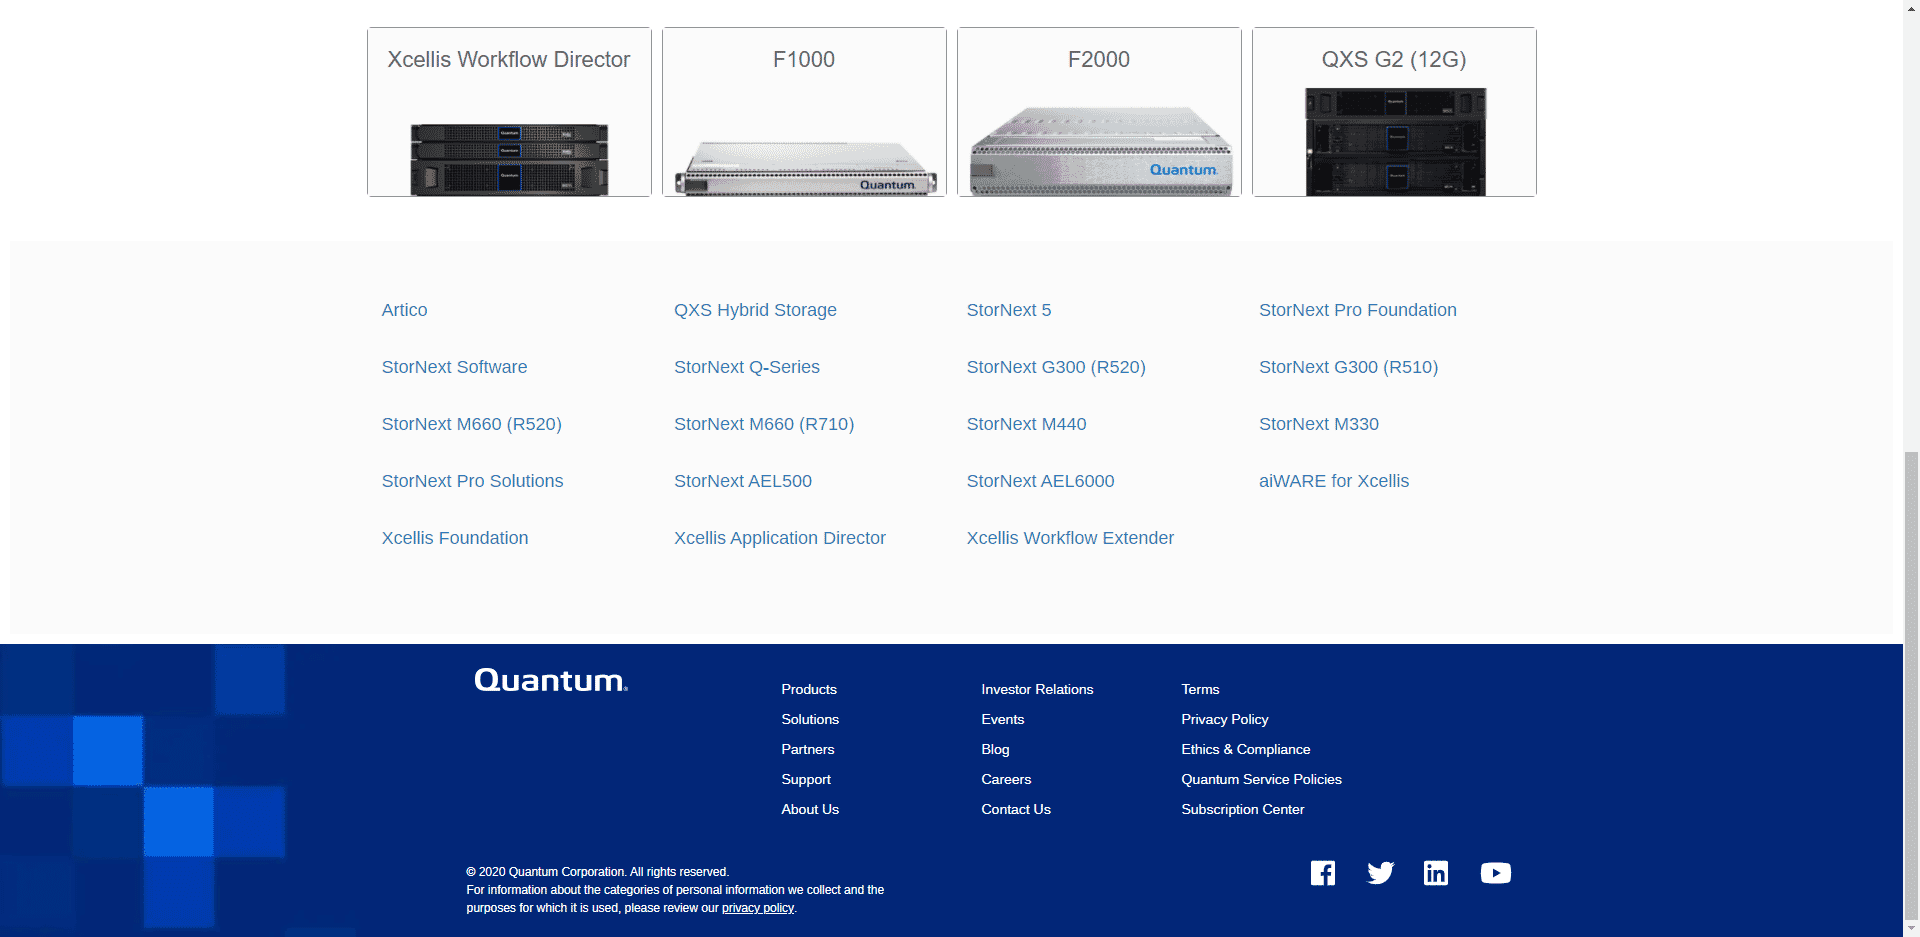
In this example, Quantum Corporation designed the footer of the master page on the home topic to mimic the look of their corporate site, giving a branded, seamless feel for their customers and included links to their social media channels as well.
Back-to-Top and Feedback
You can also insert custom scripts into your master page to add dynamic functionality to your outputs for things like topic ratings, a feedback button, or a handy “Back-to-Top” button.
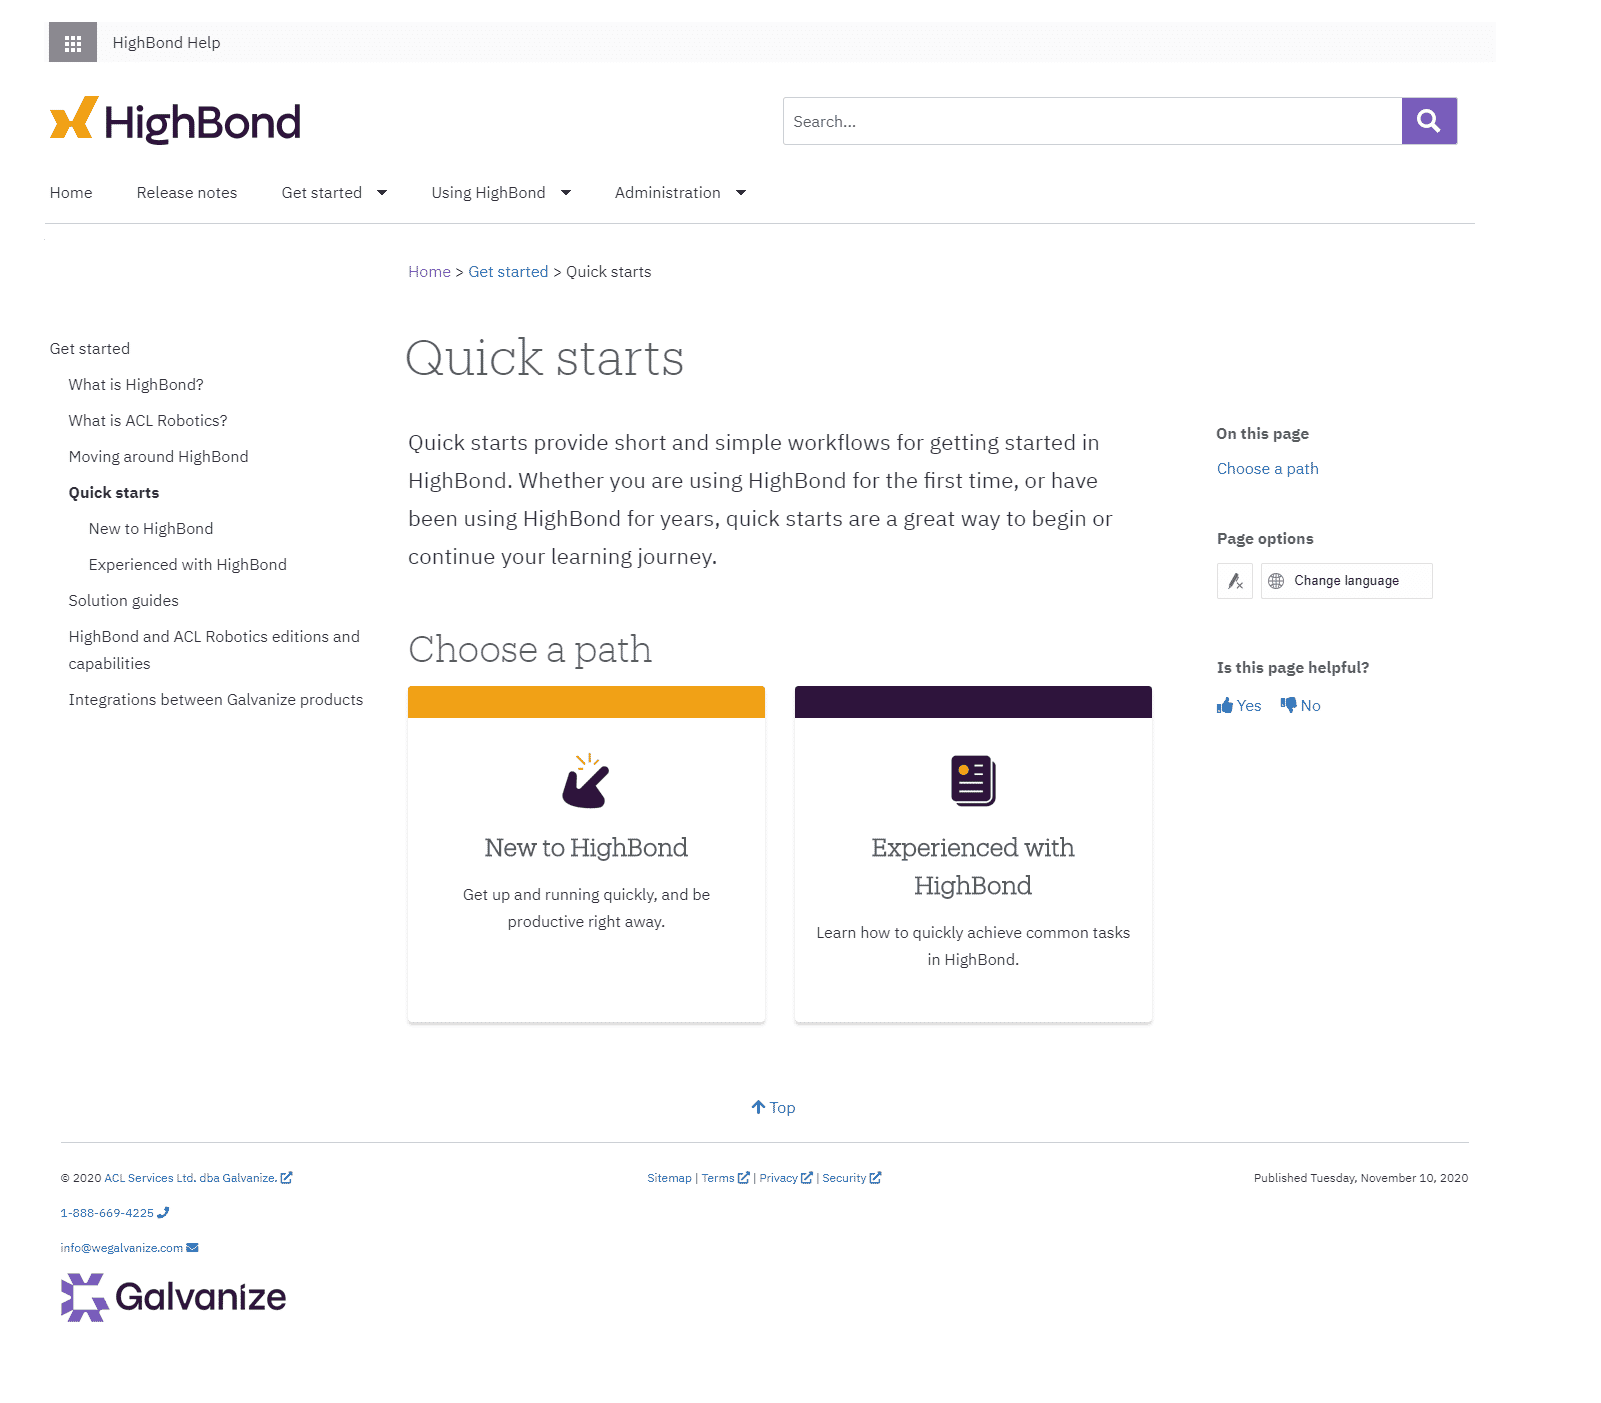
In addition to using proxies for menus, breadcrumb trails, a language picker and footer information, Galvanize utilizes custom scripts in their master page to display “Is this page helpful?” along with a thumbs up and thumbs down experience for their HighBond Platform Help Guide, making it easy for readers to proactively provide feedback. Another cool design element is a back-to-top button so readers can quickly get back to the top of the page, eliminating the need to scroll. This is done by inserting JavaScript into the master page.
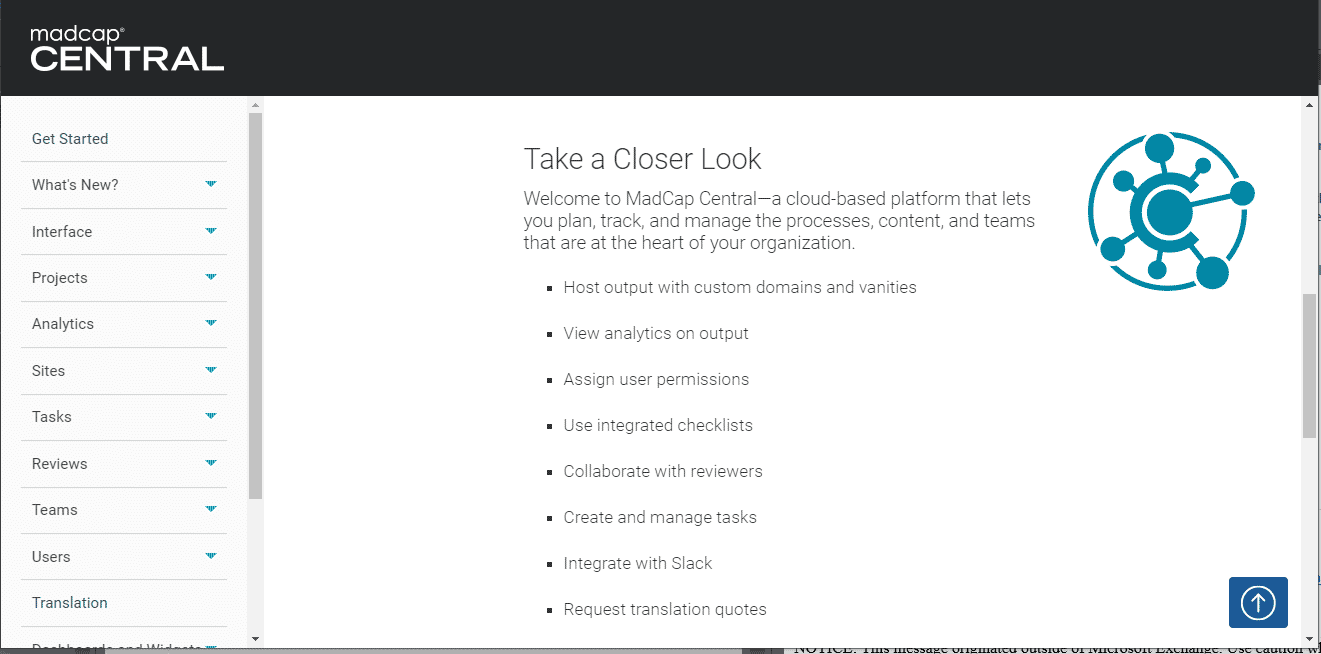
The documentation team here at MadCap Software also includes a back-to-top button in the online Help for our solutions. As you scroll down to read a topic, a back-to-top button appears in the bottom right corner of the screen. Here is an example of that in MadCap Central’s Online Help:
The documentation team added a JavaScript tutorial in Madcap Flare’s online Help, to walk authors through how to add these custom scripts to master pages.
Master pages offer a ton of flexibility to create a seamless brand experience and increase the usability of the content authored and published from MadCap Flare. If you are new to designing master pages, check out MadCap’s list of free project templates, which have master pages in place with many of these elements discussed. They are free to download and further customize to your needs.
If you are looking for more design inspiration, check out the Customer Showcase page, to see modern examples of documentation sites, help portals, knowledge bases, and more, all created with MadCap Flare.
Don’t be afraid to experiment, and reach out to us for help!