


This guest blog post was written by Michelle Welch, a senior content experience professional who has worked with MadCap Flare since its inception (way back in the day). She’s a certified MadCap Advanced Developer and has built a variety of content systems for organizations and their customers. As a word nerd, she enjoys creating thoughtful, accessible, and inclusive content experiences that attract, engage, and support people. She currently resides in the Seattle, WA area.
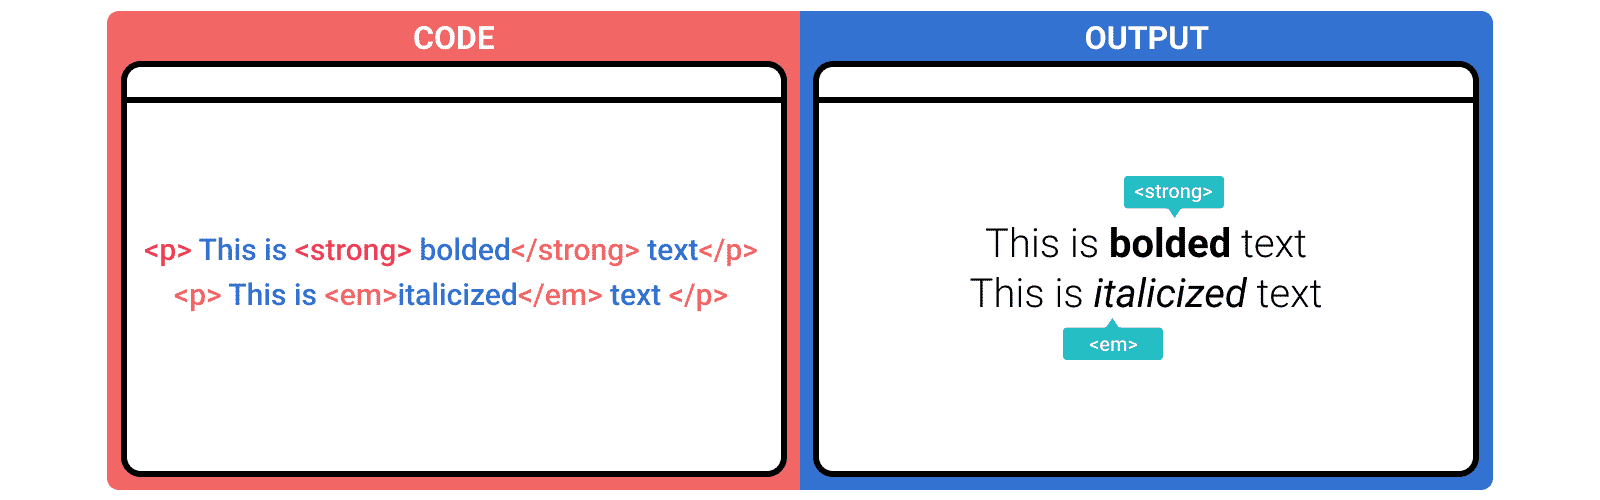
Creating content that is accessible to people with different abilities and different devices increases usability, expands your customer base, demonstrates your content expertise and professionalism, and is the right thing to do. One of the ways to help make your content more accessible is to use semantic styles like <strong> and <em> in places you may use <b> or <i>.
What’s the difference between tag types?
Bold <b> and italic <i> tags visually mark text so it sticks out. Strong <strong> and emphasis <em> tags both visually mark text and provide meaning to the content. The <strong> and <em> tags show how text should be understood, not just how it should be styled. Text marked as <strong> conveys that it is important, serious, or urgent. Text marked as <em> stresses emphasis of that text. This can be helpful for assistive technologies that read the characteristics of text. Read more about the differences between tag types.
Use a keyboard shortcut to apply <strong> and <em> tags to text in Flare
To apply <strong> and <em> tags to text in Flare, you’ll first create a macro to apply the tags, then you’ll assign a keyboard shortcut to those macros. You can also change your CTRL+B and CTRL+I keyboard shortcuts so they apply <strong> and <em> tags instead of <b> and <i> tags to text.
Record Your Macros
Create a couple of simple macros to apply <strong> and <em> tags to text in your topic.
1. Open a topic in MadCap Flare.
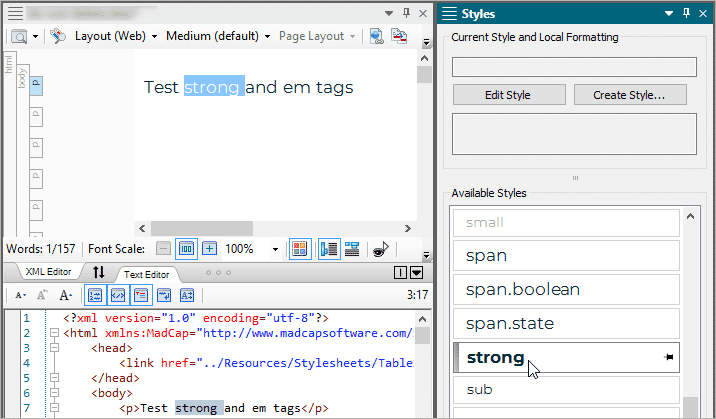
2. Open the Style Window (select Home, and then select Style).
3. Select text in your topic - you’ll record applying a style to it for your macro.
4. Select Tools, and then select Record.
5. Give your macro a name (like “strong”), and then select Start.
6. In the Style Window, select strong to apply the style to your selected text.
7. On the Tools menu, select Stop to stop recording your macro.
8. Check the Text Editor view of your topic to verify that the <strong> tag was applied to the text you selected.
9. Follow the same steps to record a macro to apply the em style to your text.
Create keyboard shortcuts
Create new keyboard shortcuts to apply <strong> and <em> tags to your text.
1. Select Tools, and then, in the Macros section, select Manage.
2. Select each of your new macros from the list, and then select Assign Shortcut. Follow the steps to assign a keyboard shortcut to your macro. You can assign the default CTRL+B bold and CTRL+I italics shortcuts to apply <strong> or <em> in place of <b> or <i> if you’d like. If you choose to do this, you’ll have to use the following steps to reassign those shortcuts:
a. Select File, and then select Options.
b. Select Keyboard Shortcuts.
c. With Global selected as the Command Scope, find the Bold option in the list and select it.
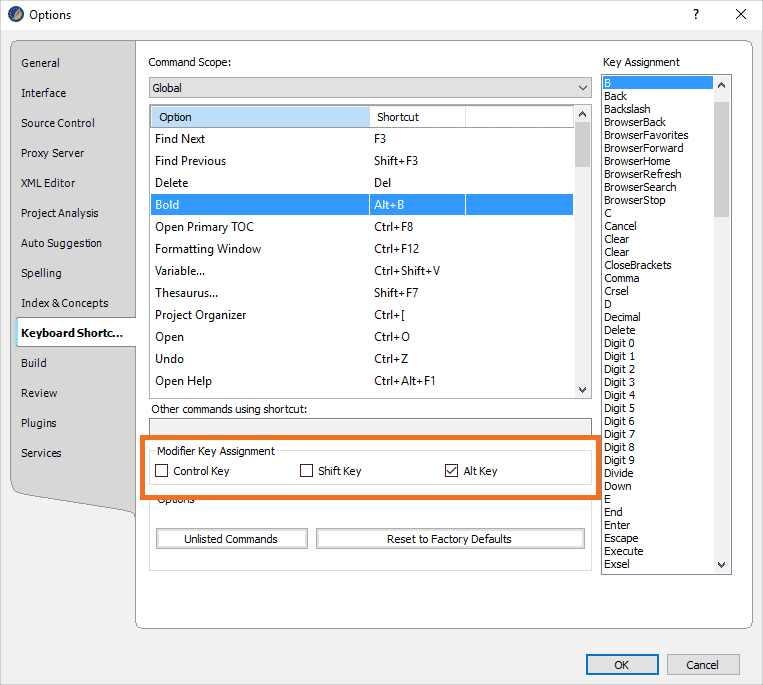
d. Change the Modifier Key Assignment. One option is to clear the Control Key and select the Alt Key instead.
e. Find the Italic option in the list and change the Modifier Key Assignment. One option is to clear the Control Key and select the Alt Key instead.
f. From the Command Scope list at the top of the screen, select XML Editor.
g. Find the Bold and Italic options in this list and change their Modifier Key Assignments here as well.
3. Test your keyboard shortcuts! If you aren’t seeing the results you’re looking for, revisit your macro settings and both sets of keyboard shortcut settings.

Other ways to support people with different abilities and different devices
There are numerous ways you can make your content more accessible. Following are a few ways you can improve the accessibility of your content:
- Use plain language and avoid figures of speech, idioms, and complicated metaphors.
- Choose simple, easy-to-understand words and consistent, predictable terminology. Read about inclusive language.
- Keep paragraphs short and sentence structure simple.
- Use parallel writing structures for similar things.
- Lead with what’s most important. Organize your content in a logical way to improve scannability and encourage better understanding. Read about organizing content to follow natural eye movement patterns.
- Don’t use directional terms as the only clue for location - left, right, up, down, above, and below aren’t useful to people who use screen-reading software. Preceding, following, and Go to are better choices.
- In hyperlinked text, clearly explain what information the reader will get when they select the link. Don’t use text such as “Click here” or “Learn more” as a link. Instead, provide clear context about the destination. Read more about links.
- Use alt text to describe images and videos in detail. People who don’t see the image should come away with the same information as if they did.
- Add captions to tables for screen readers.
- Make sure closed captioning is available for all videos, and transcripts are available for all audio content.
- Use heading styles instead of text formatting to communicate the hierarchy of content.
- Use redundant visual cues, such as both color and underline for links.


