


Content authors rely on MadCap Flare to easily maintain content from a single source, maximize the reuse of content, and publish to multiple channels to support the different consumption needs of their end users.
With the release of MadCap Flare 2019, an additional publishing option is now available, which is the ability to publish single-sourced content from Flare directly to a Zendesk Knowledge Base. No more copying, pasting, and reformatting in Zendesk. If Zendesk needs to be the presentation layer for some or all of your single-sourced content, then you are in luck – we now have a method for that.
How to Install MadCap Connect for Zendesk
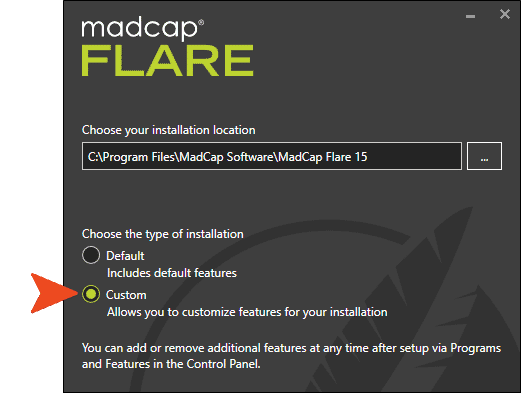
When you install Flare 2019, you will be presented with an option to choose the type of installation. Choose Custom and then click Next:
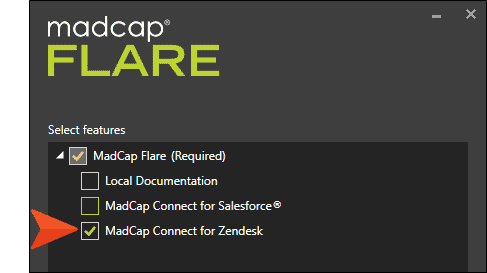
On the next page of the installation wizard, select MadCap Connect for Zendesk. Click Next.
Click Install.
If you already installed Flare 2019 and didn’t choose Custom, you can modify your existing installation.
- From the Windows Control Panel, navigate to Programs and Features, select MadCap Flare 2019 from the list, and click Uninstall/Change. Don’t worry! You won’t actually have to uninstall.
- The MadCap installer will appear, then select Modify.
- Check the box next to MadCap Connect for Zendesk and complete the steps in the wizard.
Once Flare is finished installing, you are ready to start!
Best Practices for Publishing to Zendesk
In Flare, clean XHTML and skinless HTML5 targets can be published to Zendesk. Choosing Skinless HTML5 as a publishing target for Zendesk is beneficial, since you can preserve not only styles you are maintaining in your source Flare project, but also dynamic linking effects such as drop downs and text pop ups.
Create a Zendesk Publishing Destination
Publishing destinations can be set up in Flare, making it easy to quickly transfer output files to a location where others can access them, such as in Zendesk. Publishing destinations are created and maintained in the Destinations folder in the Project Organizer. When you create a new destination, you will see a new destination type, called MadCap Connect for Zendesk:
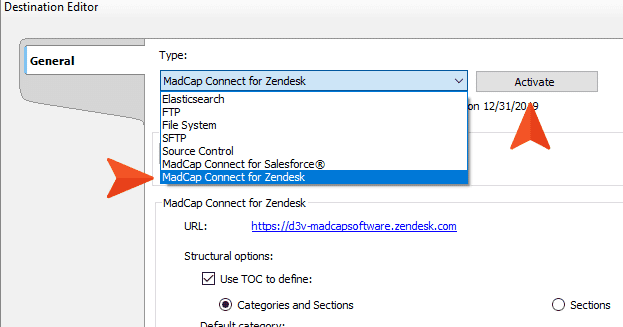
MadCap Connect for Zendesk must be activated through your destination file before you publish.
Once the plug-in is activated, log in to your Zendesk Dashboard account with your Zendesk login credentials. After connecting to your Zendesk account, additional options in the publishing destination file will become available to configure. The options are detailed in Flare’s Online Help.
Create a TOC in Flare for Zendesk
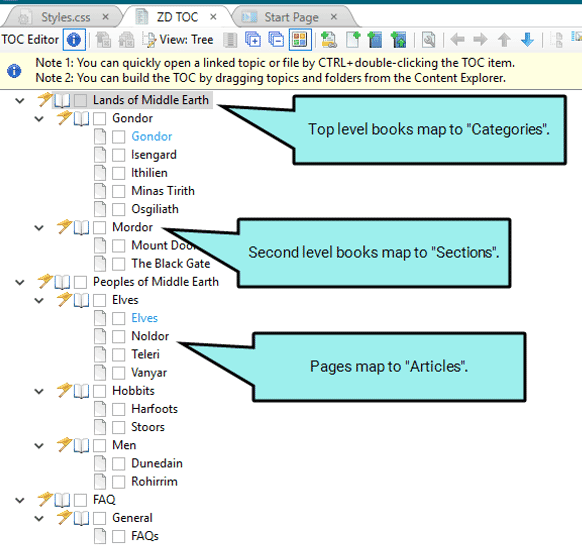
The plug-in supports publishing a Flare TOC with a hierarchy and order of content that will be reflected in Zendesk. Zendesk TOCs are structured a bit differently than Flare TOCs. Zendesk organizes content in the following structure:
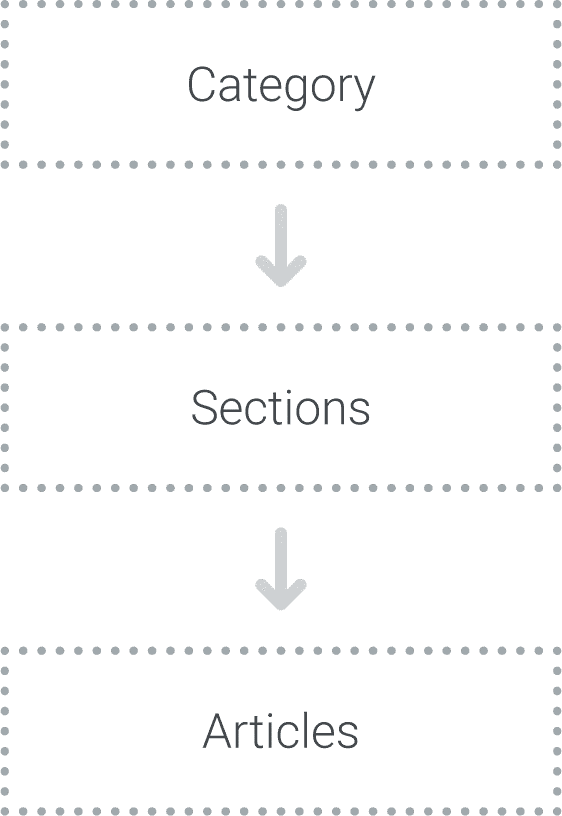
It is recommended that you create a separate TOC for Zendesk publishing, so that you can easily map your Flare TOC to the Categories and Sections in your Zendesk site. Top-level books in Flare TOCs map to Zendesk Categories, second-level books in Flare TOCs map to Zendesk Sections, and topics included in second-level books in Flare TOCs are mapped as articles in that section.
You can use the initial categories and sections created in your Zendesk Help Center if it aligns with the TOC you are using for publishing. Otherwise, you can create your own categories and sections in Zendesk to better align with your Flare TOC. More information about Flare TOCs and how they can map to Zendesk Categories and Sections can be found in Flare’s Online Help.
Create a Publishing Target
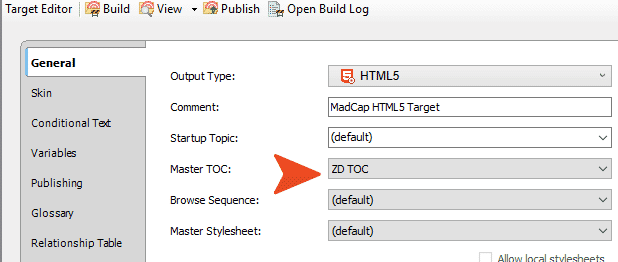
Publishing to Zendesk is supported for Clean XHTML and skinless HTML5 targets. In your target, choose the TOC created for Zendesk:
If you are publishing HTML5, set your Skin to None:

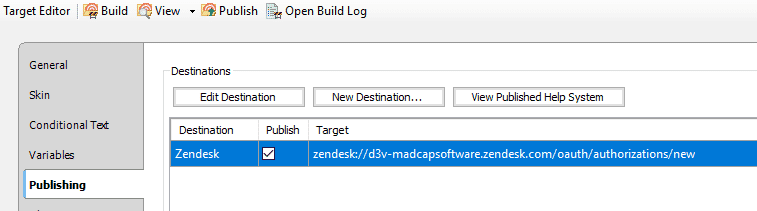
Choose the publishing destination created for Zendesk publishing:
When you are done adjusting the other settings in your target, click Publish in the Target Editor. Once publishing is complete, review your content in the Zendesk Help Center.
Zendesk Themes
A benefit of MadCap Connect for Zendesk is that styles from your Flare CSS can be preserved when publishing to Zendesk. This is a huge time saver, since you won’t have to manually style content in Zendesk. If styles change, the update happens in Flare, so that all the publishing channels, including Zendesk, respect that styling change.
When your output is published to Zendesk, a zip file is created that contains all of the Flare styles and JavaScript files needed to support your theme in Zendesk. The easiest way to export the theme created in the Zendesk output is to drag and drop it from Windows Explorer into your Zendesk Help Center dashboard. This zip file is found in the same location as the target's output folder. The naming convention of this zip file is MadCap.[target_name].Theme.zip.
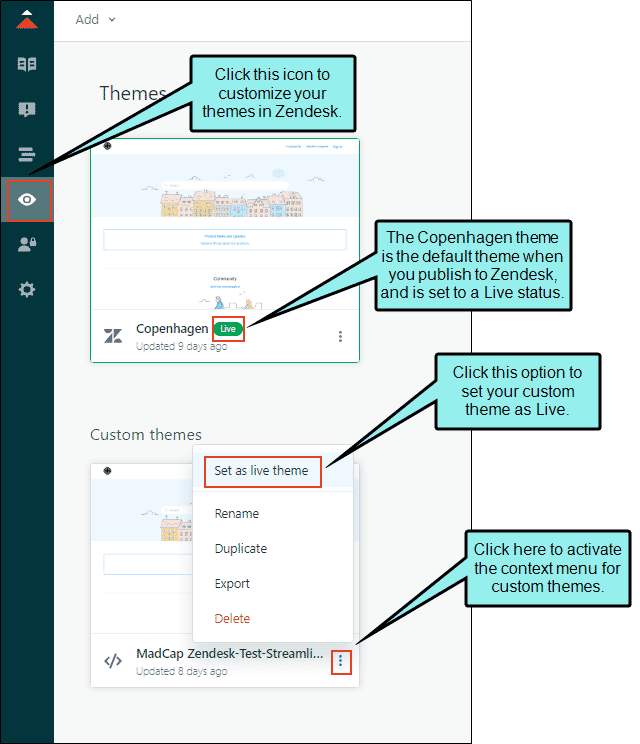
To apply a theme, use the following steps:
- In your Zendesk Help Center dashboard, click the icon to customize the design. The Themes page is displayed.
- Drag your theme's zip file from Windows Explorer, and drop it into the Zendesk themes page. Your project theme is added to Zendesk.
- Set the theme that was just added to a Live status.
What does it all look like?
Using the Flare TOC above, here’s an example of how the content looks when published to my Zendesk Guide:
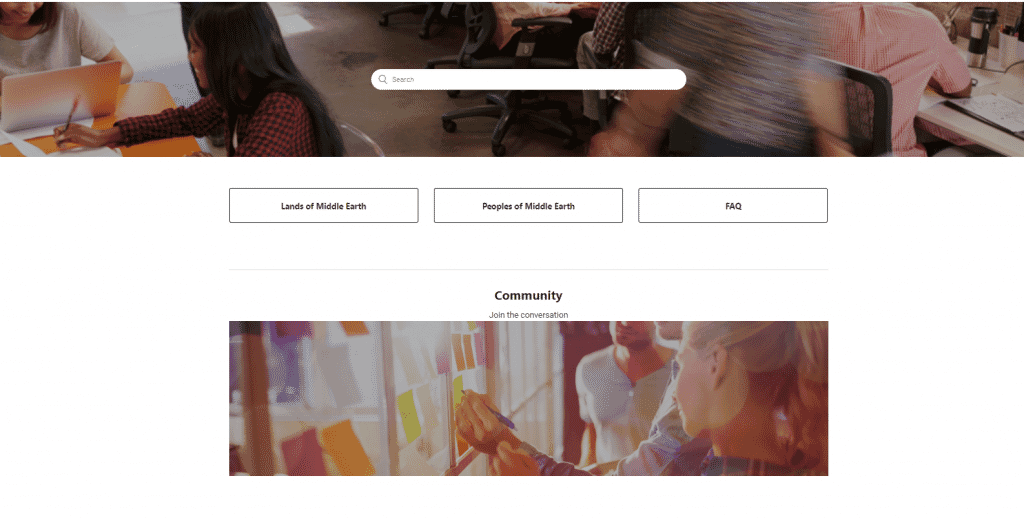
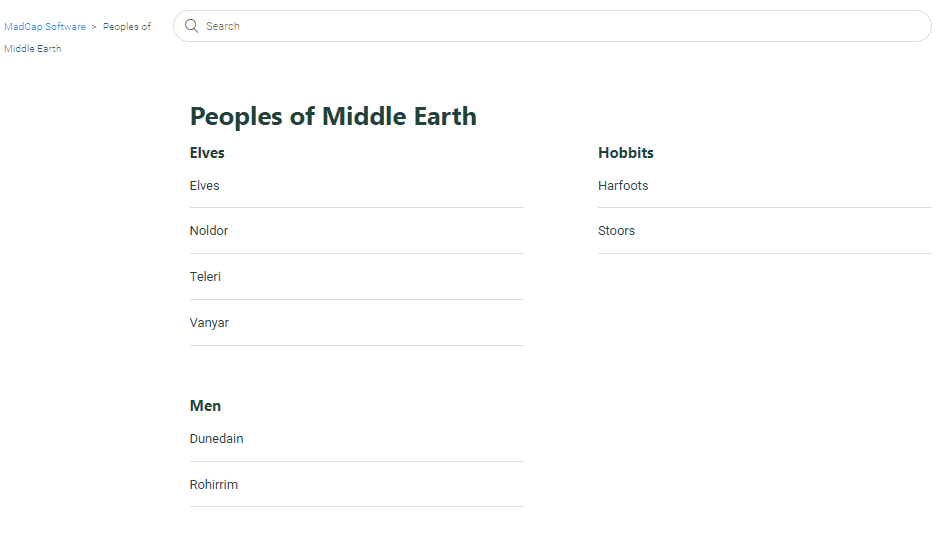
The top-level books in my Flare TOC are mapped to my Zendesk Categories. If I drill down into one of the Categories and into one of the sections, I am presented with articles, which were the topics in my Flare TOC:
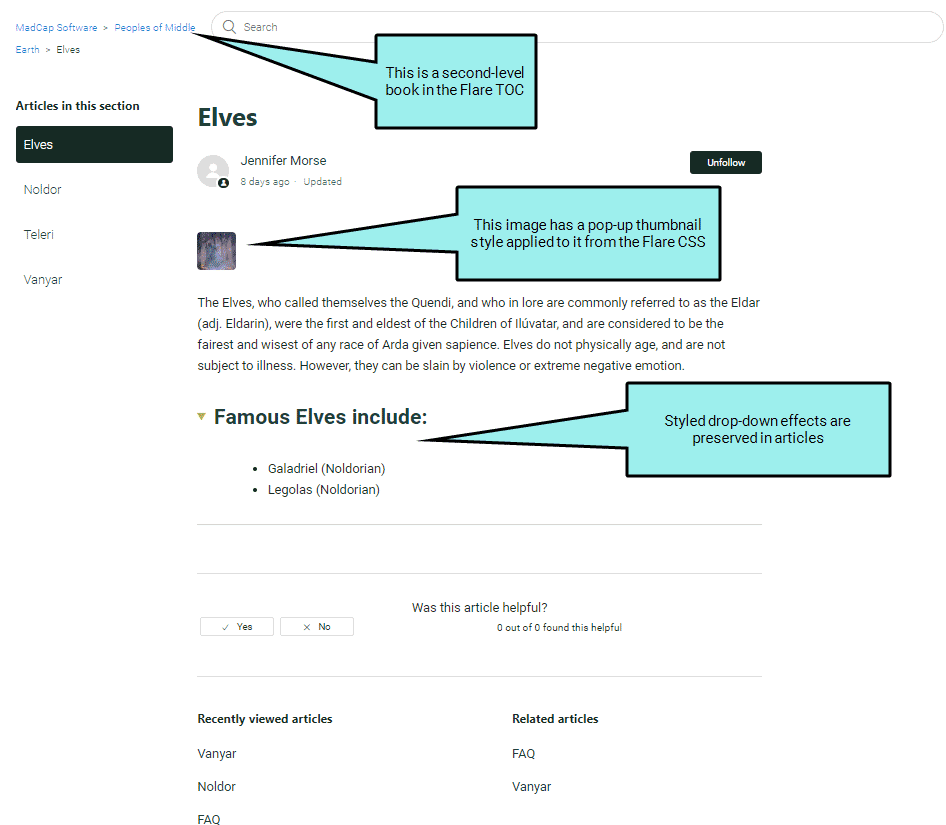
If I select an article, all of the topic content, including styles, image thumbnails, and drop down text is preserved:
If this article needs to be updated and republished to different channels, including this Zendesk guide, I easily can manage that change in Flare and republish.
Additional Considerations
- Zendesk does not support Internet Explorer.
- When content is published to Zendesk, Zendesk search is used, so you cannot use any of the search engines from your Flare output.
- As mentioned, Clean XHTML and HTML5 targets are supported. However, it’s recommended to use HTML5 so that additional dynamic links are preserved.
- Zendesk only supports one section associated with a topic. If using the same topic multiple times in the TOC, Zendesk only publishes the article to the category and section designated in the destination file.
- For additional notes and best practices, view the What’s New topic in Flare’s Online Help.
If you need to publish some or all of your content to Zendesk, this plug-in is a huge time saver. The MadCap Connect for Zendesk plug-in, as well as the new release of MadCap Flare, is now available to test with a free 30-day trial. In addition, the plug-in is now included in the MadCap Flare authoring tool at no extra charge.
Got any questions about the latest integration? Feel free to reach out at jmorse@madcapsoftware.com. We hope you enjoy the latest release!


