This guest blog post was written by Jack DeLand. Jack has provided Help projects and/or Help authoring training to Fortune 50 companies around the world for over 30 years. He specializes in MadCap Flare project development, architecture, and design, and resides in Ypsilanti, a small city next to Ann Arbor, Michigan.
Last time out, we made some structural/behavioral changes in a side nav project to create a hideable TOC: https://www.madcapsoftware.com/blog/show-hide-table-of-contents-flare/.
This time, we’ll look at some special effects for special occasions usable in any HTML5 project configuration, including
- color switching
- vanishing text
- image swapping
- sortable tables
- superscripts and extended characters
and assorted engaging tricks to delight your user with a slightly non-standard, non-boring interface.
Everything’s Provided
All code (JavaScript, modified CSS, snippet, and icons) is provided in a modified factory template project, which you can download here.
All Users — Note that some of these tricks and tweaks need careful consideration. Will your audience appreciate them? Will all the browsers you support display them correctly? What about Mac OS X/macOS? Safari and Chrome on Apple iOS? Android browsers?
Beginning Flare Users — Start from scratch by copying the project wholesale and stripping out the portions you don’t need while building your file set. Don’t try editing the JavaScript files.
Experienced Flare Users — Copy and paste sample components into your existing project. Check the instructions below to make sure you don’t miss anything.
Switchable Text Colors
I once built a Flare CSH system for a laboratory application that ran in low light at random times. The user could toggle from a lighter version of the Help UI to a darker one by selecting a palette icon to swap skins.
This example extends the color-switching concept to individual text characters.
Why Switch?
My objective was to highlight portions of a text written by Edgar Allan Poe that have a double meaning, thereby implying that two non-cancelling conflicting readings of the identical text are at work simultaneously. The example below illuminates pieces that are easily overlooked double entendres by means of a color switch.
How it Works
Standard text is all black like the rest of the site, but note the ghost icon at the far right of the toolbar.
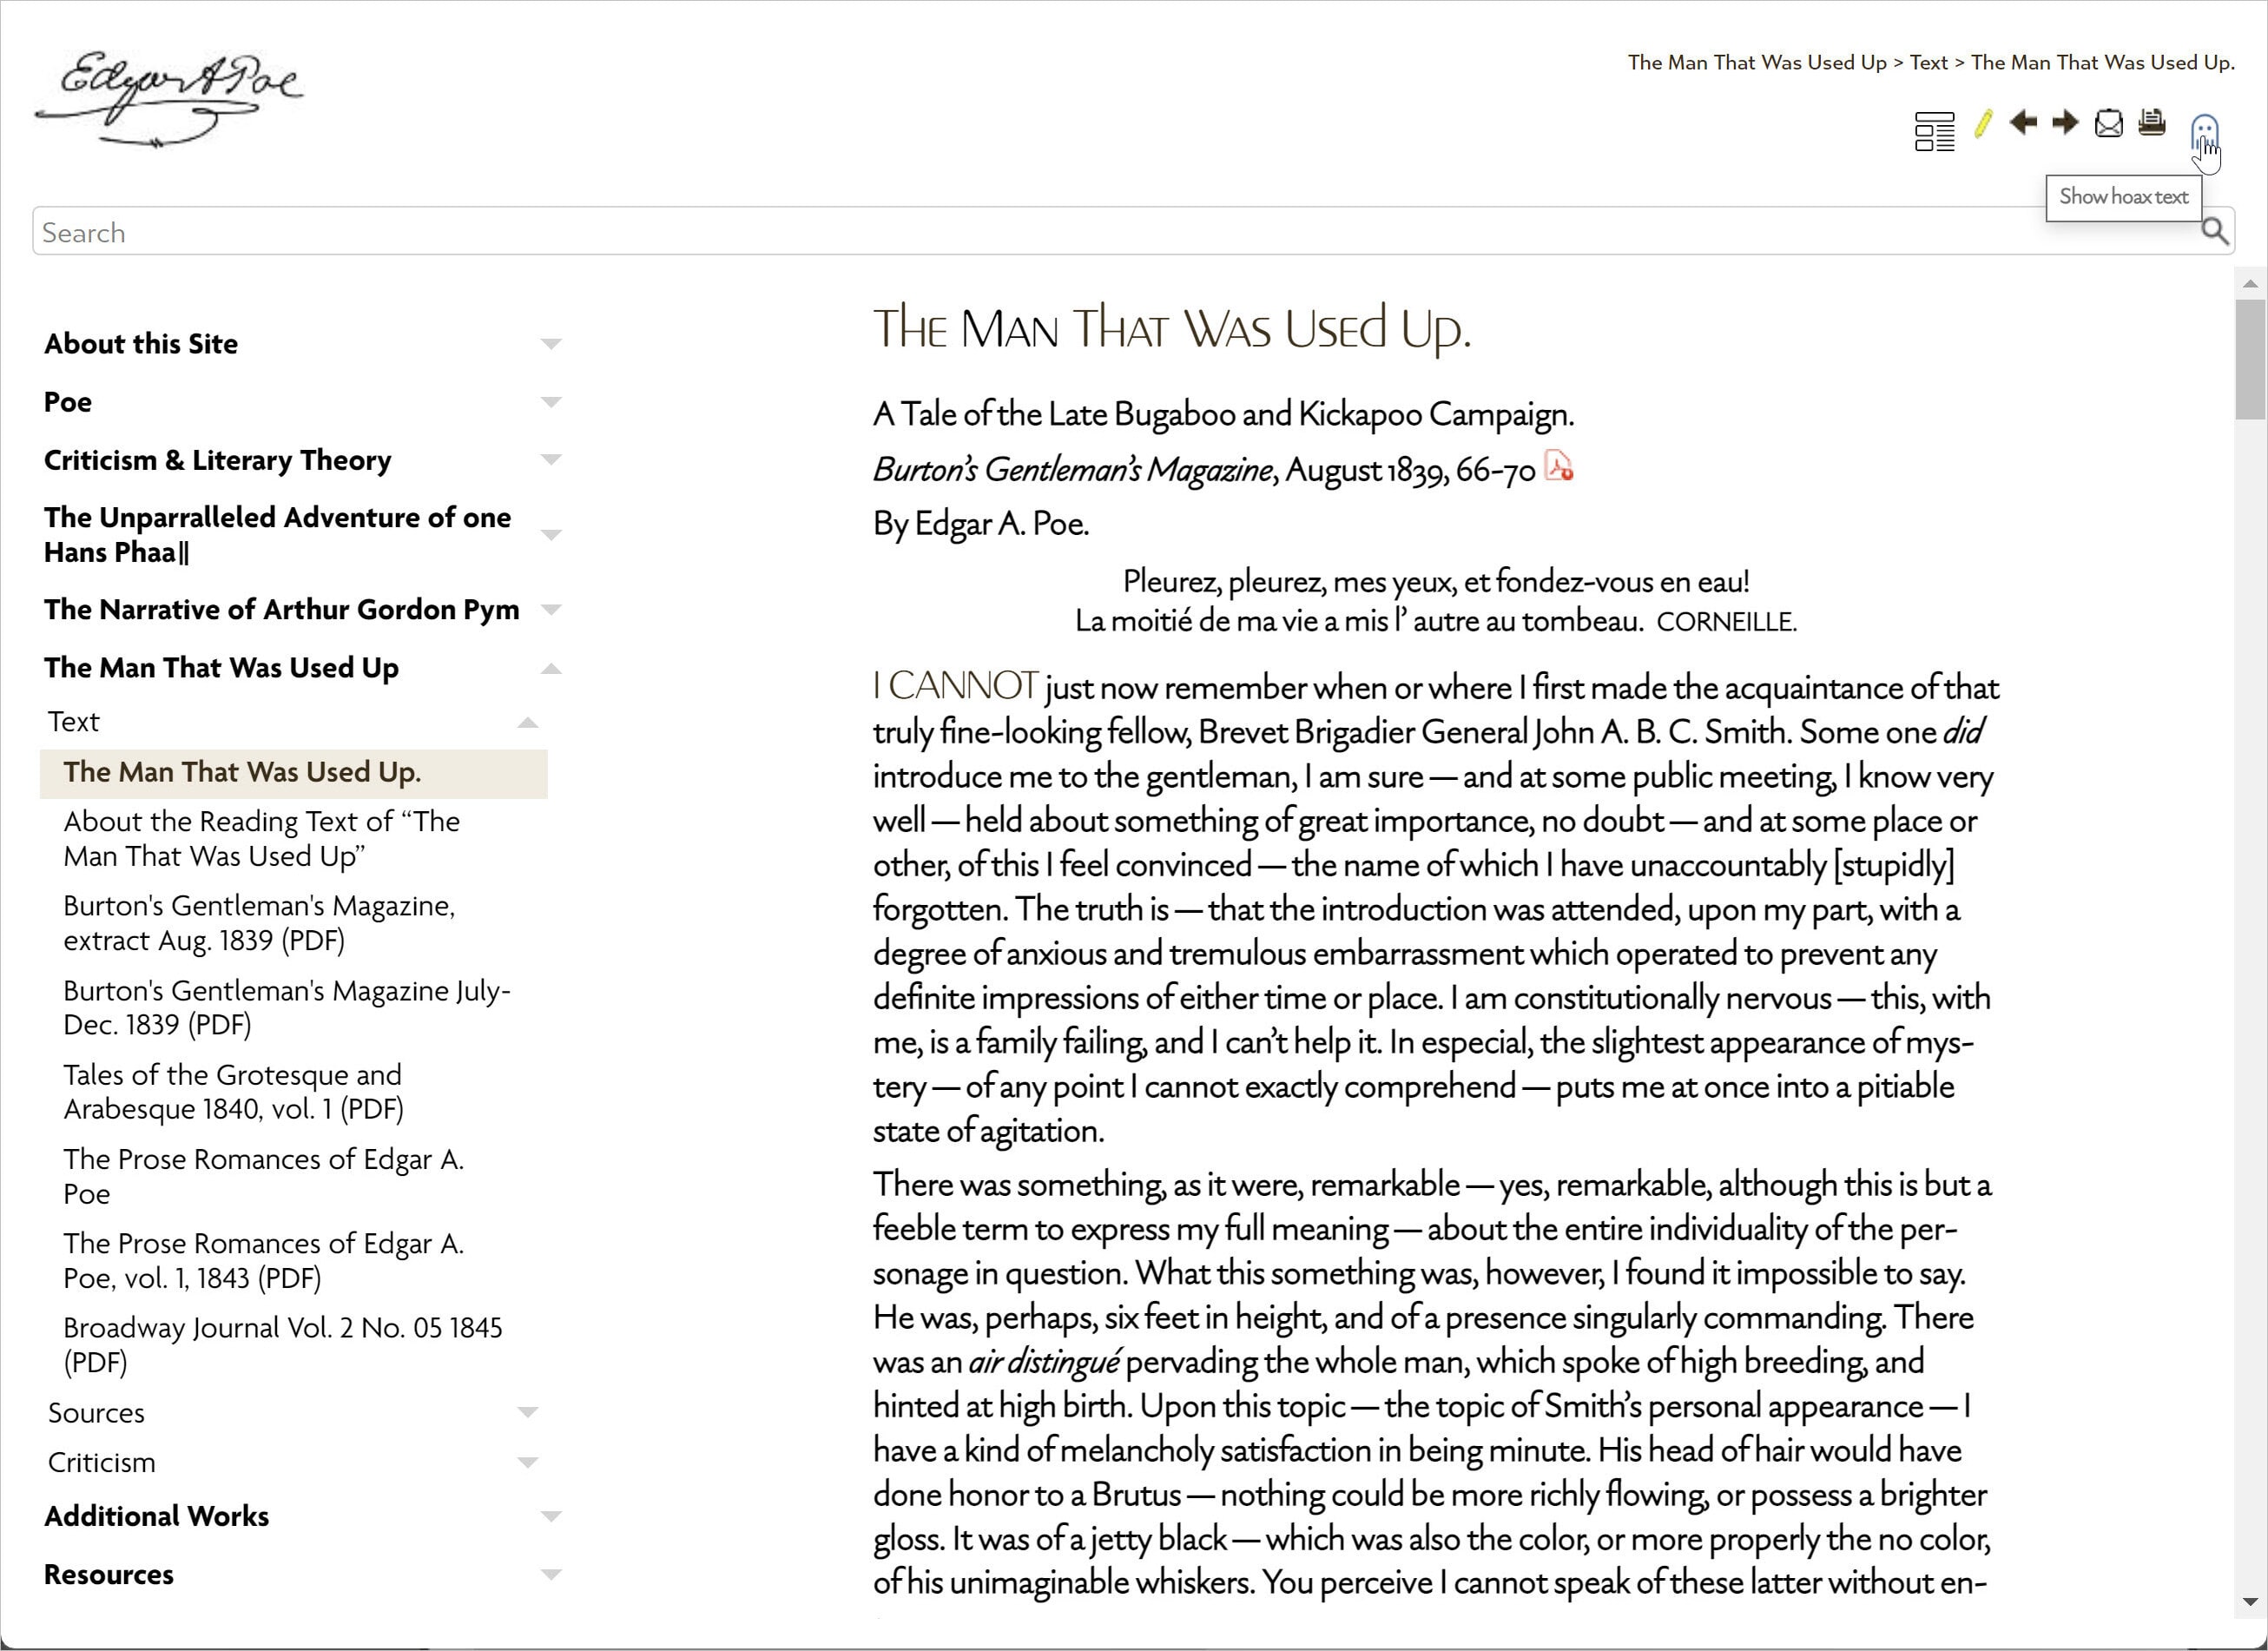
Who is the man that was used up?
Click the icon, and you’ll see portions of the same text now highlighted in blue:
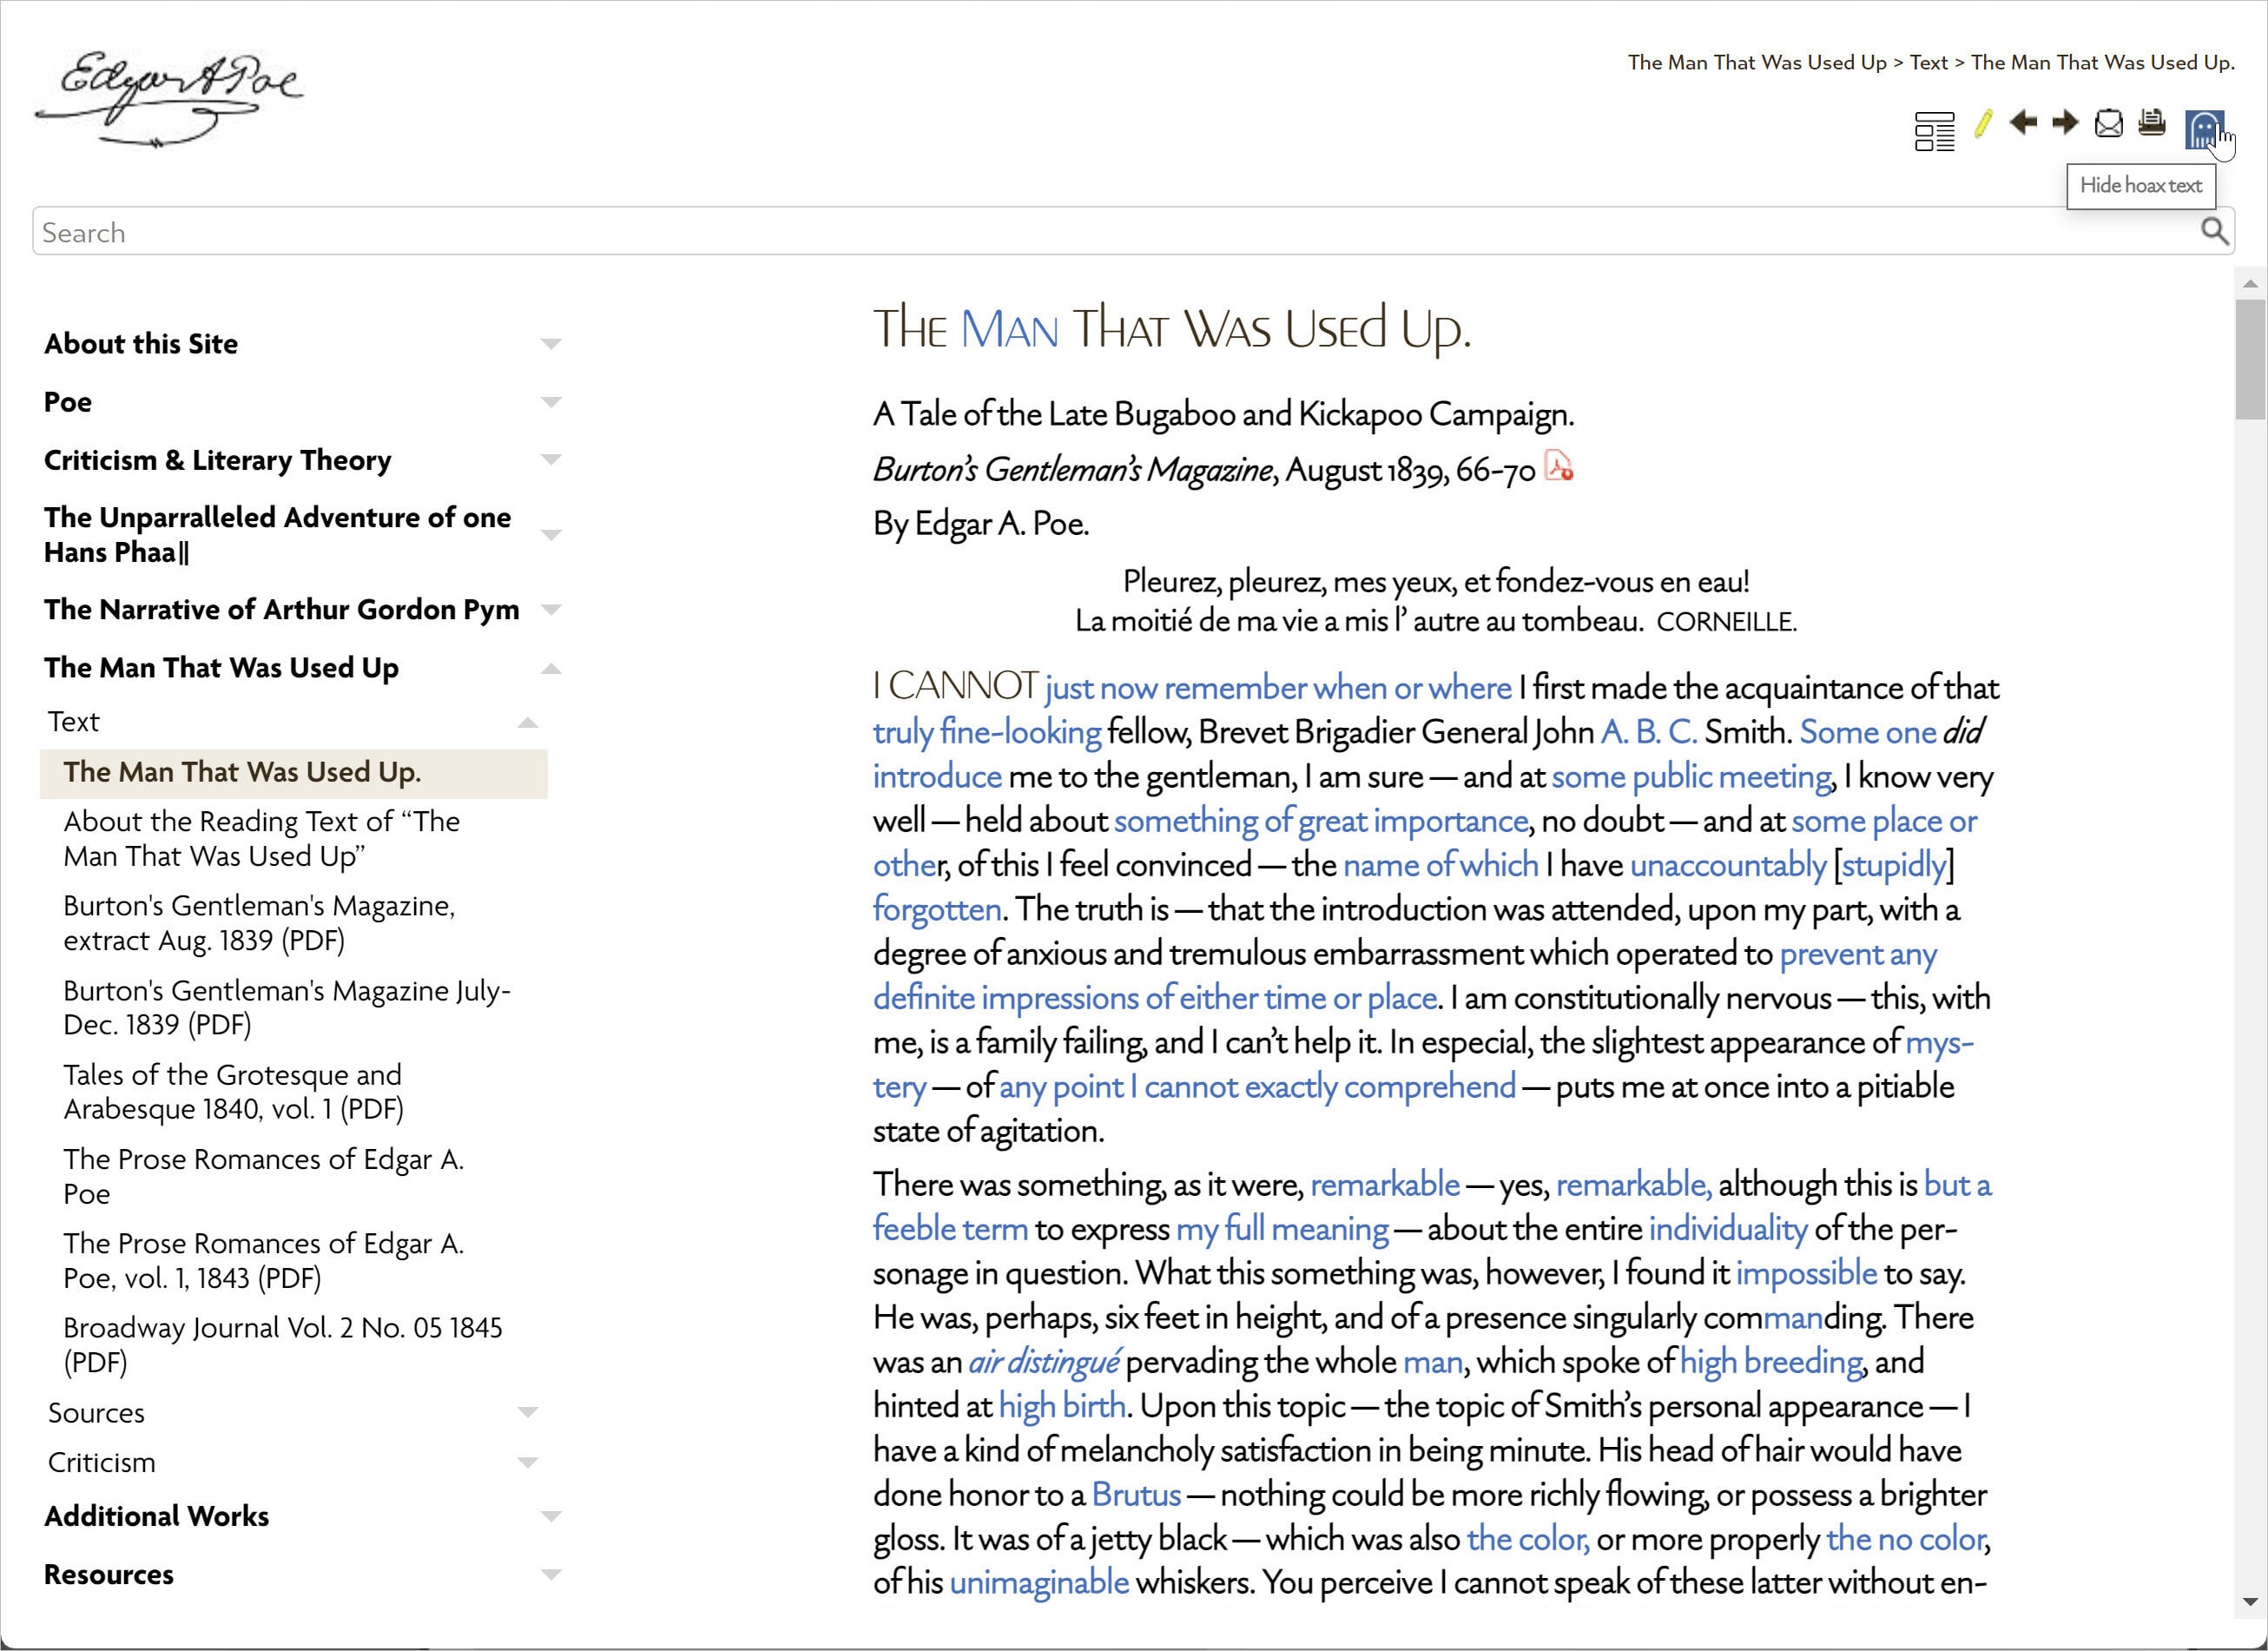
Taunting the reader with clue text in blue.
For a live demo, see https://www.howtoreadpoe.com/content/e-used-up/man-that-was-used-up.htm.
The effect visually shows the reader just what percentage of the hoax text is overloaded with double meanings much more effectively (and concisely) than any tedious, wordy description could. There are many uses for such an effect; you might want to use it for special emphasis in warnings. For drama, you could format text in white against a white page to make it “invisible,” but then spring to life in red when a button is clicked. It’s a form of secret writing if you will.
Tip: You could extend this concept to create some pretty wild format switches. Try something outlandish. What’s a starship for, anyway?
CSS Modifications
The CSS changes are in three parts. We first define the two states and assign the color (black, #000) to the default (root) and skin:
/* skin switch  */

:root span.boul {
	color: #000;
	font-style: inherit;
	font-weight: inherit;
}

html._Skins_Normal span.boul {
	color: #000;
}
The Mozilla Developer Network will tell you that “[i]n HTML, :root represents the <html> element and is identical to the selector html, except that its specificity is higher.” You’ll recognize it from Flare’s usage of :root in defining global variables. Think of it as a definition of what universal characteristics all your HTML elements will share. You can specify any text attributes; in this example, font-style and font-weight will inherit the values of the text preceding it.
The phrasing html._Skins_Normal span.boul tells the browser what color to use for text assigned the “normal” skin before activation by user input (clicking the ghost icon button) changes it to your specification.
The second portion is to create the span class for the switch color:
span.boul {
	color: #0071bc;
}
Thus, every character assigned this span will appear in a strong blue (see https://www.colorhexa.com/0071bc) when activated. The name of your class doesn’t have to be “boul;” this is just my shorthand for bouleversement, which means revolution, or more loosely, turnabout.
Lastly, the entry
span.boul.show
{
	color: #0071bc !important;
}
assigns the color to be shown on the span text when the browser encounters the show command from the included JavaScript.
JavaScript
The JS that activates the button-based switch was encoded directly within the toolbar skin (toolbar.flskn) by Mattias Sander. Mattias develops the indispensable (and still free!) Kaizen Toolbar plugin for Flare and performs Flare automation services (www.improvementsoft.com).
The script looks like this in a text editor:
<TopicToolbar
    EnableCustomLayout="true"
    Buttons="ToggleTocOn|ToggleTocOff|RemoveHighlight|PreviousTopic|NextTopic|Email|Print|ToggleHoaxOn|ToggleHoaxOff">
    <Script>$(document).ready(function () {

.
.
.

    $("button.toggle-hoax-off-button").on("click touch", function () {
        $(this).hide();
        $("button.toggle-hoax-on-button").show();
        $("span.boul").toggleClass("show");
    });

    $("button.toggle-hoax-on-button").on("click touch", function () {
        $("button.toggle-hoax-off-button").show();
        $(this).hide();
        $("span.boul").toggleClass("show");
    });
});</Script>
  </TopicToolbar>
While you don’t need to use a two-icon swap for the button, it is less confusing than showing only one icon for two toggle states.
A separate JS file, btn-toc.js, links the color-switch functionality to the button:
$(document).ready(function () {
    var style = document.createElement('style');
    style.innerHTML = 'span.boul.show{ color: #0071bc !important; }';
    document.getElementsByTagName('head')[0].appendChild(style);
    var button = $('<button>Hoax</button>');
    button.click(function () {
       $("span.boul").toggleClass("show");
    });
    $("div.button-group-container-left").append(button);
});
Icons
The sample project (downloadable here) contains two icons referenced in the toolbar and supplied in Resources > Images > Global:

The darker image was created by reversing out the lighter one, to indicate a 180° state change. I consider it an abstract of a ghost rising out of the text.
Apply the Span
Compare the span tags here to the blue text version of the finished interface.
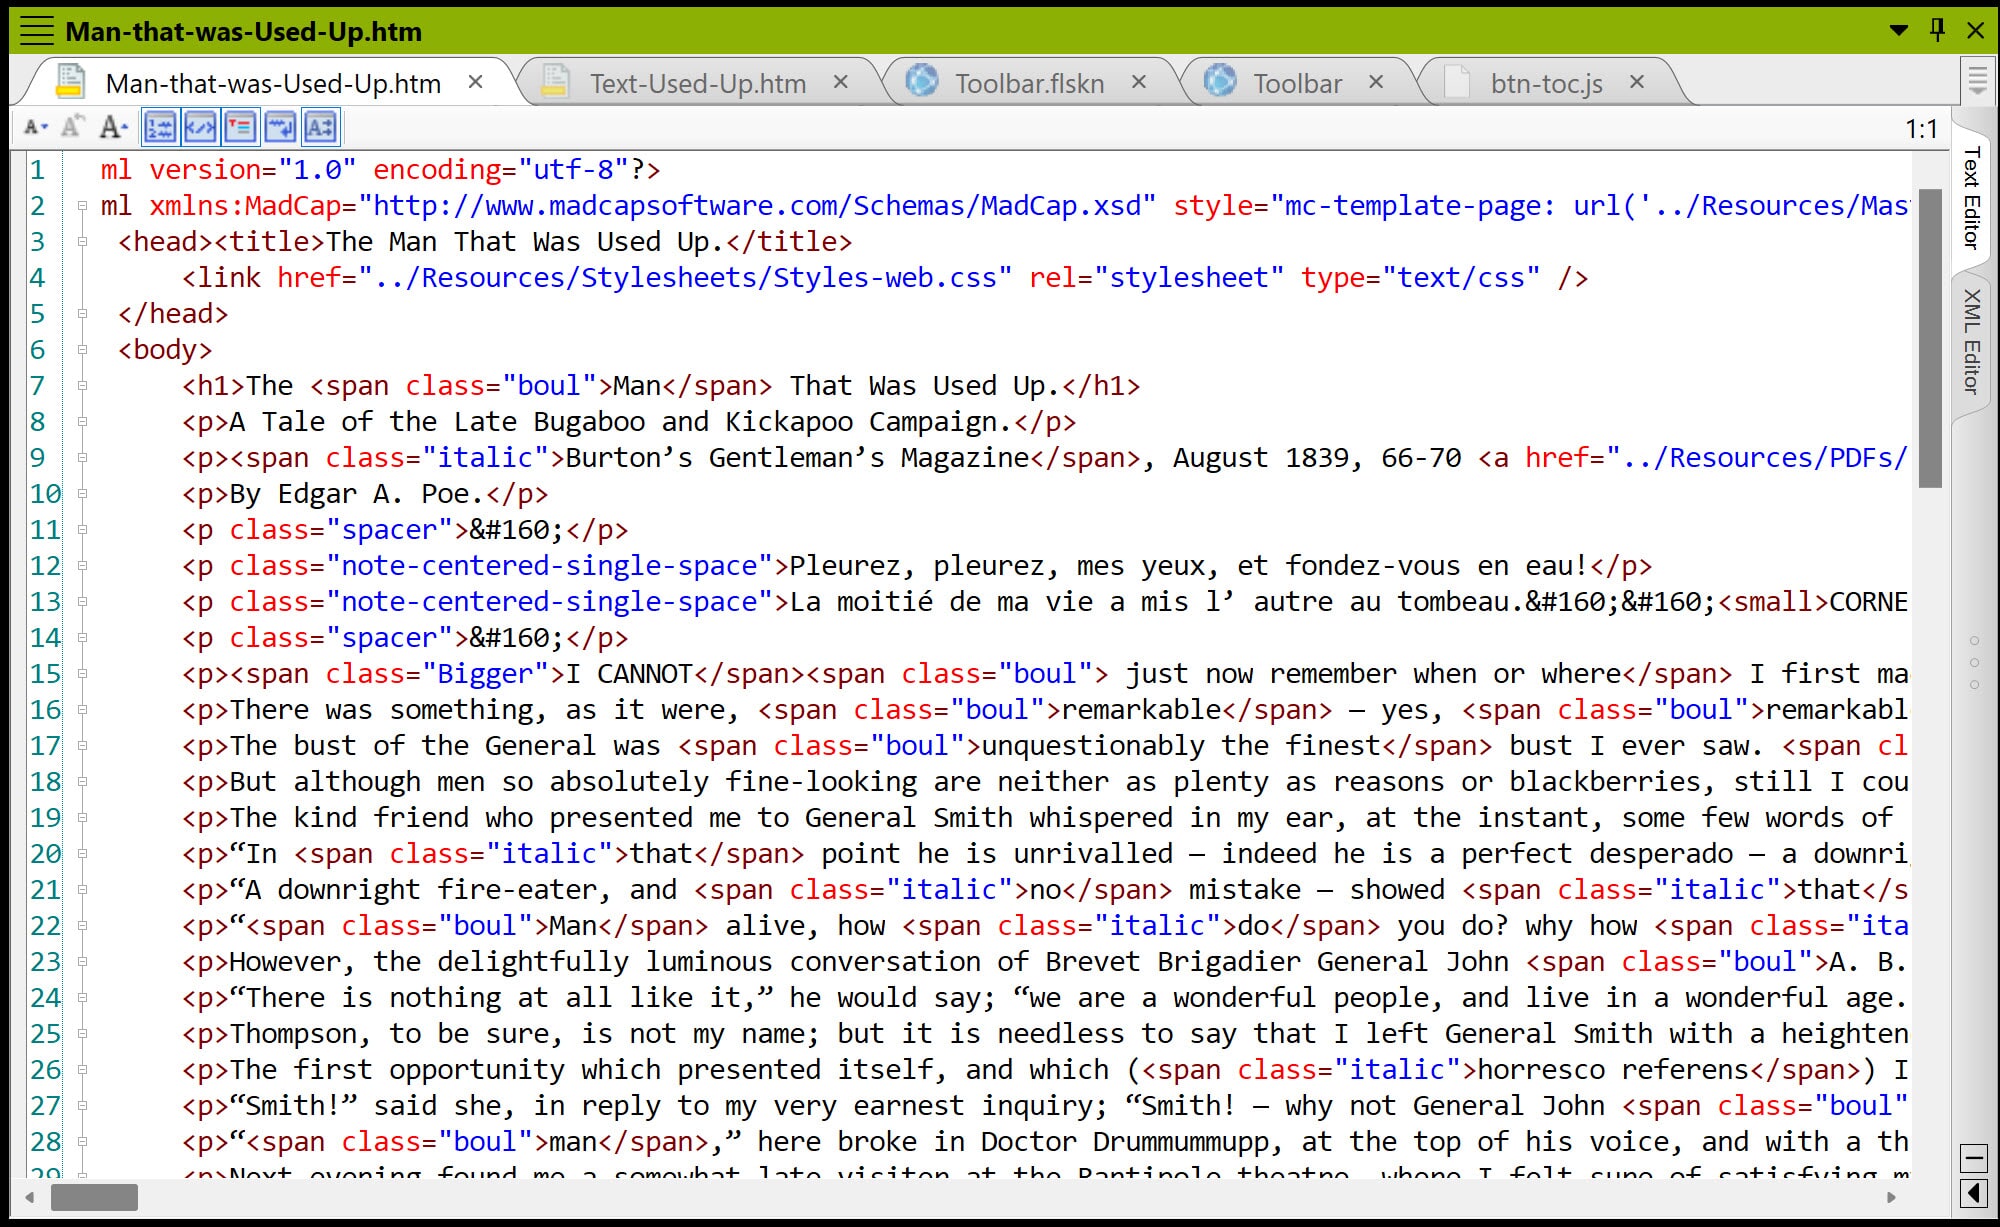
Under the covers lurk many spans.
Apply the span tag as you normally would, but beware this quirk: if you use the Flare graphical interface to apply the span to text already enclosed within another span, Flare will attempt to merge the two distinct types of spans into one, which you don’t want. You may be spending considerable time in a text editor if you’re using multiple span classes on the same text string. It’s a consideration.
Vanishing Text
What if you wanted to demonstrate a “vanishing act” in real time? On this page: https://www.howtoreadpoe.com/content/j-poe/approaching-poe.htm I advance the thesis that Edgar Poe has vanished into his own text. Note the words “beneath” and “escaped into his hoax texts” and “inside the hoax text” – they disappear and then reappear. The effect is made quick intentionally; refresh the browser page if you missed it.
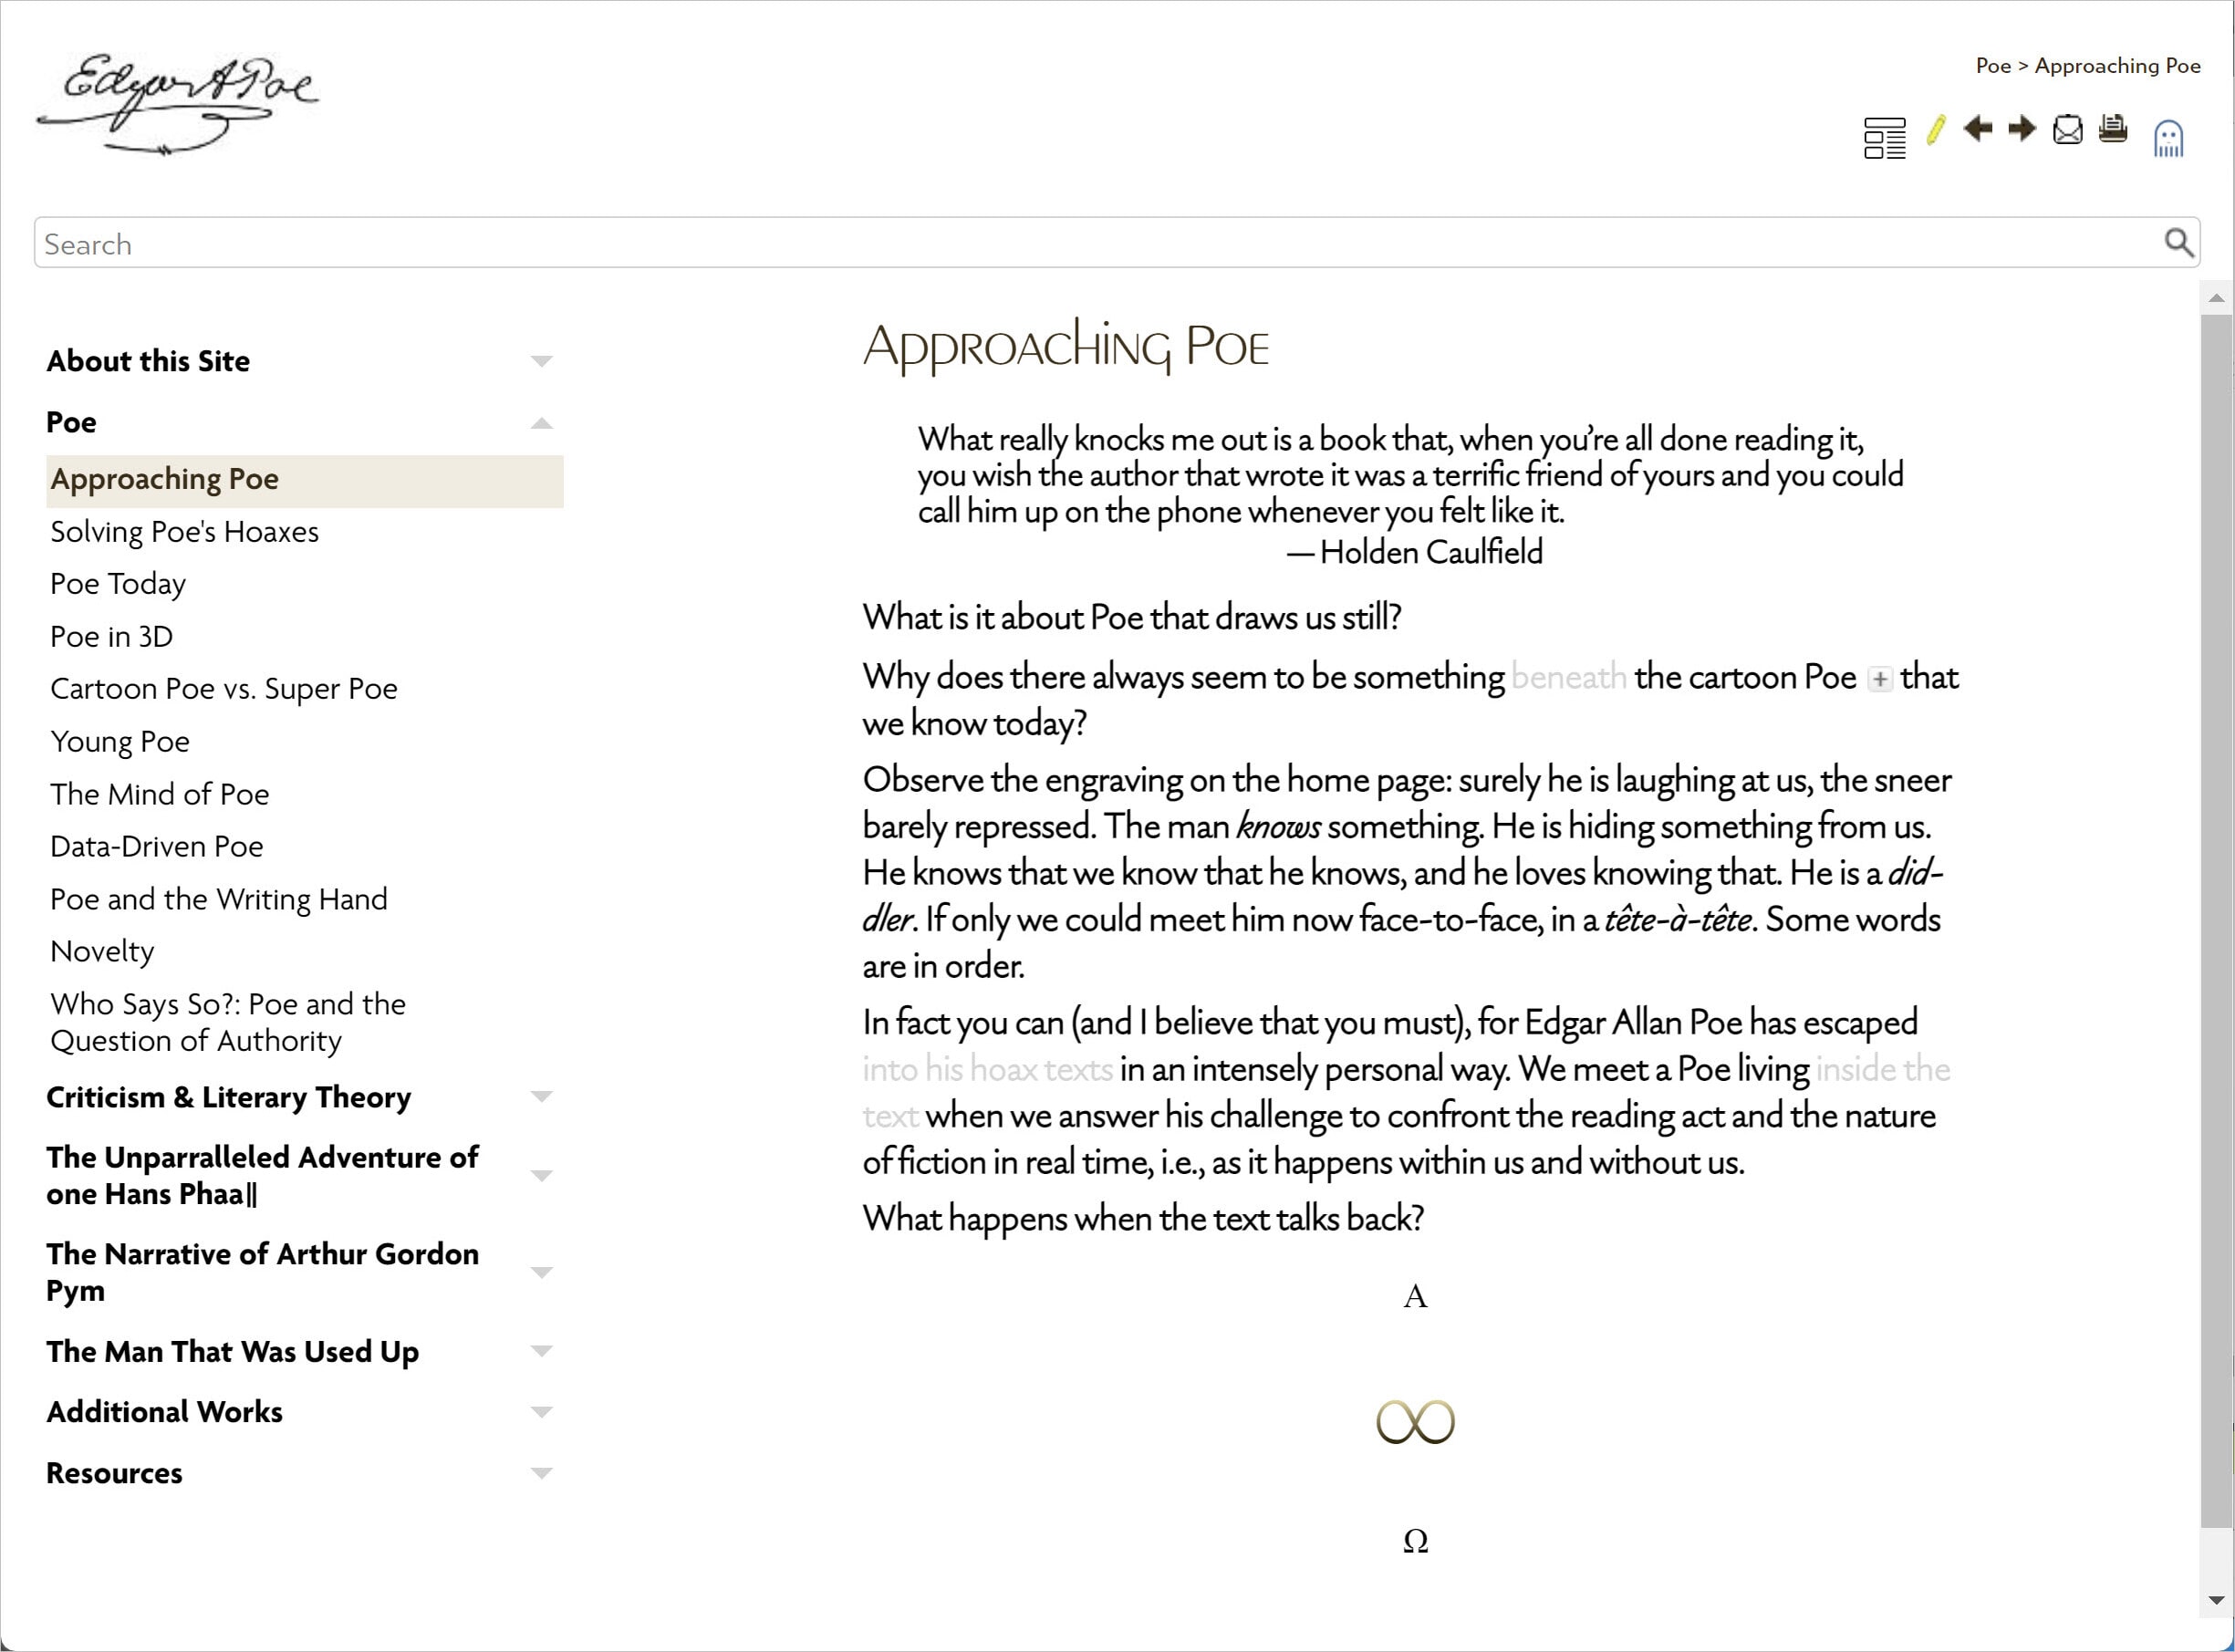
Text at the vanishing point.
CSS Modifications
This, as you have guessed, is a CSS animation. The code provided in your sample project (downloadable here) is as follows:
span.fade-out {
	animation: fadeOut ease 5s;
	-webkit-animation: fadeOut ease 5s;
	-moz-animation: fadeOut ease 5s;
	-o-animation: fadeOut ease 5s;
	-ms-animation: fadeOut ease 5s;
}

@keyframes fadeOut {
	0% {
		opacity: 1;
	}

	100% {
		opacity: 0;
	}
}

@-moz-keyframes fadeOut {
	0% {
		opacity: 1;
	}

	100% {
		opacity: 0;
	}
}

@-webkit-keyframes fadeOut {
	0% {
		opacity: 1;
	}

	100% {
		opacity: 0;
	}
}

@-o-keyframes fadeOut {
	0% {
		opacity: 1;
	}

	100% {
		opacity: 0;
	}
}

@-ms-keyframes fadeOut {
	0% {
		opacity: 1;
	}

	100% {
		opacity: 0;
	}
}
It’s very simple; it defines for four types of browsers how long to display the fade effect. You can vary the opacity and the timing function called ease. Research and experiment; besides ease, you will find ease-in-out and other variations defined on the Web. In my case, the end user would be frustrated by a continually looping effect, and one animation alone gets the point across. Keep in mind that the JavaScript file will run each time the browser displays this topic. This trick could easily become tiresome if used on a frequently viewed page.
JavaScript
The JS that controls the animation (fade.js) is more complex, and suitable for modification only by an advanced developer. It works, and you needn’t change anything in it.
Image Slider
It actually swaps rather than slides, but whatever you call it, clicking one of the four images at the bottom of the stack (sized at 20%) displays it in the larger port at top (sized at 50%). You’ve seen similar functionality in the “quick preview” windows of online shopping sites.
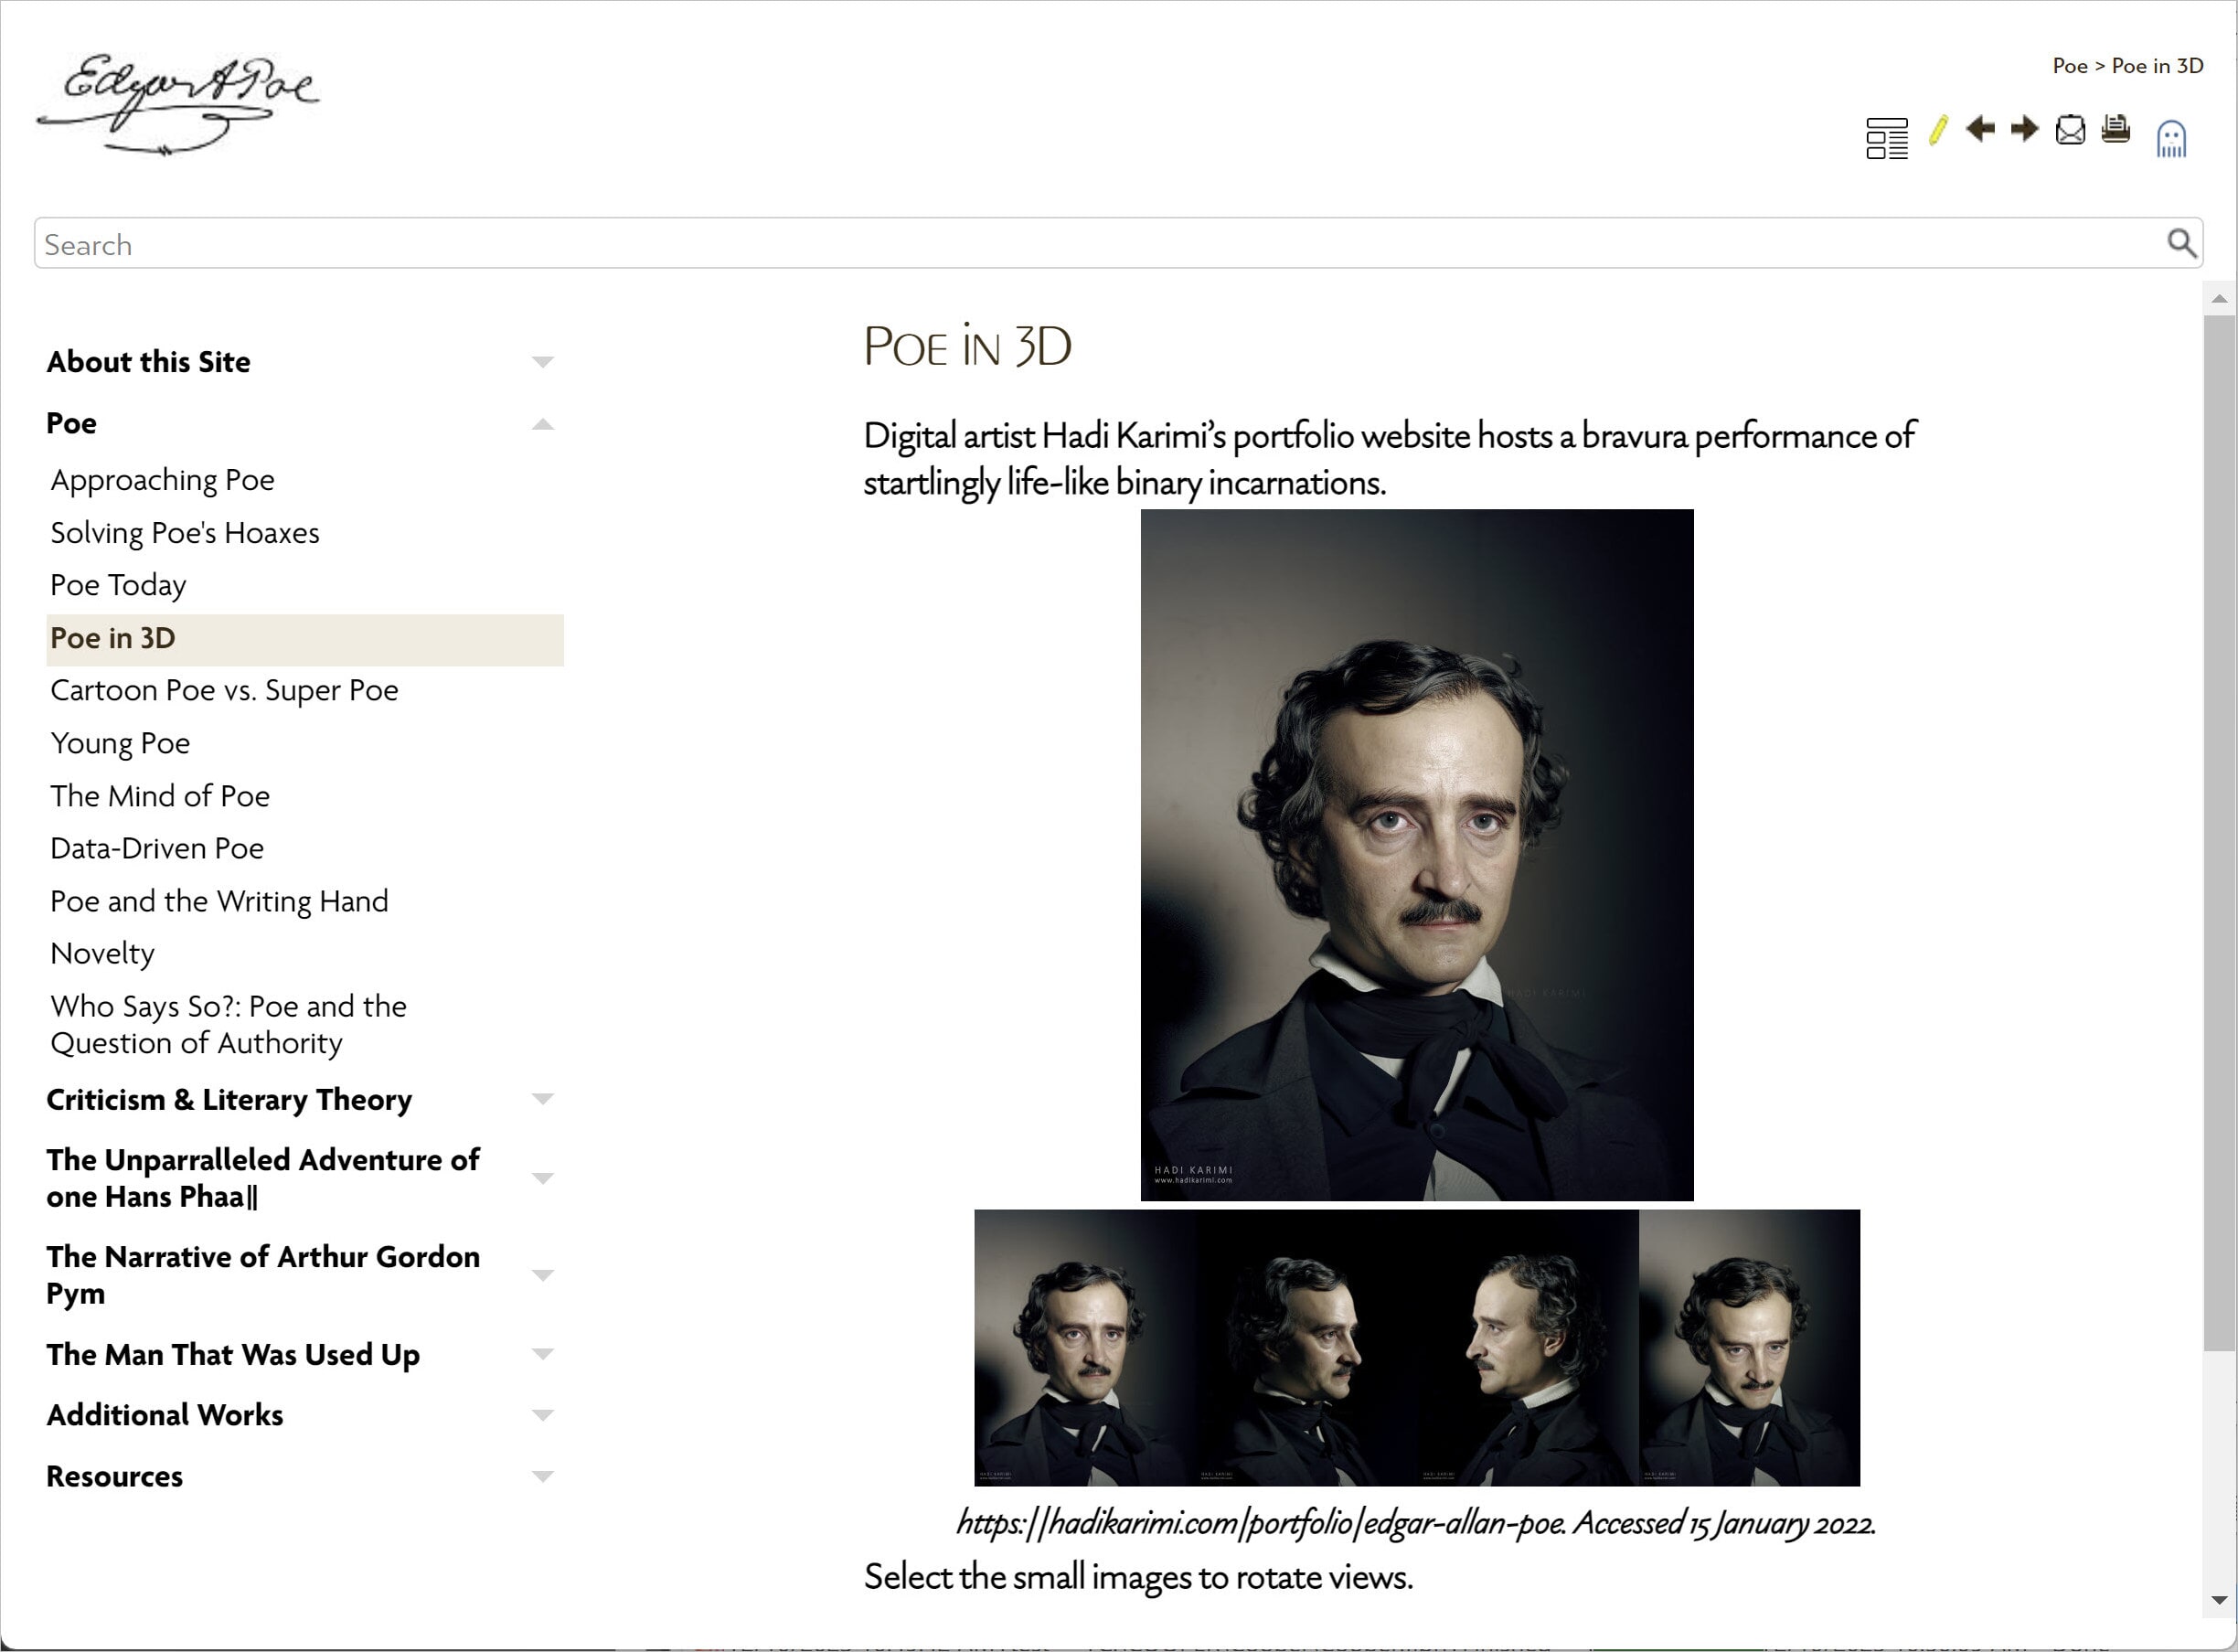
To try this out, go to https://www.howtoreadpoe.com/content/j-poe/poe_in_3d.htm. Mattias Sander pointed me to a sample on the Web; it was snappy in performance and needed only styling.
CSS Modifications
None.
Code Modifications
In this case, I retrofitted a section of code that calls up jQuery but is embedded within the XHTML file.
The relevant code section is here:
.
.
.
        <script src="https://code.jquery.com/jquery-3.5.1.min.js" integrity="sha256-9/aliU8dGd2tb6OSsuzixeV4y/faTqgFtohetphbbj0=" crossorigin="anonymous">
        </script> <script>/*<![CDATA[*/


 $(document).ready(function () {
 $("div.large-images").after("<div class='small-images'><div>");
 $(".large-images img").each(function () {
 $(this).clone().appendTo(".small-images");
 });
 $(".small-images img").click(function () {
 var src = $(this).attr("src");
 $(".large-images img").hide();
 $(".large-images img[src='" + src + "']").show();
 });
 });


/*]]>*/</script><style>/*<![CDATA[*/
div.small-images img
{
	width: 20%;
	height: 20%;
	border: none;
	margin: 0;
	padding: 0;
	cursor: pointer;
}
div.large-images img
{
	width: 50%;
	height: 50%;
	border: none;
	margin: 0;
	padding: 0;
}
div.large-images img:not(:first-child)
{
	display: none;
}

/*]]>*/</style></head>
And the divs are used here:
    <body>
        <h1>Poe in 3D</h1>
        <p>Digital artist Hadi Karimi’s portfolio website hosts a bravura performance of startlingly life-like binary incarnations.</p>
        <div class="center">
            <div class="large-images">
                <img src="../Resources/Images/J-Poe/Edgar-1.jpg" alt="" />
                <img src="../Resources/Images/J-Poe/Edgar-2.jpg" alt="" />
                <img src="../Resources/Images/J-Poe/Edgar-3.jpg" alt="" />
                <img src="../Resources/Images/J-Poe/Edgar-4.jpg" alt="" />
            </div>
        </div>
        <p class="caption">https://hadikarimi.com/portfolio/edgar-allan-poe. Accessed 15 January 2022.</p>
        <p>Select the small images to rotate views.</p>
.
.
.
Don’t worry; the sample page and portraits of Edgar are all included in the project, downloadable here.
The sample code was simple to adapt (just a sizing change), but I dithered a bit with the image positioning until finally using no margin or padding to abut the four bottom images. Because jQuery provides the functionality for the actual swap, keep in mind that you do therefore have a dependency (what if jQuery changes?). The scary-looking CDATA’s just tell the browser to execute this code as is.
Sortable Table
The problem with most JS-powered sortable tables is that they use ugly underscore anchors on column heads to initiate the sort: very off putting. Not so with this one; it’s clean as a newborn, and behaves very smoothly. Just select a column heading to run it.
Live demo at https://www.howtoreadpoe.com/content/pdf_list.htm.
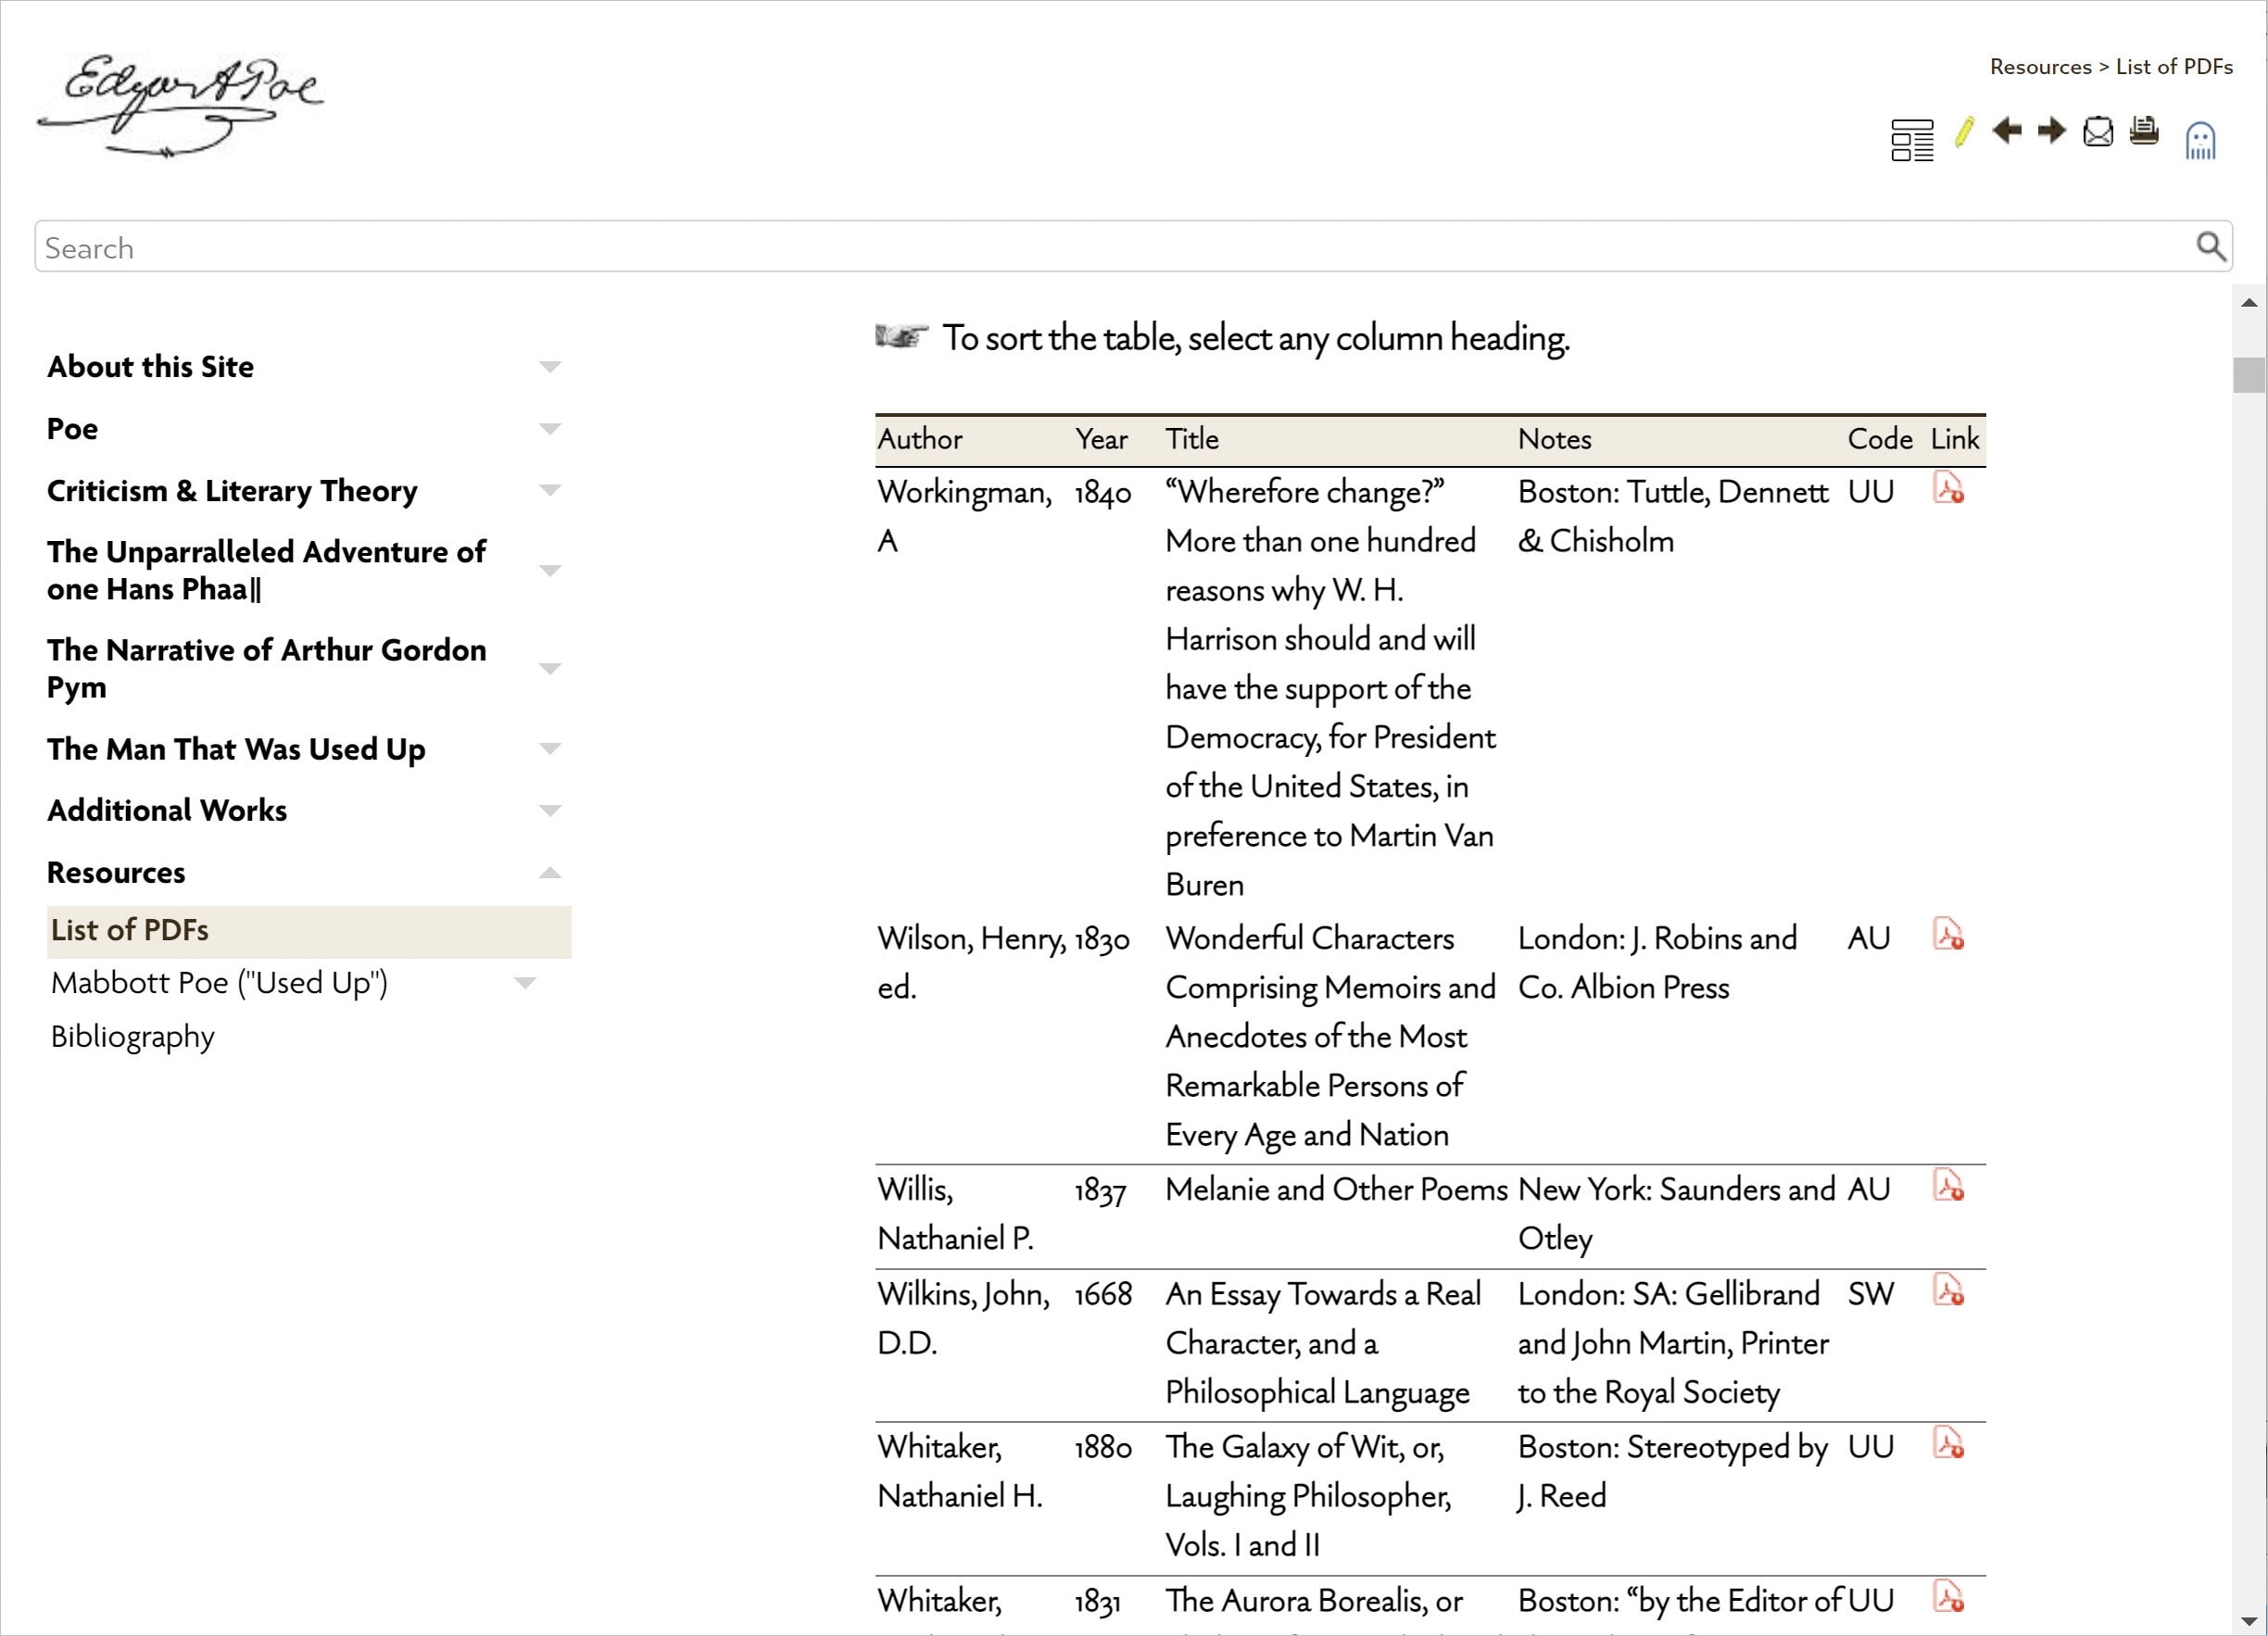
Sorted by author in inverse order.

Sorted by year.
Notice that the year sort above correctly lists Aristotle’s 350 B.C.E. entry before the one for 76 (A.D.) for Plutarch. But that’s not the way sorting works, you say: logically, 76 should appear before 335. You are correct, but so am I. The trick here is to enter the years as -350, and 0076, “covering up” the negative sign in the B.C.E. number and the two zeroes in 0076 by spot formatting them as white text against a white (not transparent) table background. This sleight of hand also forces the correct right-justified look because there are always four “digits” — if you include placeholders — to be aligned in the column.
The Greek text for Aristotle is formatted properly using the Adobe Omnes Greek downloadable Web font (see https://fonts.adobe.com/fonts/omnes-greek) in a span tag. Although Google fonts are free, I find the improved quality well worth the less than 2 bucks a day hit, which also includes the entire Adobe Creative Suite. Think of it as the cost of a candy bar and charge it against your calorie offset.
Tip: You can find the equivalent of some Linotype or Hoefler Web fonts, and even some originals from smaller foundries, on the Adobe site (https://fonts.adobe.com/).
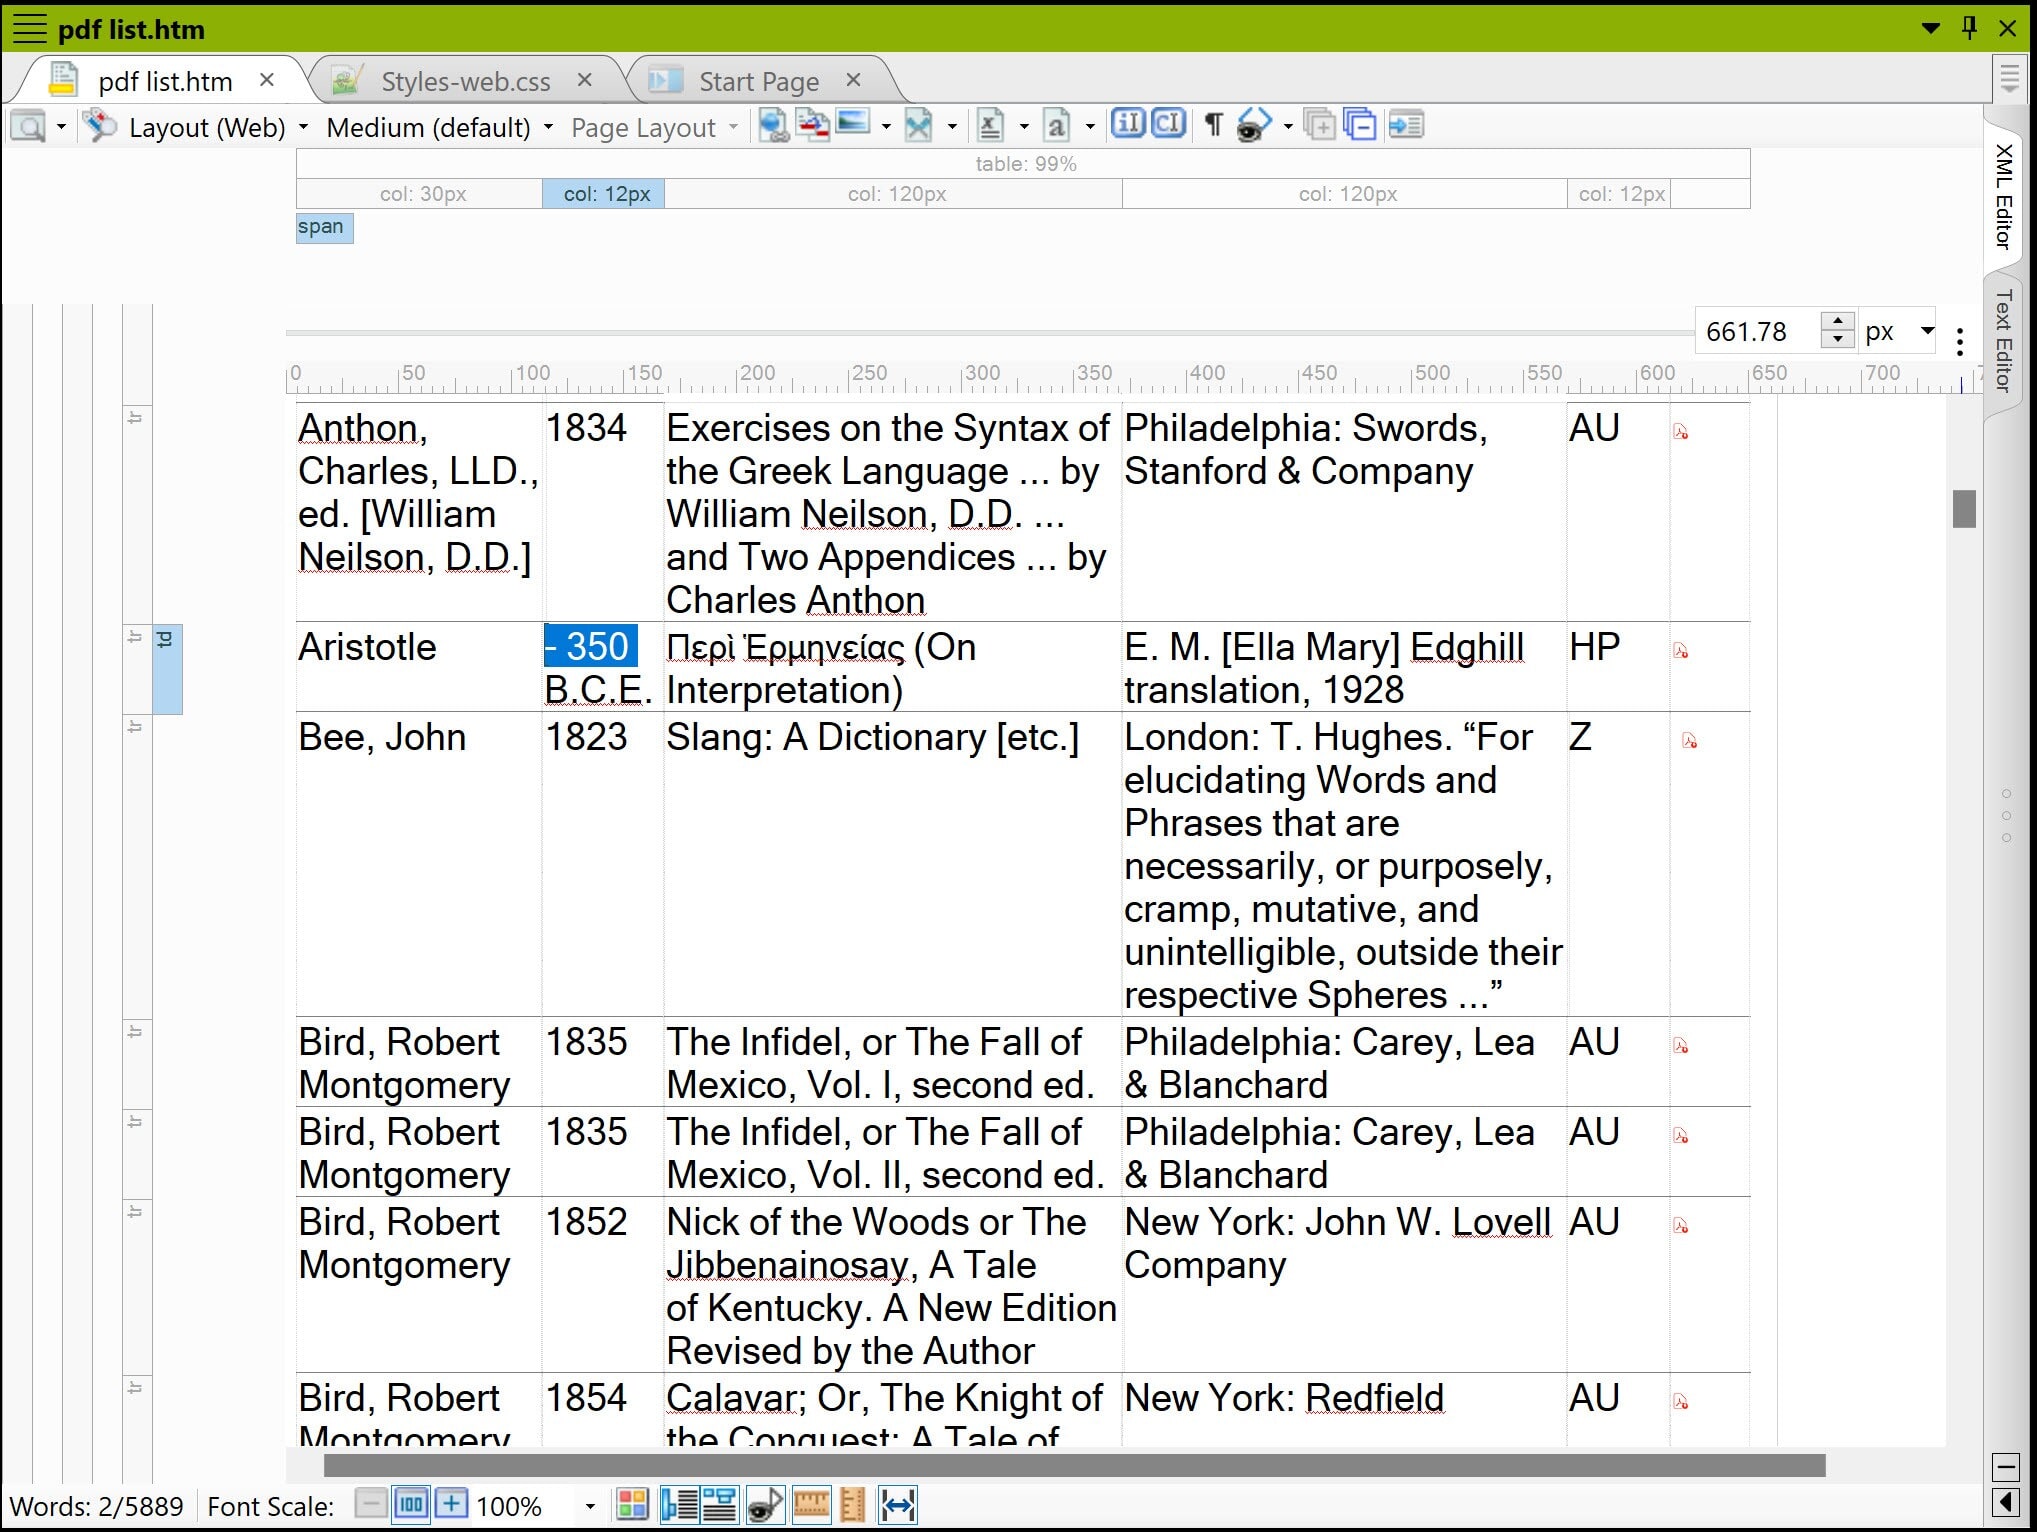
“Cheating” for a good cause: interpretability.
Hey, nobody said you had to play by the rules here.
CSS Modifications
None.
JavaScript
You’ll find a well-commented JS file called tablesort.js in your Resources > JavaScript sample folder. Download the project here.
function sortTable(table, col, reverse) {
    var tb = table.tBodies[0], // use `<tbody>` to ignore `<thead>` and `<tfoot>` rows
        tr = Array.prototype.slice.call(tb.rows, 0), // put rows into array
        i;
    reverse = -((+reverse) || -1);
    tr = tr.sort(function (a, b) { // sort rows
        return reverse // `-1 *` if want opposite order
            * (a.cells[col].textContent.trim() // using `.textContent.trim()` for test
                .localeCompare(b.cells[col].textContent.trim())
               );
    });
    for(i = 0; i < tr.length; ++i) tb.appendChild(tr[i]); // append each row in order
}
function makeSortable(table) {
    var th = table.tHead, i;
    th && (th = th.rows[0]) && (th = th.cells);
    if (th) i = th.length;
    else return; // if no `<thead>` then do nothing
    while (--i >= 0) (function (i) {
        var dir = 1;
        th[i].addEventListener('click', function () {sortTable(table, i, (dir = 1 - dir))});
    }(i));
}
function makeAllSortable(parent) {
    parent = parent || document.body;
    var t = parent.getElementsByTagName('table'), i = t.length;
    while (--i >= 0) makeSortable(t[i]);
}
window.onload = function () {makeAllSortable();};
This file is self-contained, i.e., it has no dependencies. Add it to your topic file for just one instance (Insert > Script), or add to a master page to control the behavior of multiple tables. The code looks for thead, tbody, and tfoot table markers to perform the sort in an array. It’s nearly instantaneous.
Extended HTML Characters for Superscripts and More
There are few greater sins than disrupting the user’s ability to sail placidly through a clean text. The <sup> and </sup> tags were a necessary hack in the era of the IBM-XT™ but are a scourge to proper leading (line spacing) now.
Compare these two versions of the same online text.
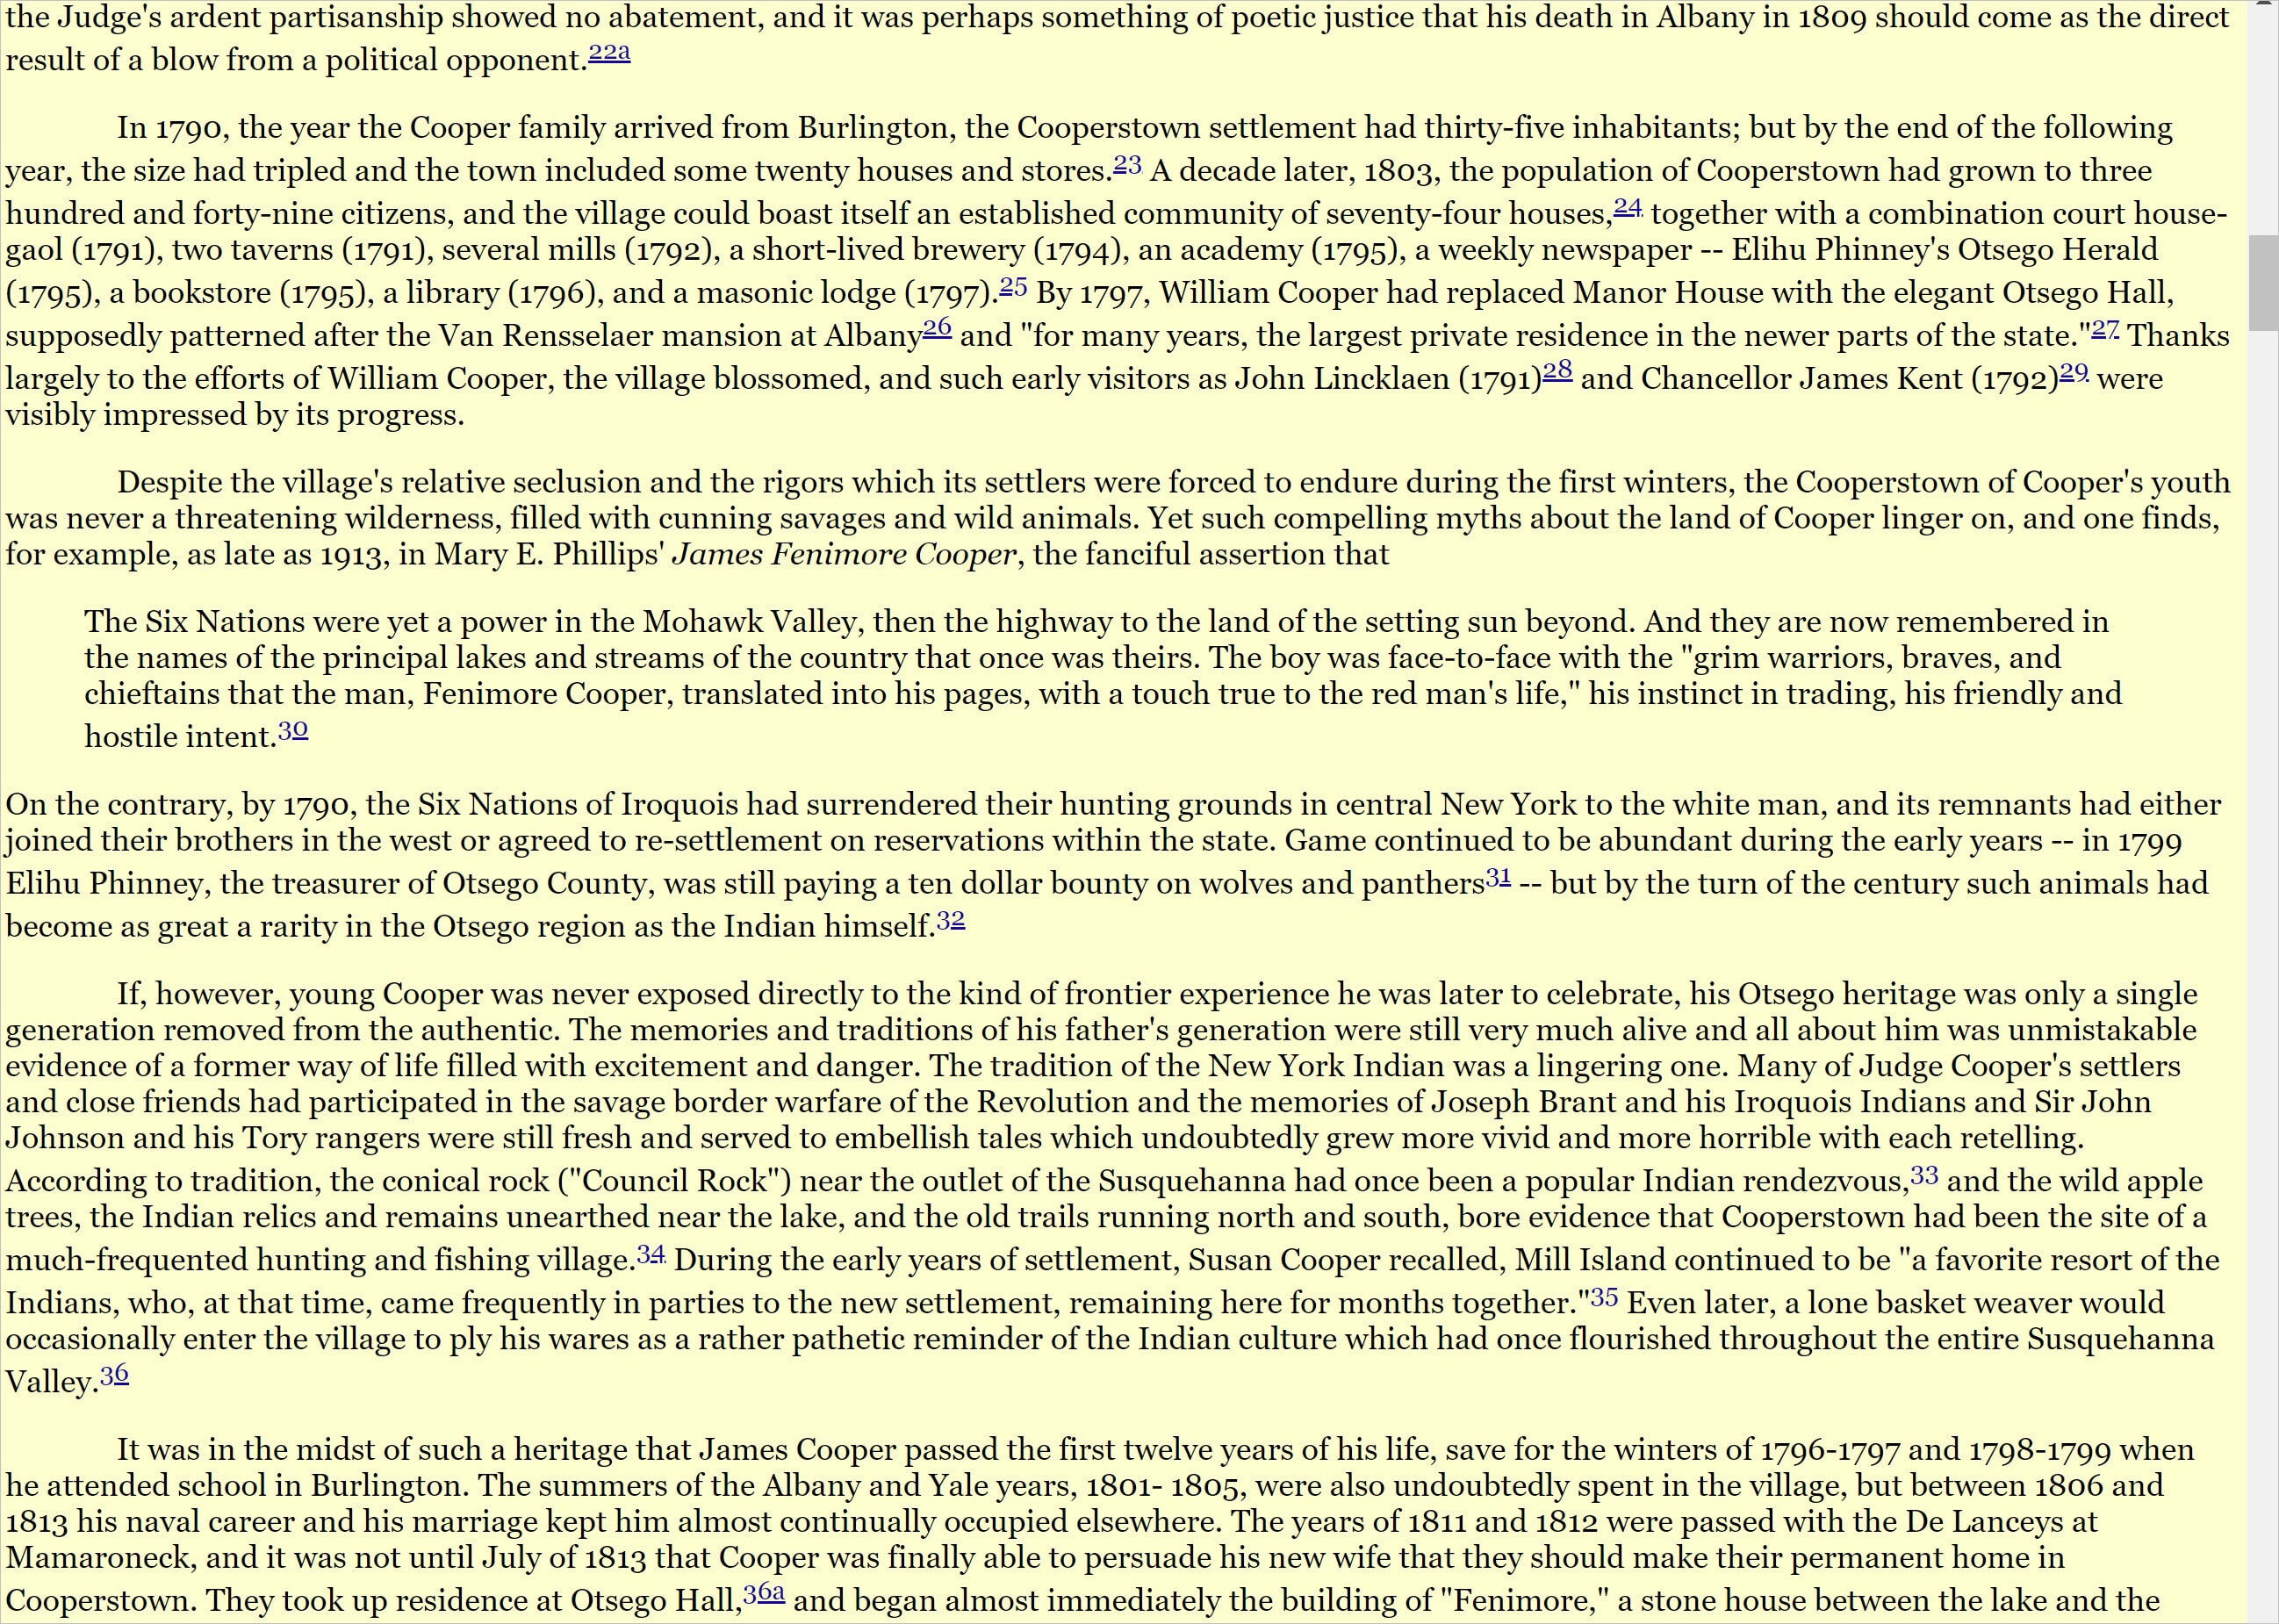
2000 – Disturbed reading pathway caused by up and down <sup> tags.
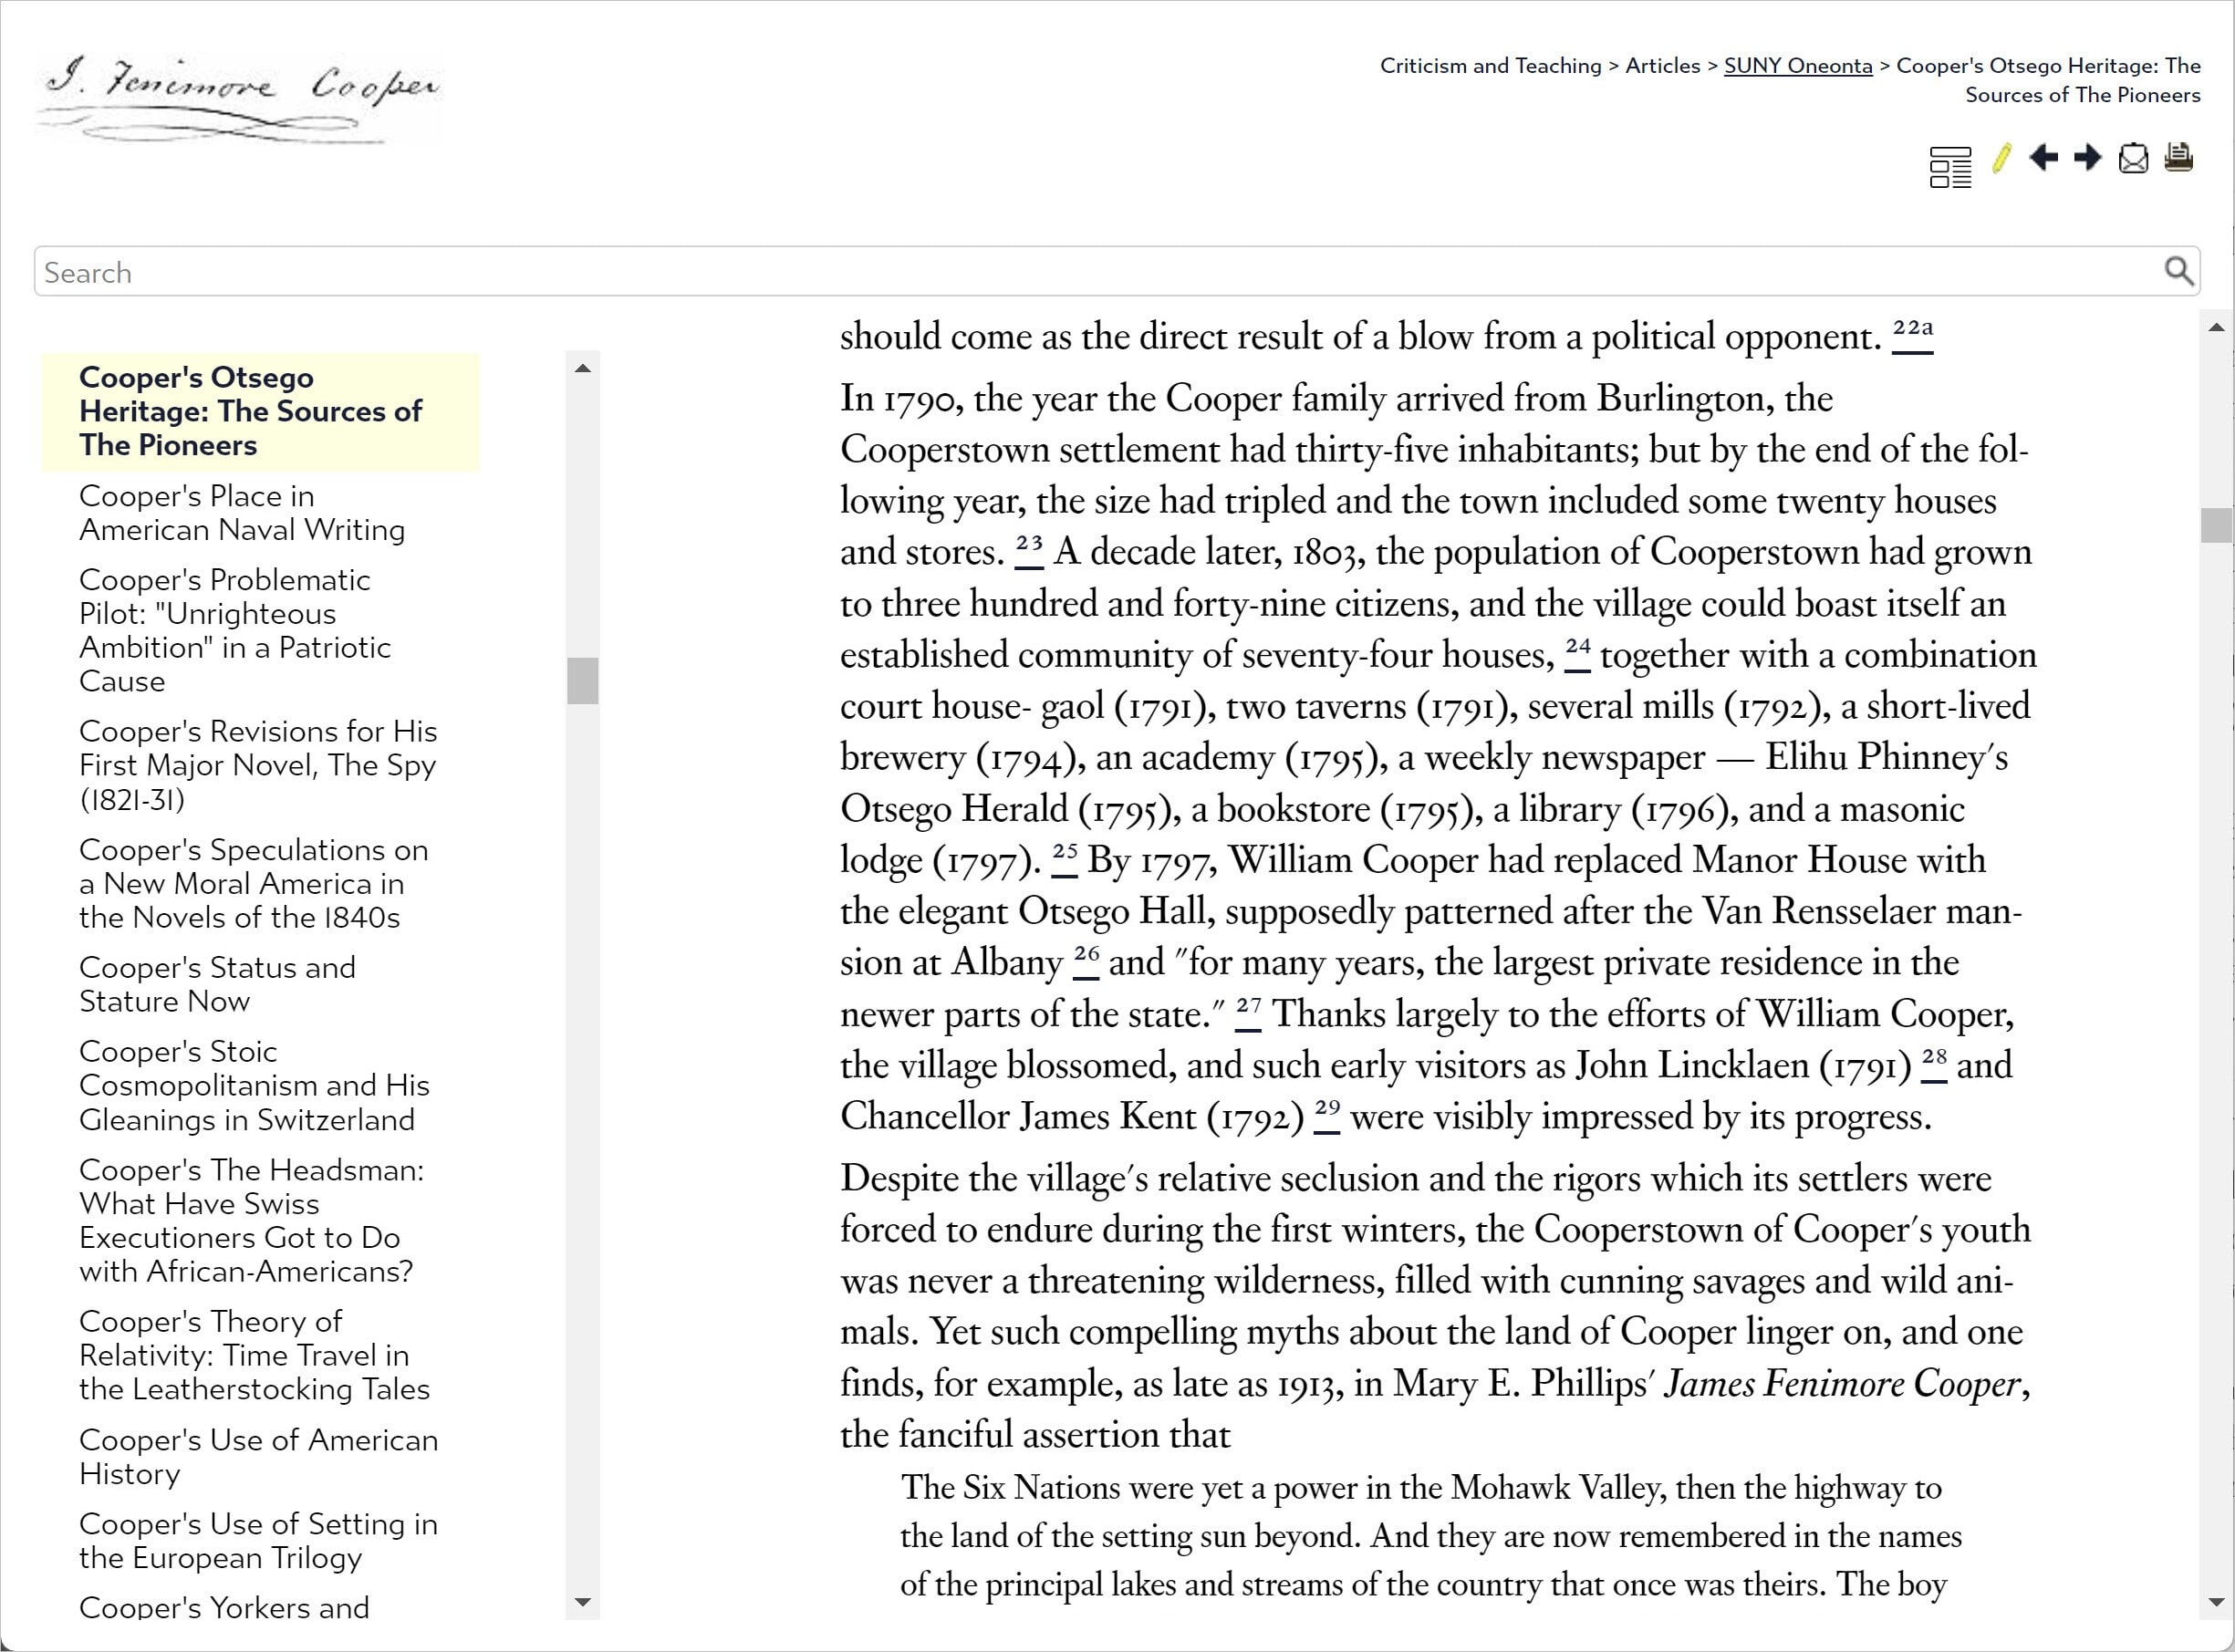
2023 – Tidy superscripts promote a steady reading flow.
The sample project (downloadable here) includes a snippet file (superscripts.flsnp) that contains extended HTML characters* for superscript numerals from 0 to 100, fractions, and a few useful symbols like dingbat numerals for callouts. Copy and paste or extract as needed. Add your own creations to the snippet; it’s a real time-saver.
*According to Mr. Google®, “[e]xtended characters are those which are not in the standard ASCII character set, which uses 7-bit characters and thus has values 0 to 127. ASCII Codes 0 to 31 and 127 are non-printing control characters, while codes 32 to 126 match the keys on a US keyboard (‘a’, ‘A’, etc.).” See also https://www.w3schools.com/charsets/ for more detail.
Good sources for more extended HTML characters are https://psdtowp.net/html-codes-special-characters.html, https://www.toptal.com/designers/htmlarrows/, and https://www.htmlsymbols.xyz/, in that order.
Fortunately for us, Flare’s topic files are all encoded to the UTF-8 standard, which is necessary for displaying extended characters properly in HTML5. The first line of the topic file declares it this way: <?xml version="1.0" encoding="utf-8"?>.
Remember that you have formatting options for text that could be difficult and time-consuming to replicate using graphics. For example, the gold effect on the infinity loop between the alpha and omega characters below is another CSS animation:
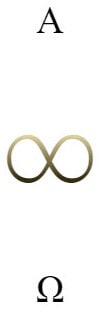
I used a span to apply Adobe Omnes Greek (discussed later) to all three. The gold effect is created by these CSS lines:
p.gold {
    background: linear-gradient(to bottom, #cfc09f 22%,#634f2c 24%, #cfc09f 26%, #cfc09f 27%,#ffecb3 40%,#3a2c0f 78%);
    -webkit-background-clip: text;
    -webkit-text-fill-color: transparent;
    color: #fff;
	font-family: 'Semplicita Pro', serif;
    position: relative;
	font-size: 48px;
	margin-top: 12px;
	margin-bottom: 24px;
	font-weight: 300;
	text-align: center;
}

p.gold:after {
    background: none;
    content: attr(data-heading);
    left: 0;
	top: 0;
    z-index: -1;
    position: absolute;
    text-shadow:
		-1px 0 1px #c6bb9f,
		0 1px 1px #c6bb9f,
		5px 5px 10px rgba(0, 0, 0, 0.4),
		-5px -5px 10px rgba(0, 0, 0, 0.4);
}
This example is also included in the sample project, downloadable here.
Now back to our superscripts.
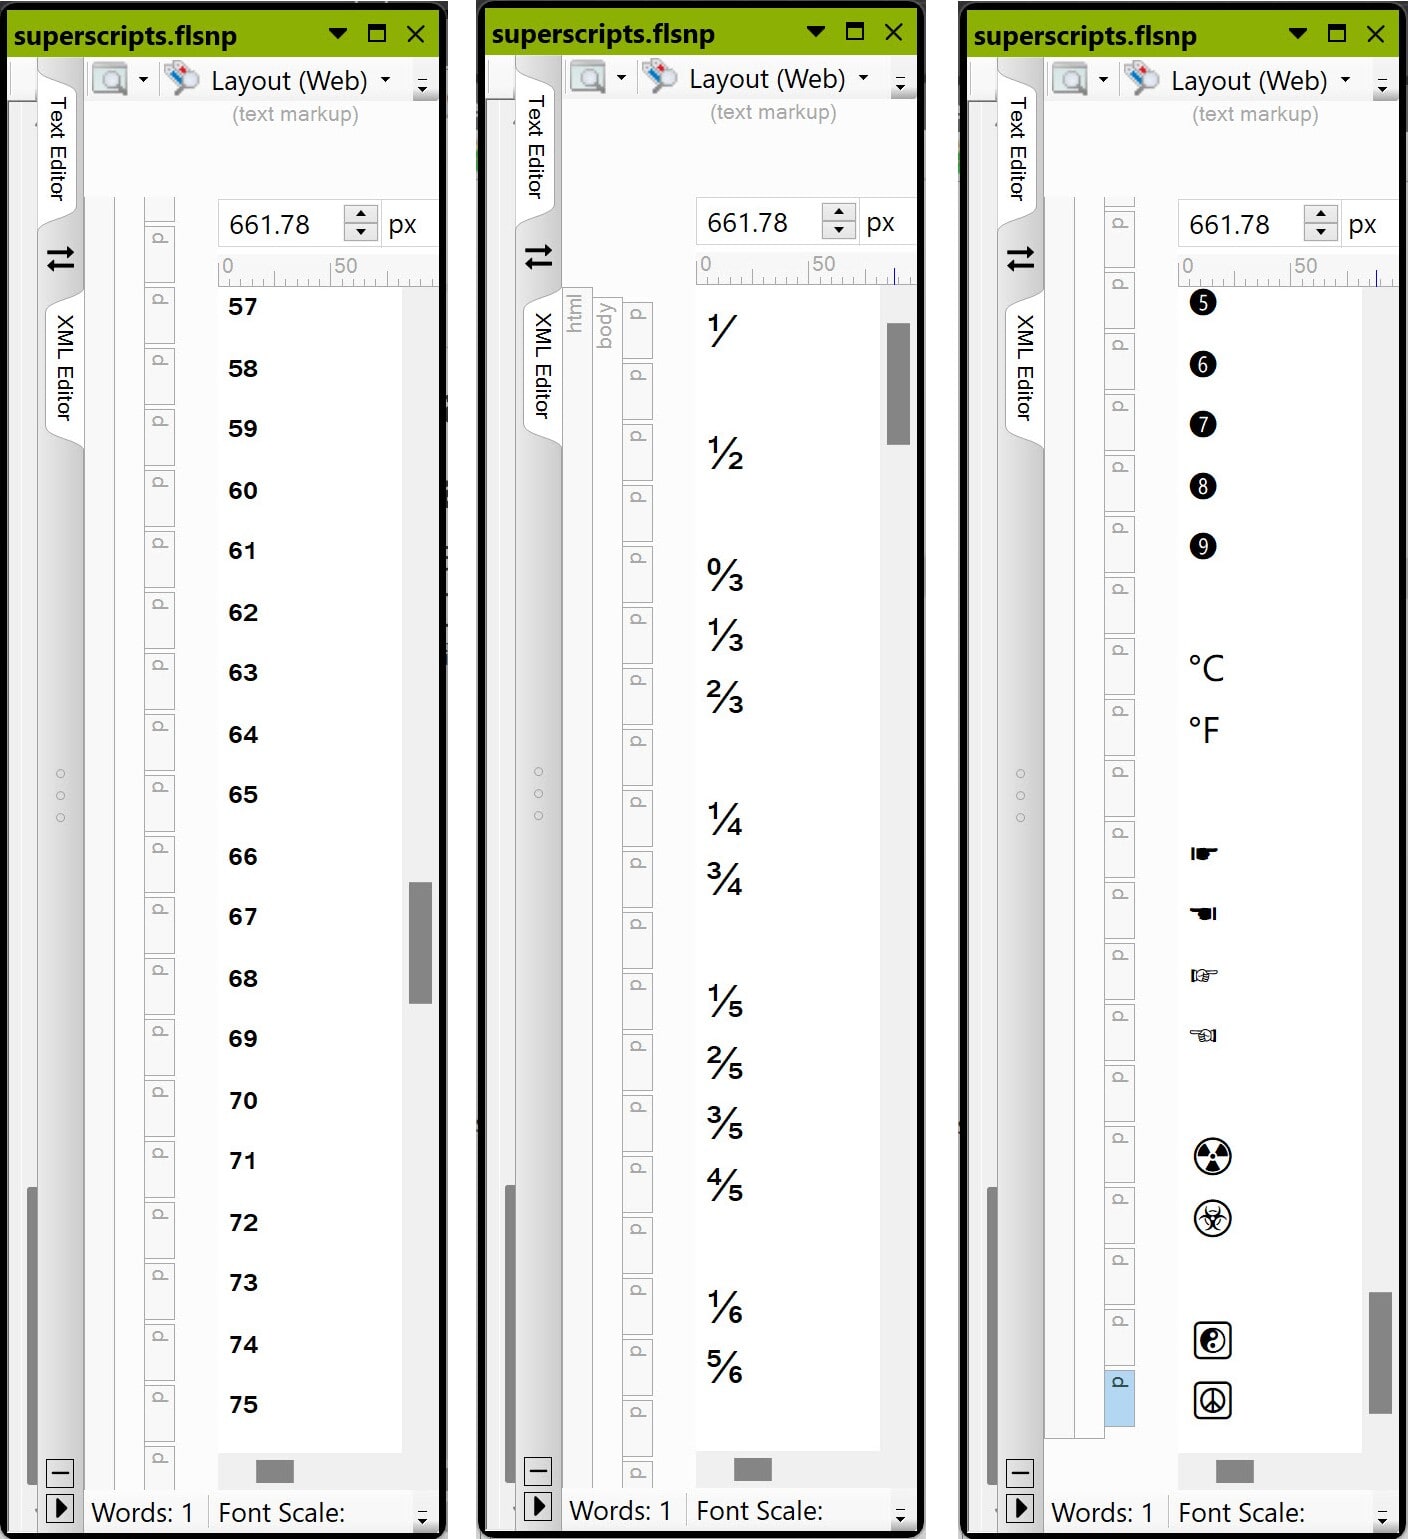
Superscripts, fractions, and-assorted symbols that won’t jangle leading.
All the superscripts and symbols above tested fine; they are legitimate, supported extended HTML characters. The ordinal superscripts for first, second, third, etc., (not shown) were created using an online superscript text generator called LingoJam (see https://lingojam.com/SuperscriptGenerator; for subscripts, try https://lingojam.com/SubscriptGenerator) that “convert[s] your text into a subset of the Unicode standard.” The developer here writes that “[t]he Unicode spec contains superscript characters for all of the numbers and letters except ‘I’ and ‘q.’ So in this converter I've had to find the nearest characters which look like superscript versions of these.” These tools are not foolproof; “nd” appeared to be corrupted in all the generators I tried (uneven character height), but it built correctly.Test any generated text thoroughly on all the browsers you support.
Pushing the Boundaries
To improve your Flare skills, keep pushing the boundaries of what you think is possible. Sure, ratchet it up a notch to find out when/where/how it breaks, but also bookmark and then try to replicate interesting sites (Web or Help) in Flare. Build a toolkit of sample Flare projects and document what structural and UI effects you were going for and how/what you tried in each. Attend the MadWorld conference to collaborate with fellow Flare users. Tweak, experiment, break things intentionally or not, and make real-time notes of what you’ve learned while you are in the process of learning it. At the very least, this will make for a fun read later, once you have become wise.
In the immortal words of Jean-Luc Picard: “Engage!”