


This guest post was written by Gavin Gray a freelance technical writer who has extensive experience in documenting software, in particular banking software, customer service software and engineering software. He loves working with MadCap Flare and is always looking for ways to make his writing and publishing processes more efficient. You can find Gavin on Twitter and Instagram: @GavinGrayWriter.
One of my pet peeves is when user interface labels change in the software that I’m documenting. It’s such a pain!
Maybe I’m trying to get on top of things by documenting new functionality that is still a work in progress. I might write an instruction like this:
In the File extensions box, type the file name extensions that are permitted, separated by commas.
Then, the next day, I’ll notice the File extensions field has been renamed Permitted file extensions. Argh!
In my experience even where functionality has already been released, labels can change in later updates, and this of course has an impact on any documentation I’ve written.
Variables Help, But They’re Only Part of the Solution
I realized early on in my career with MadCap Flare that the best way of handling user interface labels is to use variables. That way when a label changes in the software I’m documenting, I simply update the variable in Flare, and just like that, all occurrences of the label in my documentation are updated.
Even this, however, seemed to me like a less-than-desirable solution. Trying to keep a track of potentially hundreds of labels in the software and then manually updating the associated variables in Flare felt a lot like “busy work”.
As technical writers, we’re skilled professionals who bring value to the companies that we work for through our communication skills. Updating variables, however? That’s just an admin task that anyone could do.
I’m always trying to find ways to maximize the time that I spend doing high-value work and minimize the time spent on the more mundane, admin-style tasks of technical writing. As such, a while ago I decided to investigate whether there’s a better way to manage user interface labels.
What I really wanted was a solution that creates a connection of sorts between the user interface labels in the software and the associated variables in Flare. I wanted it to be possible to update the Flare variables in an automated fashion. Ideally, the solution would also be able to identify any new labels in the software and automatically create new variables for these in Flare.
What I discovered is that, yes, this is certainly possible, and what’s more, setting it up isn’t nearly as difficult as I thought it might be. Actually, it’s pretty easy.
How is User Interface Text Handled in Your Software Framework?
At the time I developed this solution, I was working with a development team that used Microsoft’s .NET Framework. If your development team also uses .NET Framework (and XML resource files – more on that below), then that’s great, you should be able to use the solution that follows as is.
Perhaps your development team uses a different software framework, however. If that’s the case, then don’t worry, you may still be able to use a similar solution. Your best bet might be to read over the rest of this post and then have a chat with your development team. Or perhaps, if you’re confident, you could even do a bit of investigation yourself.
.NET Framework Uses Resource Files
In .NET Framework, user interface text is stored in “resource files”. These operate in much the same way as variables in Flare. In the source code, developers insert a placeholder where they want a particular piece of user interface text to go, but the text itself is held in the resource file.
Separating the user interface text from the rest of the code allows user interface text to be reused in different parts of an application, and it also makes it a lot easier to translate applications.
In .NET Framework there are two types of resource file: text files and XML files. My development team used XML resource files, which made things really easy for me.
In .NET Framework an XML resource file is simply an XML file that follows a specific structure and that has a file name extension of .resx. Within the file, each piece of user interface text is stored like this:
<data name="Label_FileExtensions" xml:space="preserve">
  <value>Permitted file extensions</value>
</data>
Now, if you’ve ever opened a Flare variable set in Flare’s internal text editor or with an app like Notepad, you’ll know that a Flare variable set is simply an XML file that follows a specific structure and that has a file name extension of .flvar. Within the file, each variable looks like this:
<Variable Name="Label_FileExtensions" EvaluatedDefinition="Permitted file extensions" Comment="">Permitted file extensions</Variable>As you can see, a .NET Framework XML resource file and a Flare variable set don’t look hugely different. They’re different enough, though, that we can’t just add a resource file to our Flare project as is. We need some way of transforming it into a format that is recognized by Flare.
Enter XSLT!
How to Transform a .NET XML Resource File Into a Flare Variable Set
XSLT is a language that can be used to transform XML files. I use the following XSLT to transform .resx files to .flvar files:
<?xml version="1.0"?>
<xsl:stylesheet version="2.0" xmlns:xsl="http://www.w3.org/1999/XSL/Transform">
  <xsl:output method="xml" version="1.0" encoding="utf-8" indent="yes" />
  <xsl:strip-space elements="*" />
  <xsl:template match="root">
    <CatapultVariableSet>
      <xsl:apply-templates select="@*|node()" />
    </CatapultVariableSet>
  </xsl:template>
  <xsl:template match="resheader" />
  <xsl:template match="data">
    <Variable>
      <xsl:attribute name="Name"><xsl:value-of select="@name" /></xsl:attribute>
        <xsl:attribute name="EvaluatedDefinition"><xsl:value-of select="normalize-space(value)" /></xsl:attribute>
        <xsl:attribute name="Comment"><xsl:value-of select="normalize-space(comment)" /></xsl:attribute>
        <xsl:value-of select="normalize-space(value)" />
    </Variable>
  </xsl:template>
</xsl:stylesheet>
Now, you don’t need to understand what any of this does if you don’t want to. If your company also uses .NET XML resource files, then you could just take this file and use it as is. Save it in any text editor, such as Notepad, and use the .xml file name extension. For example, you could call the file transform.xml.
In case you’d like to understand what’s going on, each of the lines of the form <xsl:template match=""> matches an XML element in the source file. The lines that follow state what should be done each time that particular element is encountered. For example, each time a <data> element is encountered in the source file, a <Variable> element will be created in the output file.
How to Run Your Transformation
You’ve got your XSLT file. To run it, you’re going to need an XSLT processor. I use the Java version of Saxon, which you can download from SourceForge. To use it you’ll need to have Java installed, which you may already have. If not, you can download and use OpenJDK for free.
Saxon is a command-line tool, so there’s no graphical user interface for it. You can:
- Manually call Saxon from Command Prompt
- Call Saxon using Flare’s pre-build events (something that I’ve not tried myself)
- Call Saxon from a simple batch file
I opted to use a simple batch file.
How to Create a Windows Batch File
A Windows batch file is a simple text file containing a series of commands to be executed by the command-line interpreter. It has the file name extension .bat.
You can find the content of my batch file below. First, though, I should say that I save it in a Windows folder that looks like this:
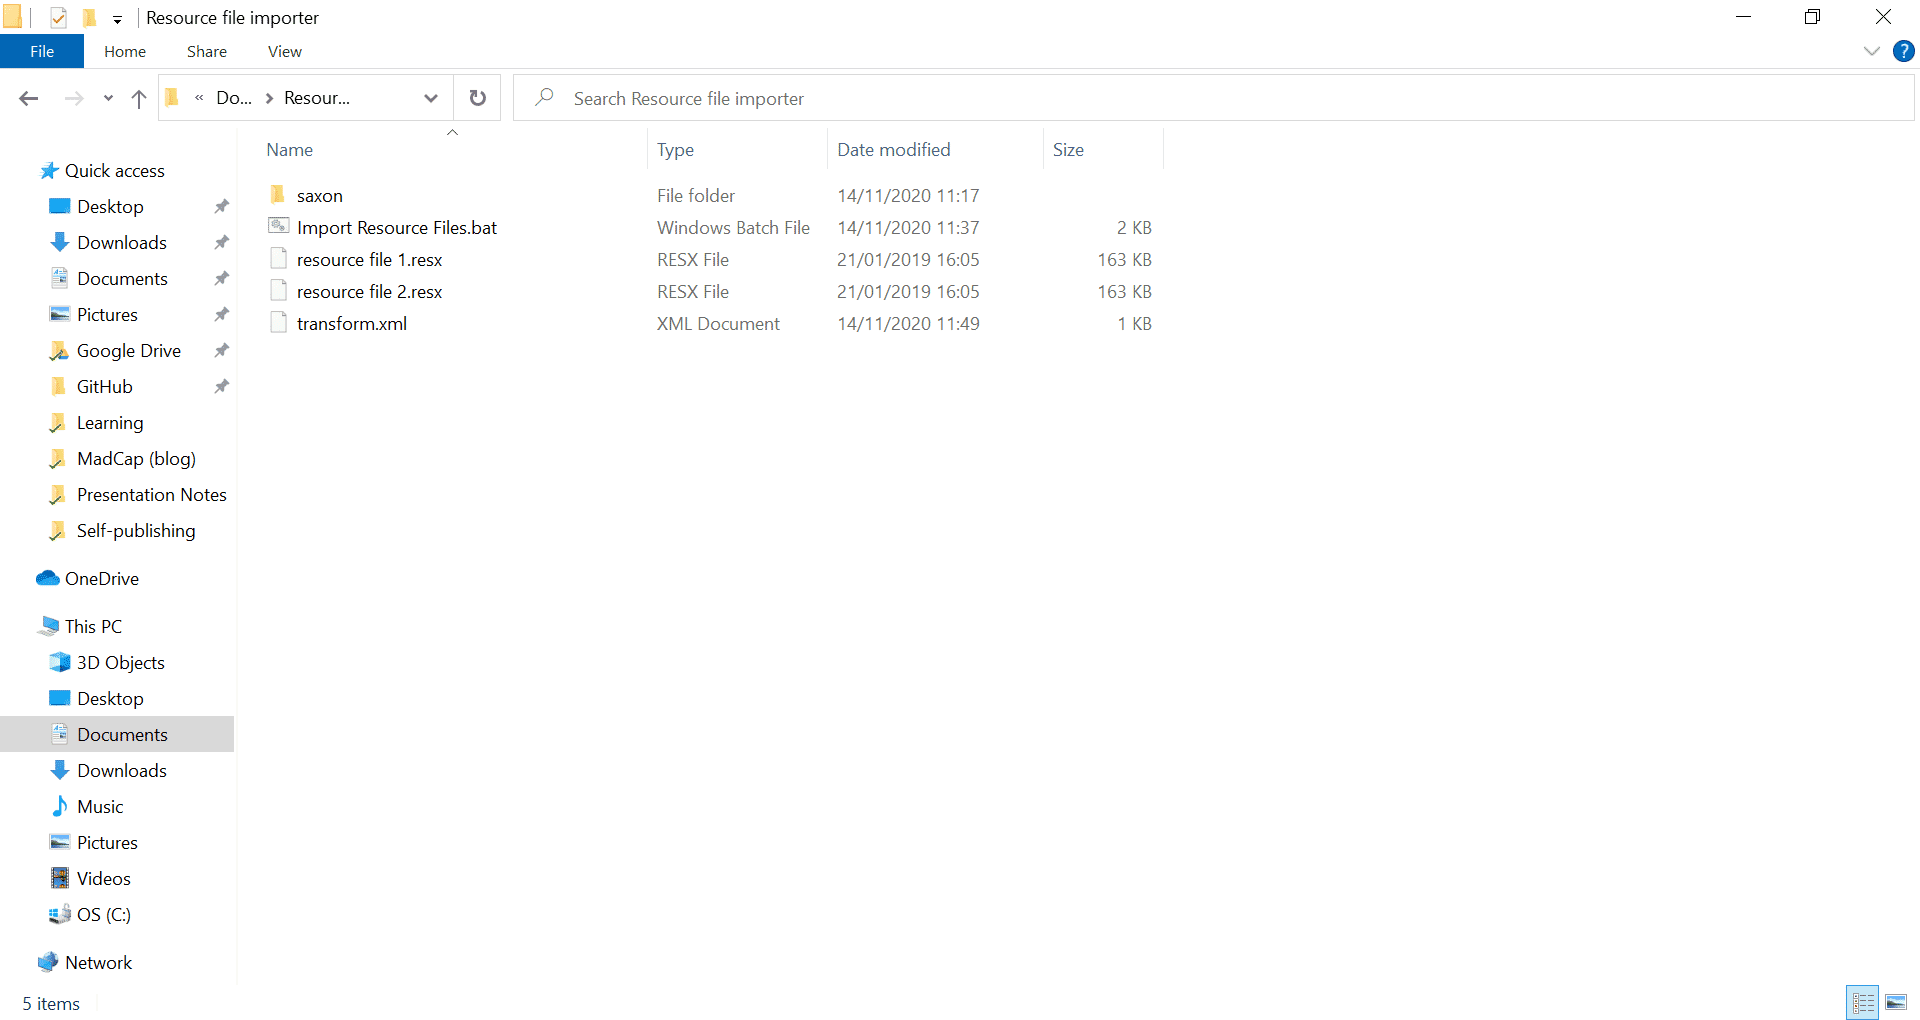
- The saxon subfolder contains the files of the Saxon XSLT processor
- Import Resource Files.bat is the batch file (see the code for this below)
- resource file 1.resx and resource file 2.resx are resource files that I want to be transformed. You can put as many resource files in the folder as you want. Each .resx file will be transformed into a Flare variable set.
- transform.xml is the XSLT (see the code for this above)
The code for Import Resource Files.bat is as follows:
@echo off
echo RESOURCE FILE IMPORTER (Microsoft ResX to MadCap Variable Set)
echo by Gavin Gray
echo.

rem CHECK FOR NECESSARY FILES BEFORE DOING ANY PROCESSING
java -version
echo.
if %ERRORLEVEL% NEQ 0 goto errorA
if not exist saxon\saxon-he-10.3.jar goto errorB
if not exist transform.xml goto errorC
if not exist *.resx goto errorD
echo The following files will be transformed to MadCap variable sets.
echo.
for %%I in (*.resx) do (
echo   %%I
)
echo.
echo WARNING: If any file has previously been transformed, the old file will be
echo overwritten (if writeable).
echo.
:input
set /p id=Proceed? (y/n)
echo.
if "%id%" == "Y" goto proceed
if "%id%" == "y" goto proceed
if "%id%" == "N" goto cancel
if "%id%" == "n" goto cancel
echo Command not recognized. Try again.
echo.
goto input
:proceed
set CLASSPATH=saxon\saxon-he-10.3.jar
for %%I in (*.resx) do (
echo Transforming %%I...
java net.sf.saxon.Transform -s:"%%I" -xsl:transform.xml -o:"%%~nI.flvar" >NUL
)
echo.
echo All done! :-)
echo.
pause
exit
:cancel
echo Cheerio then!
echo.
pause
exit
rem ERROR MESSAGES
:errorA
echo ERROR! Java is not installed. This tool requires Java.
echo.
pause
exit
:errorB
echo ERROR! Saxon cannot be found.
echo.
pause
exit
:errorC
echo ERROR! transform.xml cannot be found.
echo.
pause
exit
:errorD
echo ERROR! There are no .resx files in this folder.
echo.
pause
exit
Note: I used Saxon 10.3. If you use a different version of Saxon, you’ll need to update lines 10 and 33. Just search for “saxon-he-10.3.jar” in the above code and update it to the filename of the version that you’re using.
Once you’ve saved that code in a text file with the file name extension .bat, you can double-click the file to run it. For each .resx file in the folder, the batch file will create a corresponding .flvar file in the same folder. You can grab these files and add them to your Flare project: just pop them in the Project > Variables folder.
Why is This Solution so Cool?
Once you’ve done the above, you’ll have every single piece of user interface text that you might need to refer to at your fingertips.
What’s especially cool is that Flare has an auto suggestion feature for variables. When you start typing a word whose first few letters match the value of a variable, Flare will make a variable suggestion, as so:

I’ve found that “importing” user interface text in this way has massively increased my productivity. There’s no need for me to manually create variables for user interface labels because the variables all already exist. I just focus on writing my content and Flare throws up variable suggestions for me as I type.
Moreover, when it comes to publishing new versions of my documentation, I don’t have to worry about manually updating any labels that might have changed. I just grab the latest version of the resource file, run the transformation, pop the new .flvar file in my Flare project, and voilà, all my labels are now up to date without my having to manually update a single one of them.
I really hope you found this post useful, and if you decide to give it a go, good luck! I am confident that, like me, you’ll find that the time-saving in the long run more than justifies the initial time required to set the process up.


