


So you have a Table of Contents and you have an Index… now how about a Glossary? According to Wikipedia, a glossary is “an alphabetical list of terms in a particular domain of knowledge with the definitions for those terms.” Luckily, that’s what a glossary is in Flare, too.
When you include a glossary in your online output, users can click a glossary term in the glossary pane (or tab) to see its definition. You can also set up your output so that your glossary terms are converted to popups in your content. That way, users can click the term right where it shows up in your topics.
Depending on which project template you’re working with, a glossary called "MyGlossary," may already be in the Glossaries folder in your Project Organizer. If not, it’s easy to add a new glossary.
In the Project Organizer, right-click on the Glossaries folder and select Add Glossary from the context menu.
- The Add File dialog opens.
- In the File Type field at the top, make sure Glossary is selected.
- In the Source area select New from template.
- Because we’re keeping this easy, just expand the Factory Templates folder and click on a template file.
- In the File Name field, type a new name for the glossary.
- Click Add.
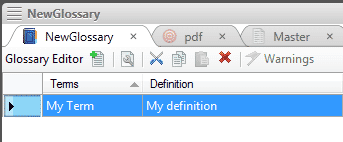
- Click OK. The glossary is added to the Glossaries folder in the Project Organizer. The Glossary Editor opens to the right, with an initial glossary term and definition shown.
Now that you've set up your glossary (or opened the one that was already there), it’s time to add terms and definitions. There are two ways to do it:
Method 1: Add entries to your Glossary Directly
- From the Project Organizer, open your glossary.
- In the Glossary Editor, click to add a new item. A new row is added to the glossary with "MyTerm" shown as the default name, and the Properties dialog will open.
- In the Terms section, replace the text "MyTerm," and type the new term you want to add.
- In the Definition section, select either Text (if you’re adding a simple definition) or Topic (if you have created a topic for the definition and want the term to link to it).
- If you selected Text, type a definition in the space next to that option. If you selected Topic, click , then find and select a topic.
- Click the Style tab.
- If you’re generating online output, select Expanding, Popup, or Hyperlink depending on how you want the definition to display (If you don't pick a style, Flare will just throw in PopUps.)
- Click OK and save it!
Method 2: Inserting Glossary Term Links
- Highlight the word or phrase in your content that you want to add as a glossary term and link.
- Select the Insert ribbon. In the Links section select Glossary Term Link and the Create Glossary Term dialog will open.
- In the Definition field, type a definition for the term.
- Click OK. The word or phrase is now shown as a linked glossary term with an icon beside it and it’s added to the glossary along with its definition.
So you've created your glossary, added some terms and definitions, and saved it (Always save! Never forget to save!!!). Here’s how you make sure your glossary shows up in your print output:
- Add a new topic (I told you how to do that here) and open it in the editor.
- At the top of the topic, add a title for your glossary, usually "glossary". If you apply any of Flare's <h1> through <h6> tags to it, the glossary title will be displayed in the print TOC.
- Add a line in the glossary topic and click the Insert ribbon. In the Proxy section select Proxy>Glossary Proxy and the Glossary Proxy dialog will open.
- If you want headings (e.g., A, B, C, D) to be added automatically at the top of each section in the glossary, click the down arrow in the Generate Headings field and select Yes.
- Click OK and the proxy is added to the topic.
- Open your print target and in the Glossary tab, click the box next to your glossary file.
- Open your TOC and from the Content Explorer, drag and drop the glossary file you made to your TOC.
- Save it and your glossary will show up in your print output!
If you’re creating online output, you have to do a couple of quick things for your glossary to show up:
Enable your Glossary in the skin you’re using for your online target
- In the Project Organizer, open the skin you’re using.
- In the General tab, check the Glossary box. Save it, and your glossary is enabled.
Associate your skin with a target
- In the Project Organizer, open the target you’re using.
- In the General tab, click the drop-down in the Skin field, select the skin you’ve enabled your glossary in, and save it.
Your lovely new glossary is officially open for business.
Now go write!
Hey, Kelly! I want to know more!
- Here’s a link to the About Glossaries section of Flare’s online help.
I have questions!
- Visit the MadCap forums or the Users of MadCap Flare LinkedIn group and you will find lots of smart people who are happy to help.


