


In my previous posts (Part 1 here, and Part 2 here), I covered how to create legal numbering and custom numbering sequences with the auto-numbering functionality in MadCap Flare. In this third post about auto-numbering, I will discuss how to add auto-numbering to Chapter Headings and other objects in your documentation. It is worth mentioning, at this point, that not all auto-numbering will work with web outputs, and the options described in this post may be best suited for PDF output.
Chapter Numbers
You may want to begin experimenting with Chapter Numbers, another type of auto-numbering that can be applied in a style. You can also incorporate chapter numbers into a page layout for print output.
In my earlier posts on auto-numbering, you will have noticed that there is a chapter numbering choice in the list. You can include this as part of any document numbering scheme.
At the beginning of each chapter of a document you can create a style for your Chapter Heading and define numbering to go with the chapter. This could be as simple as just having the word “chapter” followed by the number or a more descriptive term such as “chapter # - title”.
To create variations of Chapter Numbering, start with one of the Flare project templates, which should include a style named p.ChapterNumber. This style will provide you with a basic chapter number: CHAPTER #. You can edit this style to create the numbering style you would like to use.
If you do not have this style, I have included the CSS below. This CSS is from the Book and ebook (advanced) template in the Print folder.
p.ChapterNumber
{
 color: #47484a;
 font-family: 'Century Gothic';
 font-size: 12pt;
 font-weight: bold;
 line-height: 14pt;
 margin-bottom: 0;
 mc-auto-number-position: inside-head;
 mc-auto-number-format: 'CH:CHAPTER {chapnum}';
 mc-heading-level: 4;
}
You can change any of these settings to suit your needs, or you may want to incorporate your chapter auto numbering into your H1 style. It all depends on how you want your document to look.
Below is a screenshot showing some of the variations.
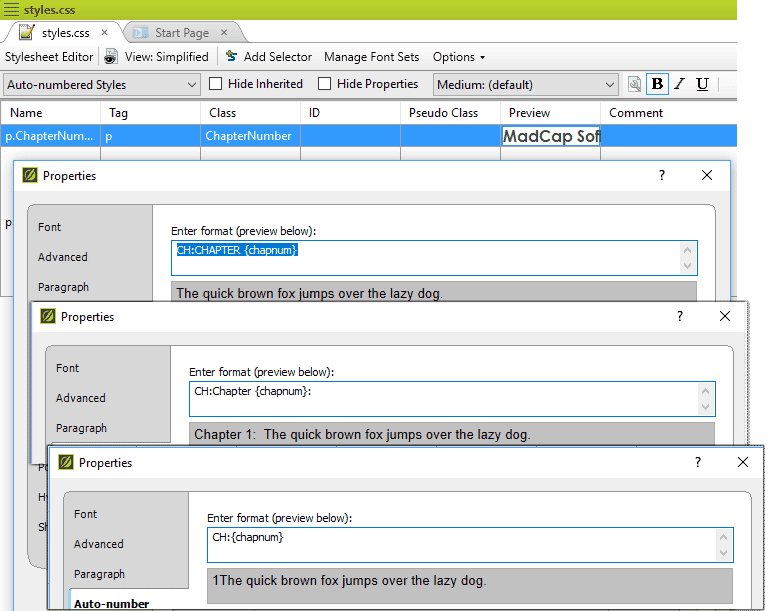
Because this style has the word Chapter, you can style an empty paragraph with the P.ChapterNumber style and see the chapter number in the preview and output. Here are examples of how the auto-numbering settings can be displayed:
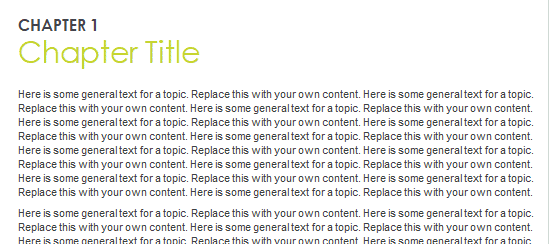
In this screenshot above, you can see the top line is an empty paragraph with the p.ChapterNumber style applied. Below it is the title of the chapter styled as heading 1 (H1).
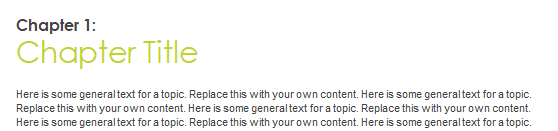
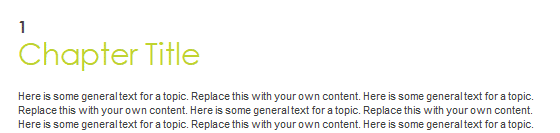
With a small edit I can make my chapter number display differently:
There are many ways to use the auto-numbering codes but following the above instructions will get you started.
Images
You can apply whatever captions you wish to your images and add auto-numbering. This may be useful for writers in regulated industries, who have to meet the requirement of having images to numbered and or referenced in some way.
I use styles to apply captions and auto-numbering to my images. Caption styles are usually created as a print media style, as I do not want auto-numbered images appearing in my web content. In addition, I also use a separate caption style for image captions in web content.
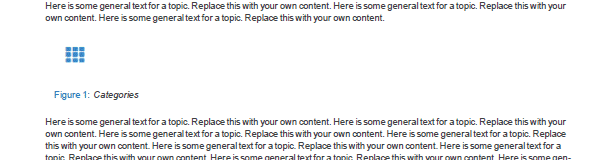
In the example below, the styles allow me to place a caption, where the caption text Figure and the number displays in a shade of blue as defined in the FigNum span class. Any text I type under image appears in the default colour for the document unless I change it.
p.Figure
{
font-style: italic;
mc-auto-number-class: FigNum;
mc-auto-number-format: 'CF:Figure {n+} : ';
margin-left: 10px;
padding-bottom: 10px;
}
span.FigNum
{
color: #007DBA;
font-style: normal;
}
The mc-auto-number-format ‘F:Figure {n+}: ‘ prints as “Figure # Text describing image”. Here’s an example:
You can vary this style to include other numbering information such as a chapter number. In the example below, I have added a chapter numbering code to my auto-number definition.
p.FigureChap
{
color: 007DBA;
font-style: italic;
mc-auto-number-class: FigNum;
mc-auto-number-format: 'CF:Figure {chapnum}.{n+}: ';
margin-left: 10px;
padding-bottom: 10px;
}
Example:
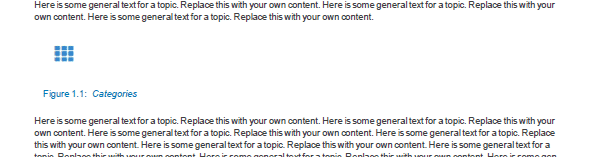
Notice that I have included a colour in the style to ensure that all the text appears in the same colour (#007DBA). I have included the {chapnum} code in the autonumbering definition, which adds the number of my chapter in front of the image number. In addition, I am using CF as the definition of my numbering sequence to ensure that my image numbers do not get mixed up with any other numbers I am using.
When writing, I usually want images embedded within the text with the text flowing around them. This is a little more difficult to achieve, but once mastered, this method ensures that your image and caption stay together on the page.
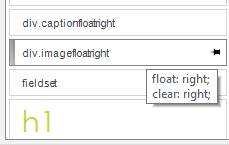
To do this you will need to create div classes with the correct settings for your images and captions. The first div class, div.imagefloatright causes the image and the caption to float to the right of the page.
div.imagefloatright
{
float: right;
clear: right;
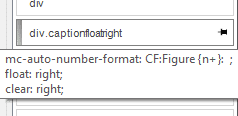
}The second div style div.captionfloatright adds autonumbering to your caption.
div.captionfloatright
{
mc-auto-number-format: 'CF:Figure {n+}:  ';
}
We can now place the image and the caption in <div> </div> tags.
While this can be done manually, typing out the whole thing can be tedious. Usually I will add my image and caption normally, then change the styles for the image and the caption. These styles will appear in the Style window that are opened on the right-hand side of your screen. The Style Window button is on the Home tab of the Ribbon or can be opened by pressing the F12 key on your keyboard.
When you have applied your styles, you can check the HTML by clicking on the Text Editor tab at the bottom of your topic.
Example:
<div class="imagefloatright">
     <img src="../Resources/Images/Egton House.jpg" />
   </div>
     <div class="captionfloatright" MadCap:autonum="Figure 2:  ">
     Egton House</div>
Then we can add a <div> </div> to hold the two items of content together.
<div>
     <div class="imagefloatright">
       <img src="../Resources/Images/Egton House.jpg" />
     </div>
       <div class="captionfloatright" MadCap:autonum="Figure 2:
        ">Egton House</div>
</div>
This method ensures that your content stays together and properly aligned within your topic.
Tables
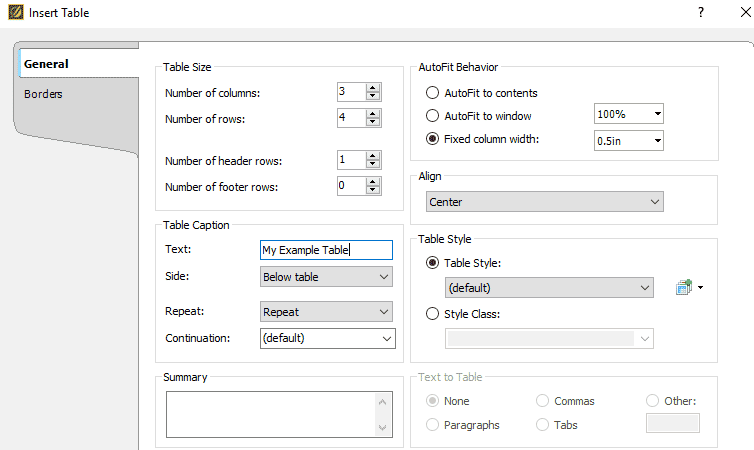
Adding auto-numbering to tables is slightly different to adding numbers to images. The difference is that the insert table dialogue has a Caption entry box and automatically styles your caption with <Caption>. However, this has no auto-numbering and if you try to edit it using the Styles editor you are not offered the auto-numbering facility. If you look in your stylesheet you may be able to find a style titled p.TableCaption, which contains auto-numbering. Caption text can be added in the Insert Table dialog.
As mentioned above, in the images section, this form of numbering may be problematic in web outputs but will work in PDF output. In case the template you are using does not have the p.TableCaption style, the CSS code can be seen below, which would be added to the @print media section of your CSS.
p.TableCaption
{
 color: #404040;
 font-style: italic;
 mc-auto-number-class: TableNum;
 mc-auto-number-format: 'CT:Table {chapnum}-{n+} ';
 padding-bottom: 0;
 padding-top: 12px;
}

span.TableNum

{
 color: #007DBA;
 font-style: normal;
}
Settings can also be changed to fit your company branding. You can use all the regular forms of adding your numbers e.g. {n+1} {n=1} {n}. You will need to consider whether you want the tables numbered from 1 at the start of the document or to begin at 1 at the start of each section.
In the style above we have a chapter number followed by the table number. With this numbering the table numbers will increment by 1 throughout the document so you may need to consider having a first table caption style in addition to the style shown above. For more information about restarting numbering in a document, view my first blog post about auto-numbering.
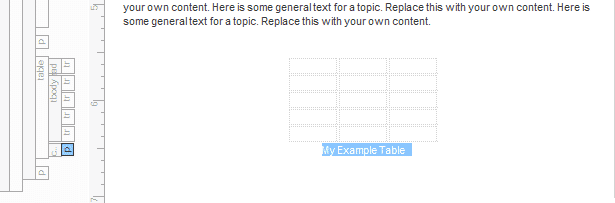
You will find that if you add your caption to the Insert Table dialog it will include it as part of the table and will allow you to repeat the caption when the table breaks over pages. This is convenient but you will find that you are unable to apply the p.TableCaption style to the caption because the caption is not in paragraph tags.
Entering this information via the Insert Table dialog adds the following HTML to your topic. Note that the caption text is at the top enclosed in HTML caption tags.
<table style="caption-side: bottom; mc-caption-repeat:
true; margin-left: auto; margin-right: auto;">
<caption>My Example Table</caption>
<col style="width: 0.5in;" />
<col style="width: 0.5in;" />
<col style="width: 0.5in;" />
<thead>
  <tr>
   <th> </th>
   <th> </th>
   <th> </th>
  </tr>
</thead>
<tbody>
  <tr>
   <td> </td>
   <td> </td>
   <td> </td>
  </tr>
  <tr>
   <td> </td>
   <td> </td>
   <td> </td>
  </tr>
  <tr>
   <td> </td>
   <td> </td>
   <td> </td>
  </tr>
  <tr>
   <td> </td>
   <td> </td>
   <td> </td>
  </tr>
</tbody>
</table>
To apply the p.TableCaption style you need to add the <p> and </p> tags to the caption text.
<caption><p>My Example Table</p></caption>When you have included the <p> tags you are now able to apply the p.TableCaption style to the text.
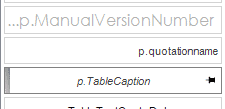
The P tag in the CSS structure bars can be seen on the left of the screen. If you click on the P tag in the structure bar it will select the caption text and allow you to select the p.TableCaption style from the style window.
Select the style name to apply the style.
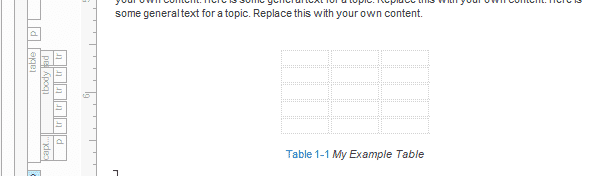
When you have done that, you will see the caption complete with the numbering.
You can format the caption to display how you want by changing the existing values. You may also want to add padding if you feel the caption is too close or not close enough to the table.
Remember that if you are using the chapter number you may want to restart the numbering at the beginning of each chapter. To do this you will need to set up a style that sets the number to 1.
For the first table in each chapter you should apply this style to the caption:
p.TableCaptionFirst
{
 color: #404040;
 font-style: italic;
 mc-auto-number-class: TableNum;
 padding-bottom: 0;
 padding-top: 12px;
 mc-auto-number-format: 'CT:Table {chapnum}-{n=1} ';
}
This style resets the number to 1.
For all the following sections in the chapter you should use this style:
p.TableCaptionFollow
{
 color: #404040;
 font-style: italic;
 mc-auto-number-class: TableNum;
 padding-bottom: 0;
 padding-top: 12px;
 mc-auto-number-format: 'CT:Table {chapnum}-{n+1} ';
}
This style increments the number by one for each table.
Conclusion
With the techniques above, you can gain control on how chapters, tables, and images can be numbered and customized with MadCap Flare’s auto-numbering feature. In a future post, I will discuss page layouts for print, and how to incorporate auto-numbering with advanced use of page layouts.


