


In MadCap Flare, publishing builds is a relatively simple process - your content is added and formatted in the project, the target is developed, and you’re ready to build and publish the final output. But say you’re creating an HTML5-based output that you have to build every day at a certain time. Or you’re a part of a team that uses agile development and requires documentation to be regularly updated. How do you streamline your workflow and free up time to focus on what’s important?
MadCap Flare comes with a number of build automation features that enables you to save time and effort when publishing builds. If you’re looking for a way to eliminate routine tasks in your workflow, take a look at these advanced features:
1. Set Up Publishing Destinations
In Flare, you can set up a location where your copied output files are placed by creating a Publishing Destination.
When you press the Build button in Flare, it will create your output locally wherever your Flare project is located. However, the outputs that you’re building will need to end up somewhere in order to be read. For example, you may need to put your PDFs in a SharePoint library or your HTML5 output on a web server. Setting up a Publishing Destination makes it so that when you press the Publish button, Flare will automatically begin to copy your output files to your Publishing Destination.
In order to Publish you will first to create your Publishing Destination.
- Open the Project Organizer.
- Right-click the Destinations folder and select Add Destination. The Add File dialog opens.
- In the Source area select the Factory Template called “MyDestination”
- In the File Name field type a name for your destination (e.g., FictionSoft Staging website, FictionSoft Live website, Network Documentation Folder)
- Click Add. The destination is added to the Project Organizer and opens in its own page in the Destination Editor.
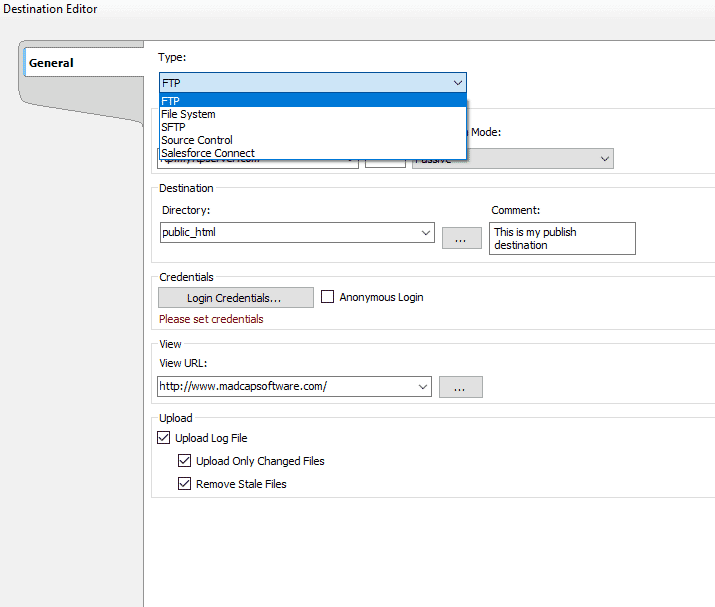
While in the Destination Editor you will be able to select one of the various Destination types in Flare:
- FTP – Use this if you want to publish output files to another computer over a TCP/IP network and you are not overly concerned with security.
- SFTP – Use this if you need a much more secure option than FTP.
- File System – Use this if you want to publish the output to a location on your computer or to another drive on a network. This will be the option you will use if you want to Publish to a SharePoint Location.
- Source Control – Use this if you want to publish output files to a source control server, such as TFS or Subversion.
- Salesforce Connect – Use this if you want to publish Clean XHTML output files to Salesforce. This Publishing Destination requires a Salesforce Connect plugin.
If you do not have credentials to publish to some of these locations, you’ll need to consult your I.T. department to get you set up to publish.
Once the Destination file has been created it’s time to associate your publishing destinations with your Targets.
- Open the Project Organizer.
- Double-click the Targets The existing targets are shown.
- Double-click the target that you want to associate with the destination. The target opens in its own page in the Target Editor.
- Click the Publishing All publishing destinations that have been added to the project are displayed. If a destination contains a check mark next to it, that means it is associated with the target. If it does not contain a check mark, it is not yet associated with the target.
- Click the check box next to any destinations that you want to associate with the target. A check mark appears next to any destinations that you select.
- Save your Target
The initial setup takes a few steps but once implemented, updates to your documentation are quick and easy. It eliminates the step of having to click and drag files to a location and even in some cases, having to use another client for file transfer. Simply make your edits in Flare, press the “Publish” button, and your content is updated.
For more details on the Publishing Destinations please visit the following page in Flare’s online help: http://help.madcapsoftware.com/flare2017r3/Content/Flare/Output/Creating-Publishing-Destinations.htm

2. Schedule Builds Using Batch Targets
Want your builds to be generated at a predetermined time, or on a regular schedule? Flare allows you to schedule your builds so that you do not need to open the application itself for your builds to start.
To schedule builds you will need to first create a Batch Target in Flare. A Batch Target lets you build and/or publish multiple other targets in a single group (or "batch").
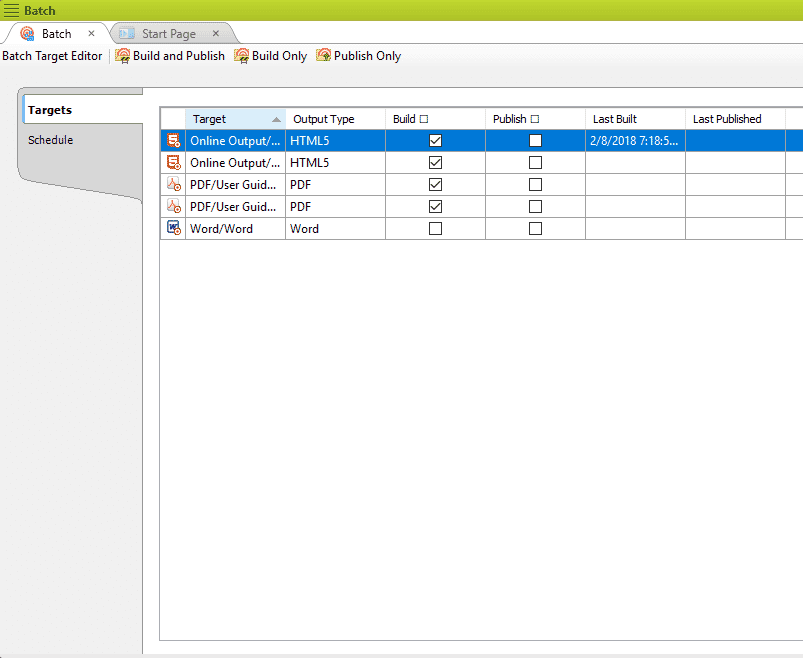
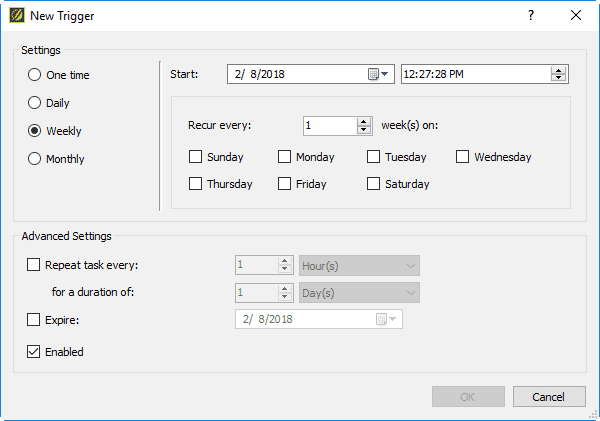
In order to schedule builds, Flare uses Windows Task Scheduler which allow you to set exactly when you want your outputs to build. You can decide whether the builds are generated monthly, weekly, daily, or at a specified time. Did you notice the image above has a Publish checkbox next to it? That means you can schedule Flare to Build AND Publish your outputs.
Note: Since Flare uses Windows Task Scheduler by default, the builds will only run if you are logged into your PC. However, if you want to change this behavior, you can do so in Windows Task Scheduler Options. For more information, take a look at Flare’s help documentation on the topic here.
3. Build Targets Using the Command Line
Want to start your builds without having to open Flare? You can use your operating system’s command line to build all targets, single targets, or batch targets.
While the Commands below can be typed directly into the Command Line, creating a Batch File lets you save the commands to be used at a later time. To create a Batch File, open up a text editor like Notepad on your computer. Type the path to the Flare.app folder where you installed Flare and press Enter.
If you installed Flare at C:Program Files folder, you would type the following and press Enter on your keyboard:
cdProgram FilesMadCap SoftwareMadCap Flare 13Flare.appNext, type the following and press Enter on your keyboard (entering the path to your project in place of the section in angle brackets):
madbuild -project [project]Now let’s say you have a Flare project called "FictionSoftPro" that is stored in a folder of the same name at the root level of the C: drive. You can type the following to open the project:
madbuild -project c:fictionsoftprofictionsoftpro.flprjHowever, if you have spaces anywhere in the path name, use quotes around the path like this:
madbuild -project "c:my projectsfictionsoftpro.flprj"Depending on your project location, your file in Notepad may look like this:
cdProgram FilesMadCap SoftwareMadCap Flare 13Flare.app
madbuild -project "c:my projectsfictionsoftpro.flprj"
Now at this point if all you want your command to do is to Build All Targets in your Flare project then scroll down to “I’ve Typed Out My Commands Now What?”
How to Build a Single Target from the Command Line
When building a Single Target, use a format such as the following:
madbuild -project [project] -target [target name]If the project is located in a folder called "My Projects" (with a space), you would type this:
madbuild -project "c:My Projectsfictionsoftpro.flprj" -target BeginnerIf the target is named "Beginner Online Help" (with spaces between words), you would type this:
madbuild -project "c:my projectsfictionsoftpro.flprj" -target
"Beginner Online Help"
How to Build A Batch Target from the Command Line
When specifying a Batch Target that already exists, you’ll use a format like this:
madbuild -project [project] -batch [batch target name]If the project is located in a folder called "My Projects" (with a space), you would type this:
madbuild -project "c:My Projectsfictionsoftpro.flprj" -batch BatchIf the batch target is named "My Batch Target" (with spaces between words), you would type this:
madbuild -project "c:My Projectsfictionsoftpro.flprj" -batch "My Batch Target"I’ve Typed Out My Commands - Now What?
Save the Notepad file to any location on your computer. When you do this, type .bat as the extension at the end of the file name (e.g., MyBatchFile.bat). Once this is set up, you can generate the output at any time simply by double-clicking the batch file. Flare will run the build in the background and your command will run. Alternatively, you can also use another tool to run the batch file or to schedule the batch file to run.
If you need more information on Command Line Build options, please visit the Flare online Help topic on Building Targets Using the Command Line.
Bonus Tip: Automating Builds with MadCap Central
Builds can also be automated through MadCap Central, a cloud-based platform that lets you plan, track, and manage processes, content, and teams that are responsible for producing documentation. Among many of the project management features included in MadCap Central, one is the ability to automate, manage and publish builds. In addition, you can select any of your Flare Targets to be built on a schedule.

Why schedule builds in MadCap Central? This is helpful if you wanted to ensure that you had an archive of your outputs. MadCap Central will allow you to easily rollback to a previous versions of your build at any time. Also, it removes the dependency on your own machine for the build process. By letting MadCap Central handle build automation, it can alleviate the compiling load on your own machines.
Any questions or comments on how to automate your builds in Flare? Comment below!
New to MadCap Flare or MadCap Central? Start a free 30-day trial, which comes with free inquiries to our Platinum Level technical support. If you have any questions on how to customize your documentation, a technical support team member is ready to assist you.


