


Kelly here with the third post in my Flare 101 series. I've already addressed topic-based authoring and how Flare differs from Word, now I'm going to show you how to start your first Flare project. When learning any new software, figuring out the best way to begin using it can be frustrating. This post should make things easy for you.
There are a few ways you can start a Flare project: open an existing project, import a project, or create a project from scratch. Let’s start from scratch using the Start New Project Wizard.
- When you open Flare, the first window that pops up is the Getting Started window.
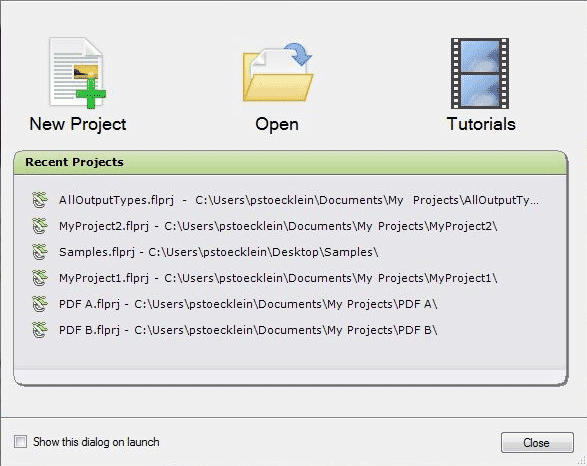
- Click New Project and up pops the Start New Project Wizard! If you aren’t greeted with the “Getting Started” window, no problem. Just click on the File tab in the upper-left-hand corner of the ribbon. Click New Project, and the Wizard will appear.
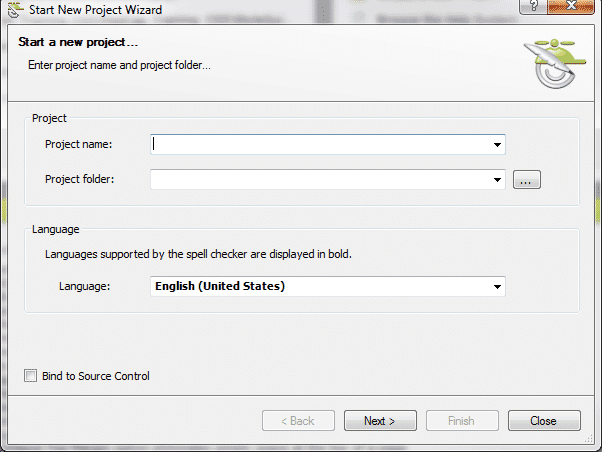
- Make up a name for your project and type it in the Wizard’s Project Name field. Your project name should describe the content going into it. Don’t make it too broad or too narrow. When you installed Flare on your computer, it created the My Documents\My Projects folder on your hard drive and that’s what shows up in the Project Folder field. Every piece of your project will be placed in this folder as you work.
- If you want your project files placed in a different folder, do this:
- Click and the Browse For Folder window will pop open.
- Navigate to the folder you want, select it, and click OK.
- In the Language field, select the language that you want to use for the project. Click Next, and the Select a Project Template window will open.
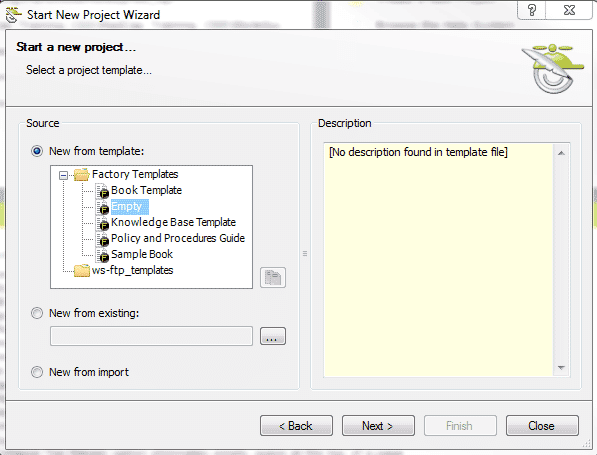
- In the Source area, select New from template. This lets you choose either a factory template provided by Flare or one of your own customized templates. Since we’re new to Flare and want to keep things easy, let’s choose a factory template. Expand the Factory Templates folder and click on a template file. I like the Empty template, because it gives you one of every type of file. You can keep them or get rid of them, but it’s nice to know what they all look like. Click Next, and the Select The Primary Target window will appear.
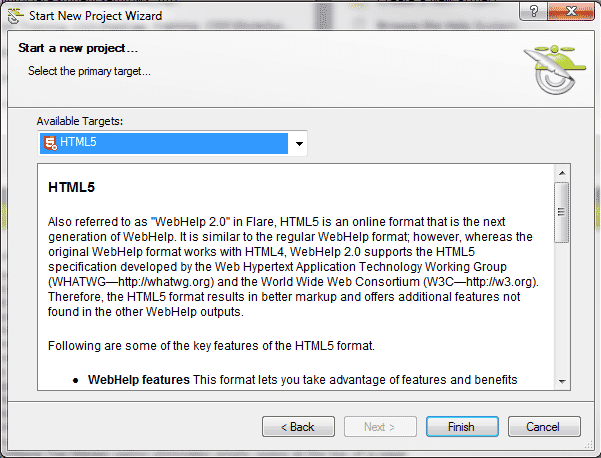
- From the Available Targets field, select the primary target (EPUB, PDF, HTML5…whatever you want to create) for your project.
- Click Finish…and you have now created your first Flare Project!
In my next post, I’ll show you some easy ways to add content…because an empty Flare project is a sad Flare project. :(
Now go write!
Hey, Kelly! I want to know more!
- Here's a link to the Starting Projects topic in Flare's online help.
I have questions!
- Visit the MadCap forums or the Users of MadCap Flare LinkedIn group and you will find lots of smart people who are happy to help.