We have had people us ask how they can have Flare's WebHelp output 'plug into' Google translate. Although this is not an ideal solution to get your content translated, it could be "good enough" for a temporary solution or for content that you only need a rough translation. Google makes it pretty easy for us to do this. All we have to do is add the script below to a master page and then use that master page in the target. This solution will only work if you have an Internet connection.
You can get a more customized script from Google or use the one below:
<div id="google_translate_element"  style="float: right;"></div><script>
function googleTranslateElementInit() {
 new google.translate.TranslateElement({
 pageLanguage: 'en',
 layout: google.translate.TranslateElement.InlineLayout.SIMPLE
 }, 'google_translate_element');
}
</script><script src="http://translate.google.com/translate_a/element.js?cb=googleTranslateElementInit"></script>
In this example we will create a new project, add a master page and add the script from Google to it, assign the master page to a target, generate and view the output.
Create a New Project
- Create a new project (File > New Project)
- Name it whatever you want and pick the location
- Click Next
- Select the Policy and Procedures Guide template
- Click Next
- Select MyWebHelp from the list
- Click Finish
Create a Master Page
- Click on the Project ribbon
- Click on New File
- From the drop-down in the New File UI, select Master Page
- Select the MasterPage.flmsp from the New from template area and name it MP

- Add the file
- Optional: We will now remove some of the other items in this master page. Right-click on the breadcrumbs proxy and Delete it. Repeat this for the mini-toc proxy and the topic toolbar proxy
- Save all
Add the Script to the Master Page
At this point you should have a master page with just a topic proxy in it. It should look like this:
- Open the master page in the text editor by clicking the text editor toolbar button shown in the image above.
- Select and copy the script from the beginning of this post, or get a more customized one from Google. Note: If you get another version of the script from Google, make sure that you type in http: after the src=" and before the // toward the end of the script.
- Paste the script into the body of the master page, as shown below:
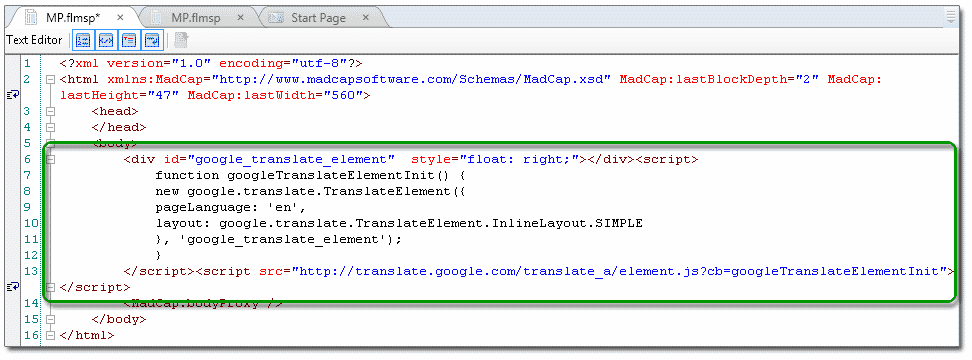
- Save All
- Close the tabs that are named MP.flmsp
Add the Master Page to the Target
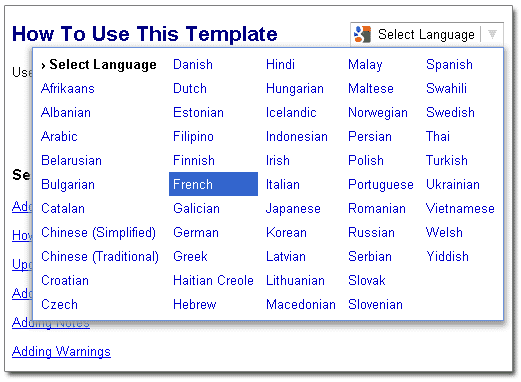
All that is left to do is assign the master page to the target, generate and view the results.
- Go to the Project Organizer and open the Targets folder
- Double-click the WebHelp target
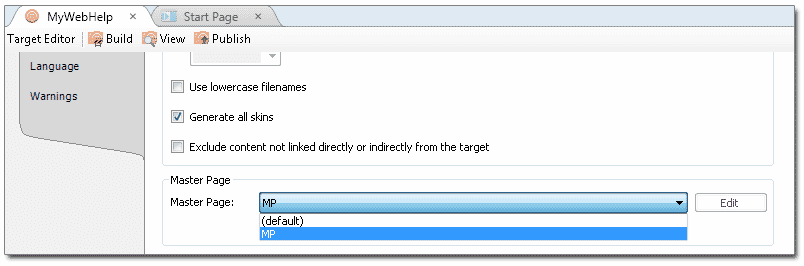
- Go to the Advanced tab and scroll down to the Master Page section
- Select the MP master page from the drop-down