Having multiple Tables Of Contents in your content might sound a little over-the-top, but it's not unheard of in technical documentation. A lot of manuals and books have a main TOC as well as "mini" TOCs for each chapter. While the process of creating multiple TOCs in online outputs is similar to the way it's done in print outputs, a couple of clients have recently asked us how they can display a secondary TOC in their generated online navigation.
After chatting with some our clients, we noticed that they were not using Browse Sequences. If you are not using a Browse Sequence in your output, these are the steps that you can take to re-purpose a Browse Sequence to create a 'secondary' TOC as well as renaming it in the navigation:
- Create the Browse Sequence (to use as a Secondary TOC)
- Change some settings in the Skin File
- Select the Browse Sequence ("Secondary TOC") in the Target
- Generate and View the output
Create a Browse Sequence:
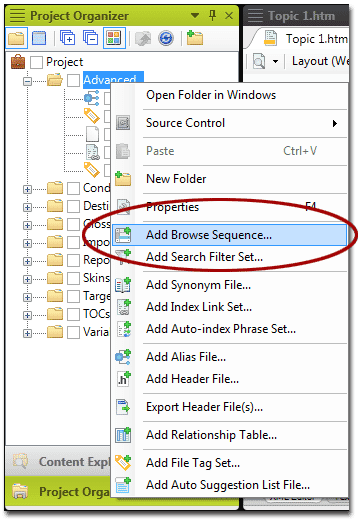
Right-click on the Advanced folder in the Project Organizer and select "Add Browse Sequence"
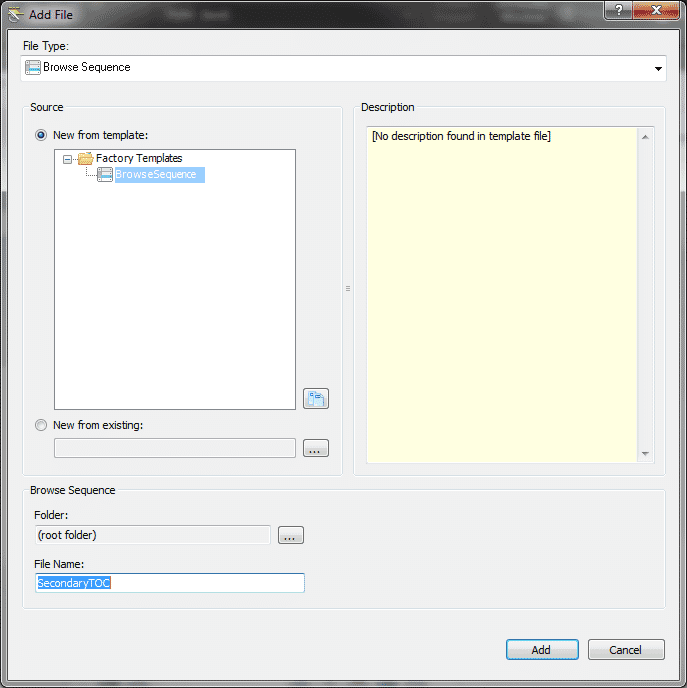
Now give it a name. It's a good idea to name it something that indicates these Browse Sequences were created to be 'Secondary TOCs.' In this example, we'll call it "SecondaryTOC." OK, so it's not very creative...but we'll know exactly what it is when we run into it later. Notice that after you create the file it will live in the Advanced | Browse Sequences folder in the project. This is because it's still a Browse Sequence file, even though we're using it as a 'Secondary TOC.'
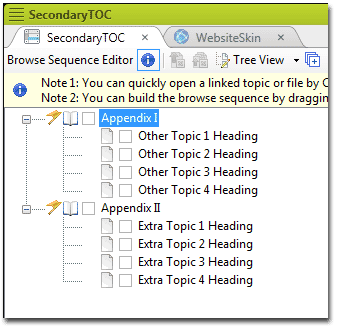
Add content to the Browse Sequence just like you would if you were creating a TOC. The editors are very similar.
Change Settings in the Skin File:
Turn "on" Browse Sequences in the Skin | General Tab

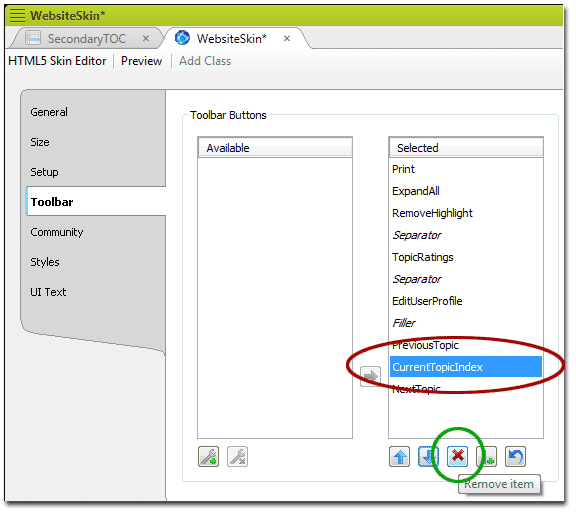
(Optional) Remove "CurrentTopicIndex" Browse Sequences in the Skin | Toolbar Tab
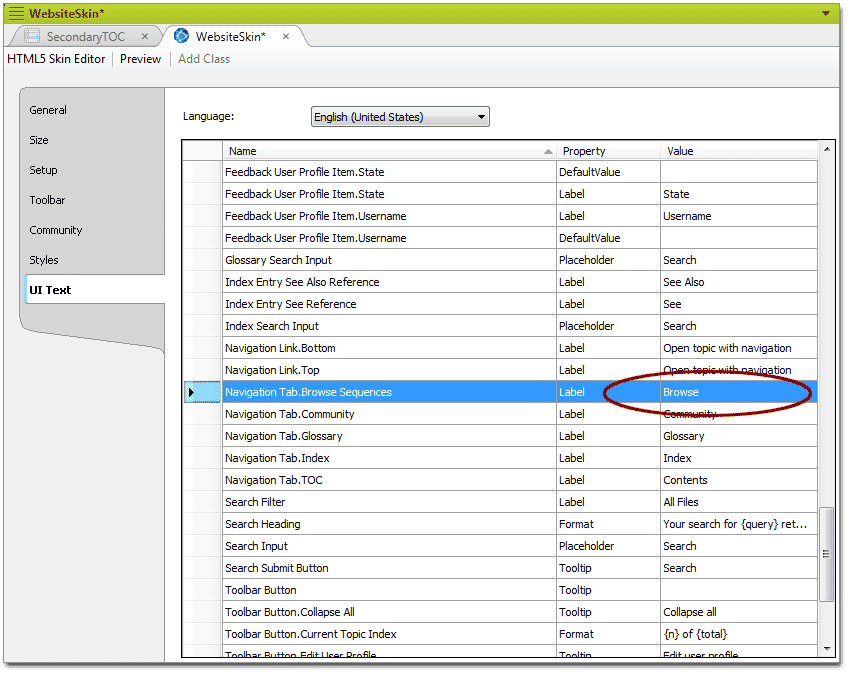
Replace"Browse" with your desired name in the Skin | UI Text Tab | "Navigation Tab.Browse Sequences" area:
Select the Browse Sequence in the Target:
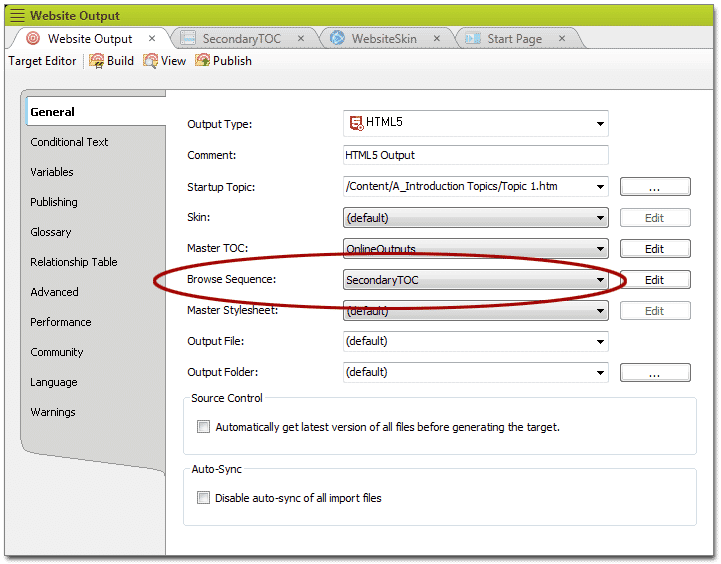
Open the WebHelp or HTML5 Target file and select the Browse Sequence that you created to be the "Secondary TOC":
Generate and View the Target:
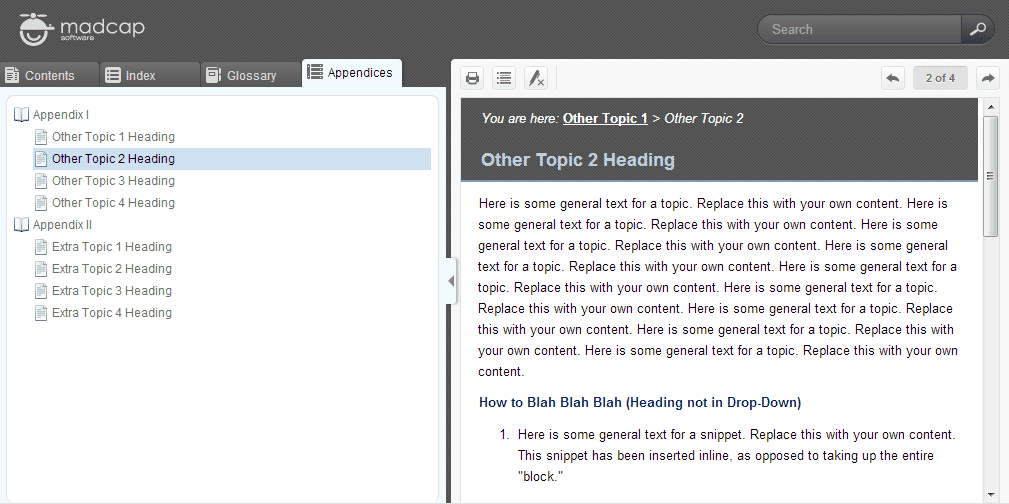
Now you see that you have a functioning "Secondary TOC." Yay, you!