


When I’m tasked with creating a new PDF, the first thing I do is get together with my graphic designer colleague to discuss the look and feel. Generally, I tell him that if he designs it, I’ll build it in Flare. That approach has gotten me in to a lot of trouble in the past when he’s built some seriously complicated designs!
Anyway, he designed this look for a PDF I’m developing for the USMC and promptly sent me the pieces for it:
- Logo in the upper left corner
- Logo in the lower right corner
- Text (as an image) in the lower left corner
- Gradients for the header and footer

I had to turn it into a page layout in Flare and I’m going to show you how I did it.
For this post, I’m going to focus on the main pages of the document – meaning I’m not going to build the front matter, index, or glossary.
In addition to the header, footer, and body frames, you’ll need three decoration frames.
1. Open the default page layout.
2. Stretch the header and footer across the width of the layout (815px). I know it won’t print out this way because the printer can’t print edge to edge…but that’s ok.
3. Set the height of both header and footer by right clicking on the header or footer frame, go to the Size tab, and enter 30px as the height. If not already done, set the width to 815px.
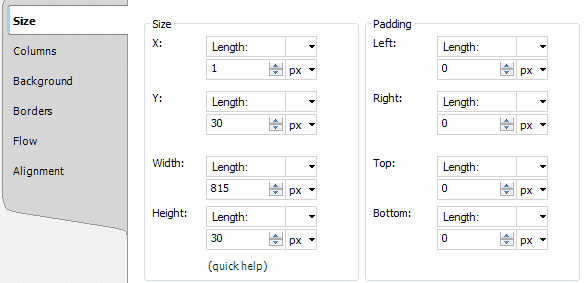
Positioning of the header and footer isn’t really important yet.
Now let’s add the gradient to the header and footer.
4. Right click on the header frame and select Properties > Background. In the Image section, select Browse and find the image. Set Repeat to no-repeat.
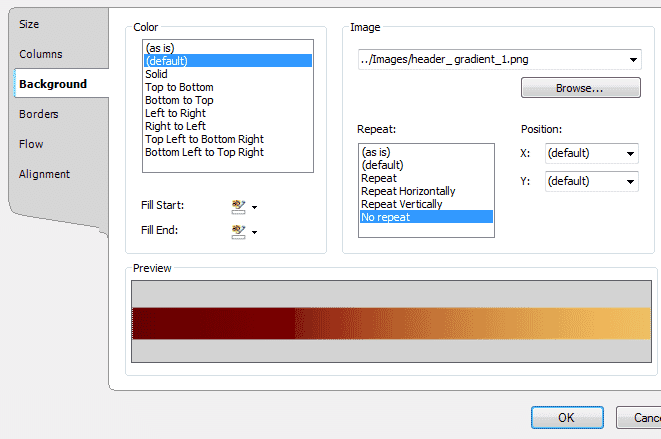
5. Repeat step 4 for the footer.
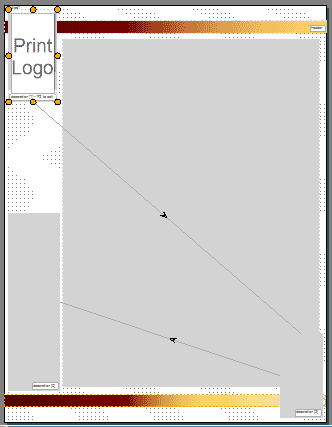
Now we have this:

Let’s tackle the decoration frames.
6. On your page layout, go to New Frame > New Decoration Frame. Add it to the upper left hand corner of your page layout.
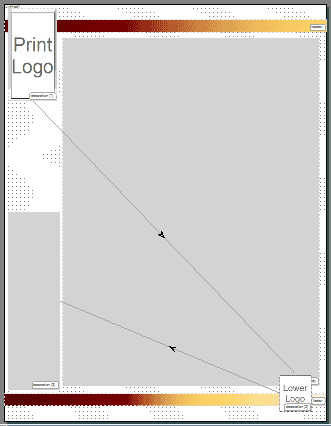
7. Repeat step 6 and place the second deco frame in the lower right corner.
8. Repeat step 6 and place the third deco frame in lower left corner.
You haven’t set the sizes for the decoration frames – so do that now.
9. Right click on the first decoration frame and select Properties > Size and then enter the height and width in the corresponding fields.
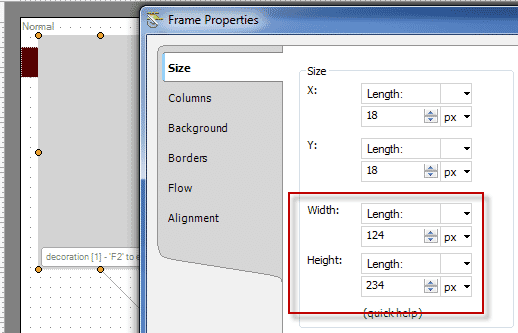
10. Repeat setting the frame property size for the 2nd and 3rd deco frames.
You now have all three deco frames sized properly and approximately in the right place.

11. For deco frame 1, insert the upper left logo as the background image. For position, X should be left, Y should be top and set background-repeat to no-repeat.
12. For the second deco frame, add the correct image as background image, set position (X & Y) to right bottom and background position to no-repeat.
13. For the third deco frame, add the correct image as the background image, set position (X&Y) to right bottom and background position to no-repeat.
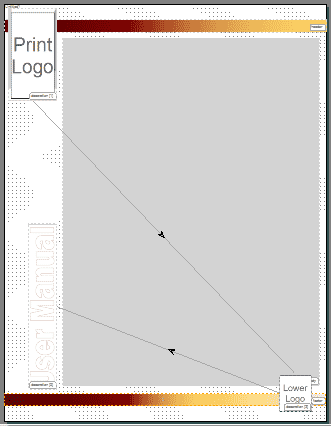
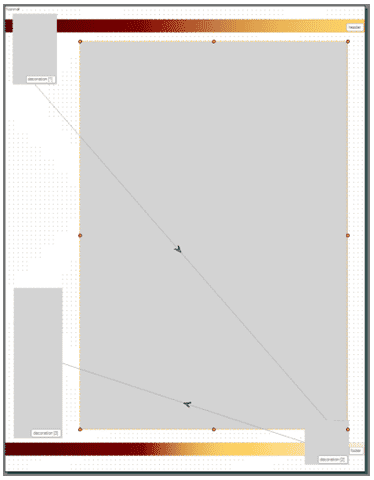
14. Do another test build. Your page layout should look like this one.

Have questions? Email me at flareguru@me.com.


