


Now that your MadCap Flare content is authored and you’re ready to build, you need a place to publish your outputs so that it’s available to your end-users. MadCap Central gives Flare authors the power to manage, collaborate with other authors and subject matter experts (SMEs), build and host outputs in the cloud, easily obtain output analytics, and more. With only a few clicks in MadCap Central, you can get a live site hosted and available to your users, without having to set up an additional hosting server or involve your IT department for help.
What about deliverables that aren’t for the public eye, or any content that needs to be protected behind a login? While this is possible currently, it often requires assistance from the IT department or developers to set up a login screen in front of your MadCap Flare output. With the new MadCap Central May 2020 release, authors can easily host live outputs and secure them behind a branded login with the new Private Output feature. In addition, Central now has a new free user type, called a “Viewer”. This user type has been added to allow individuals who are not Central Authors or SMEs (e.g. employees and customers) to access live sites that are secured behind a login screen.
In this blog post, we are going to use MadCap Central’s new Sites pages, the new free Viewer role, and the new Private Output feature to walk through an example of how to host a secured internal knowledge base that’s only accessible by employees of a company.
In this example, our deliverable is almost complete, but we’re still in the final stages of the reviewing process. We want to allow authors and various subject matter experts to view the protected, staged output before it is available to our employees.
There are a few components to understand when setting up private output in MadCap Central, so let’s cover what you need to do.
Note: Before setting up Privatized Output, make sure you have the appropriate permissions checked in your MadCap Central User Settings:
- Run/Schedule Builds
- User Administration
- Manage Teams/Projects
- Manage Sites
Create Teams
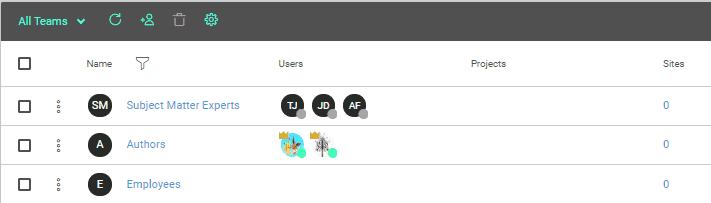
The Teams page in MadCap Central is used to organize Central Authors, SMEs, and now Viewers into groups. Teams provide a convenient way to associate authors with projects and are also important if you produce private output because only members of a team that are associated with a private site can view that output and will be prompted to login to view content.
Authors in MadCap Central have always had a way to view outputs with a private URL. However, subject matter experts that need to see all of the information in context did not have a convenient way of viewing the output privately. Now that MadCap Central has private output, we can give subject matter experts access to the output before it’s made available to a wider audience, and protect the output behind a login.
In MadCap Central, we create a team of Authors, Subject Matter Experts, and Employees. After we create our teams, we can then add authors and subject matter experts to their respective team. Although we created an Employees team, we don’t have to add anyone to this team just yet since the output is not quite ready for them to view.
With our teams identified, it’s time to use the new Sites page and create private sites.
Create a Site and Set the Site to Private
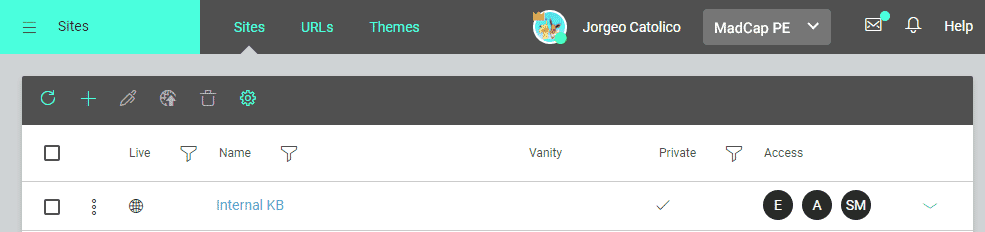
A new Sites page has been added to MadCap Central that allows you to create and manage all of your sites for your MadCap Central license in one convenient location. What do we mean by a site? A site in MadCap Central is a collection of information about an output and its destination. The Sites page makes it easier for Central Authors to have a global view of all of the live sites for all of your projects uploaded to MadCap Central. This way you can manage all of your sites in one place and don’t have to look into every project’s target to see which builds are live.
Although the Sites page looks a lot like the Builds page in MadCap Central, you can’t actually build an output from this page as targets are still built and stored on the Builds page. After the target is built, you can then create a site.
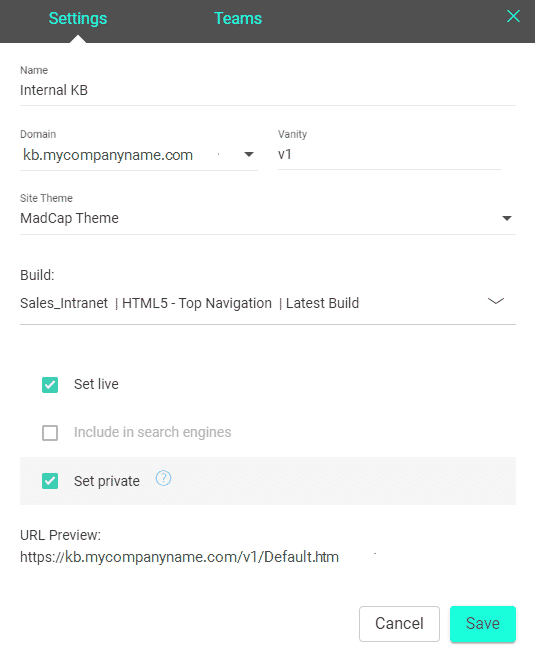
To create a site, first, open the Sites page, then clickin the toolbar. Give the site a recognizable name, select the domain that you would like to use, and, optionally, the vanity URL for the site. Previously, you could have just one domain (or URL) for your license. But with the introduction of sites, you can have as many as you want, and you can control which projects, targets, and builds use which domains. A host mapped domain is set on the Sites page, instead of the License Settings dialog. For more information on managing domains and URLs, visit this link in the online Help. *link to online help*.
Next, choose the site theme which will display various branded interface elements like login fields and 404 pages. If you do not select a theme, the default Central design will be used. More on creating branded themes below.
Then under Build, select the project, then the target, and finally the specific build that you want to use for this site. You can select a specific build or select Latest Build to automatically use the target’s most recent build.
If you are setting the site as "live" for the general public, we recommend you select a specific build. Otherwise, if you tell Central to use the latest build, you might end up with live output that is not yet ready for publication but happens to be the most recent build for the target. However, if the output is also set as "private" and intended only for individuals in your company, you might find it beneficial to choose the latest build. Just give it some thought when making a selection in this field.
To set the site to private, select the checkbox next to Set Live and then Set Private. Here is an example of the settings applied to our private site called “Internal KB”
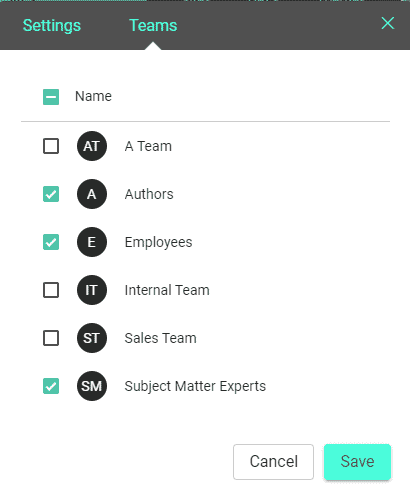
The next step is to select the teams that can login to this private site. Since we set up our teams beforehand, all we have to do is associate the appropriate teams with our site. Click the Teams tab, then select the teams that you would like to associate with the site.
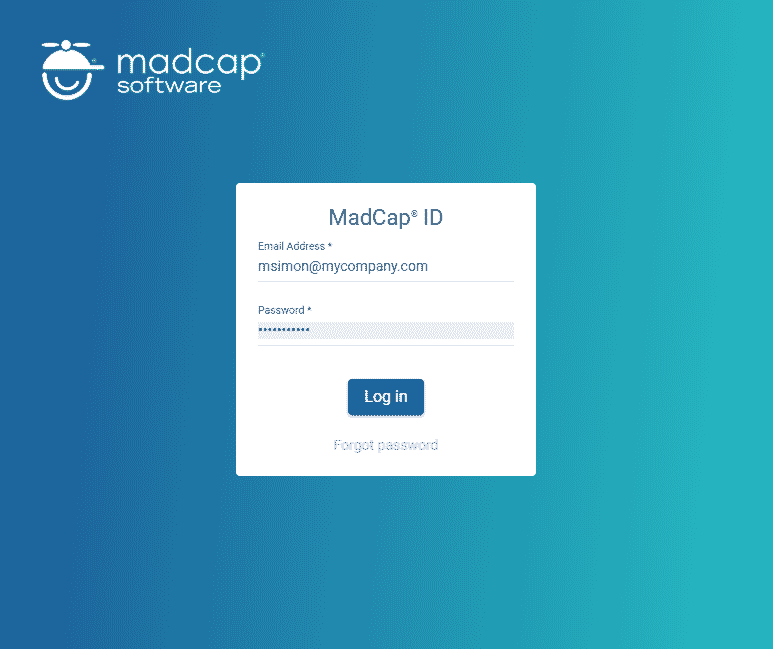
Select Save to create your Site and you now have a hosted privatized output! SMEs that have the live, private URL for the site will be greeted by a branded login page where they have to first input their credentials to view the site.
Now that SMEs can access the private site, final collaboration can be done with the authors to get everything ready to make it available to our wider audience. In this case, that audience is our employees.
Invite Viewers
A new, free Viewer role was added to MadCap Central to allow individuals who are not authors or subject matter experts to view private outputs. Unlike the other MadCap Central seat types, Viewers do not access MadCap Central itself, since their only role is to view private output.
To invite new viewers, go to the Users page and in the toolbar click the Plus icon. Complete the name and email fields. Under the User Seat Type dropdown, select Viewer. From the Teams drop-down, you can associate new users with any teams you have created. In order to see live private output, users must be part of a team that is also associated with a site. Therefore, this field is required if you are inviting Viewers. From the Onboarding Site drop-down, select the live private site to which you want the Viewer to have access.
We'll invite our viewers and add them to the Employees team.
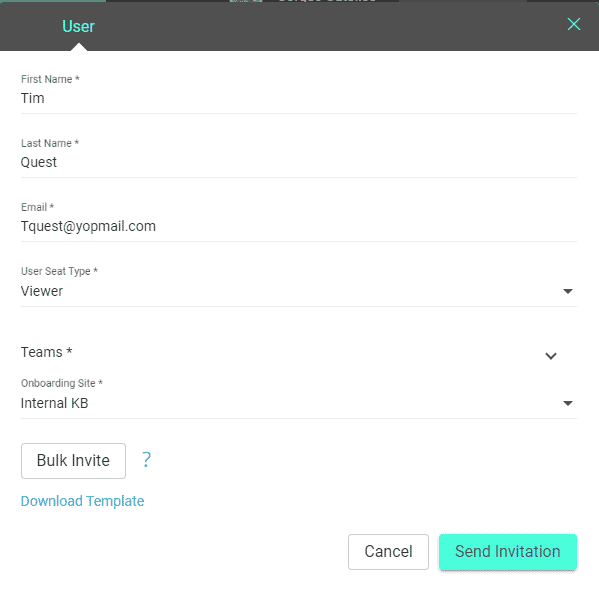
Alternatively, you can use the Bulk Invite option to invite multiple viewers and assign them to a team at once using an Excel template that MadCap Central provides.
What Your Viewers See
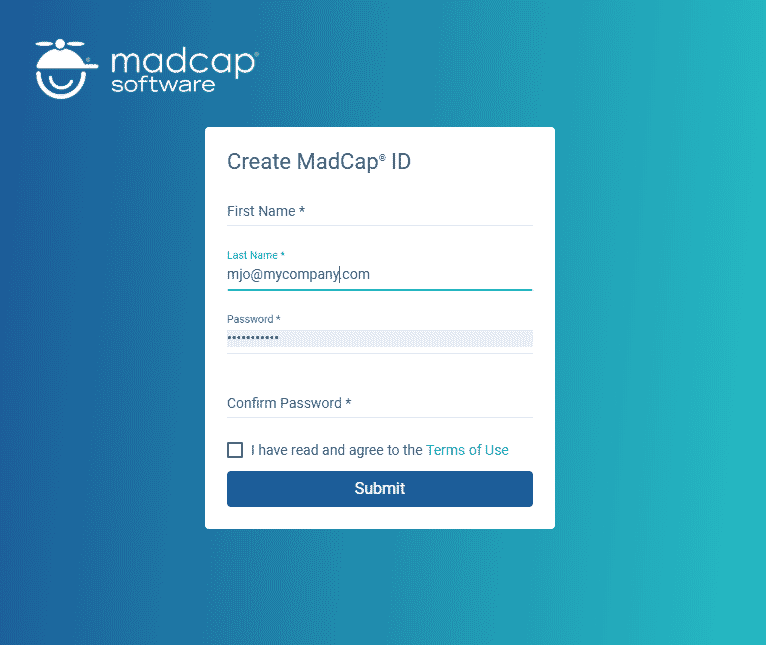
Once invited, viewers will receive an email with a link to view the private site. They will be greeted with a branded login page to input their credentials prior to accessing the knowledge base. This is an example of a theme branded with MadCap Software’s colors, gradients, and logos.
After logging into the site, an Account or Login icon now appears alongside the menu items and only appears for private outputs hosted by MadCap Central. You can customize the location and look of the account link that displays in HTML5 output using the skin editor in Flare, but only if you are using Flare 2020 or newer. For older versions of Flare, the account link will still display in HTML5 output, but the skin functionality is not available to modify it. For more information on customizing the account link using skin files, see the Flare online Help.

Additional Tasks: Customize Themes
With your private site created, you might want to customize the look of the different interface elements to fit your company branding so that your viewers (e.g. employees or customers) are greeted with a login page and invitation that looks familiar.
In the Sites page, you will notice a new Themes tab
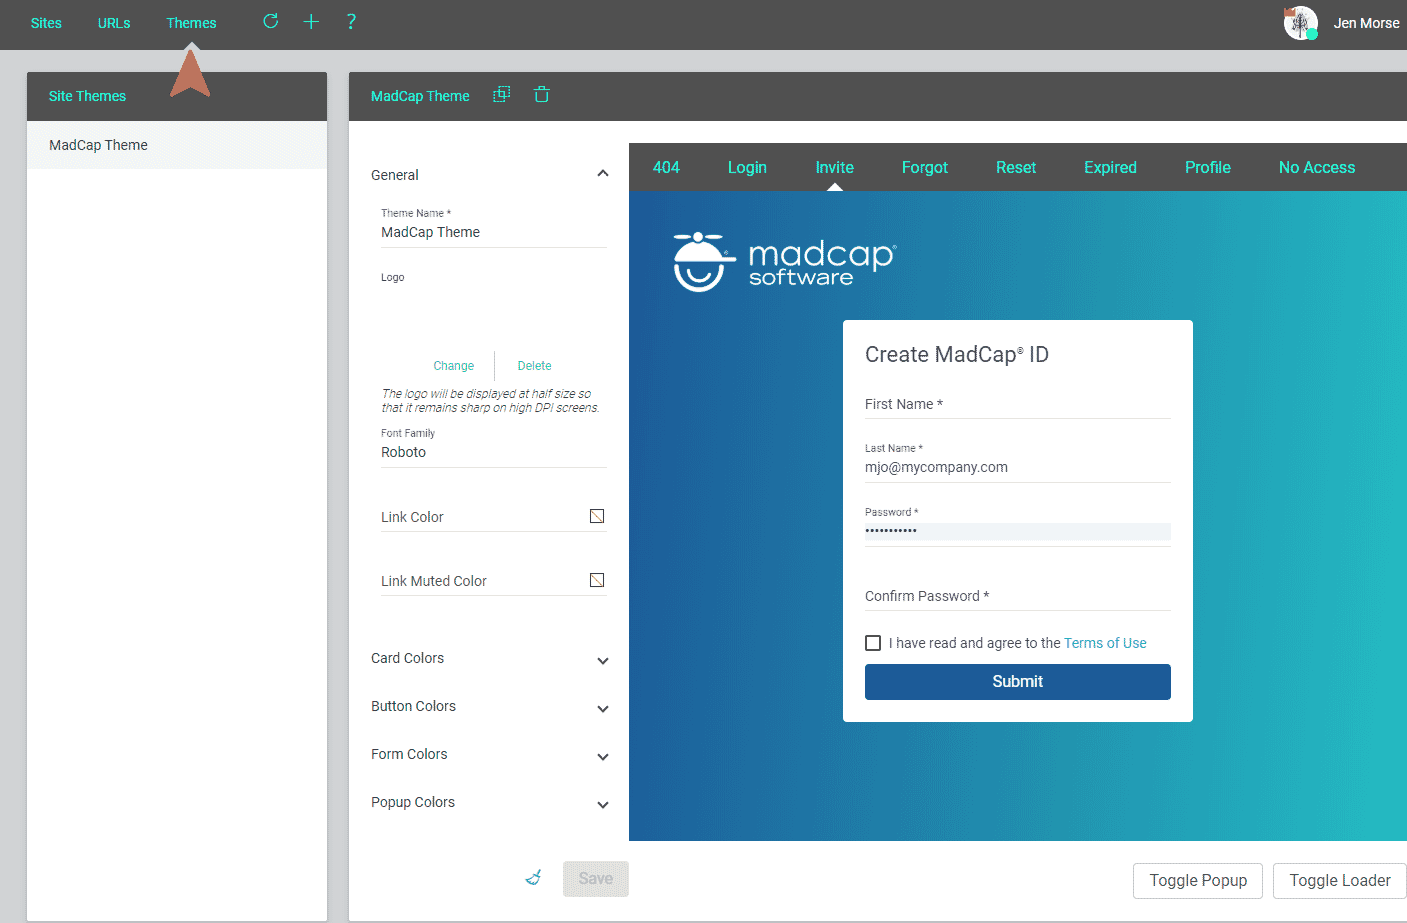
Here, you can customize screens such as the login, invitation, forgot password, and more by adding elements including your company logo, card colors, pop up text, loader togglers, and gradients. You can have one, or multiple themes created, depending on your needs. For more information on customizing themes, please visit Madcap Central’s online help: *online help link*.
Note: If you don’t select a custom theme for your site, a default theme provided by MadCap Central will be used.
Summary
Try it out! You can start hosting a privatized output with a free trial of MadCap Central for 30 days, or you can use your existing license. By eliminating the dependency on IT to configure hosting servers, Central’s new Private Output feature makes it easy for Flare authors to host secure content so that it is viewable for an intended audience. For additional information and best practices, please visit the Central Online Help.
Have any questions about private outputs in MadCap Central content management platform? Feel free to leave a comment below or reach out to me directly at jcatolico@madcapsoftware.com.


