


Image maps provide a way to define multiple clickable areas in a single image. They are a great tool to use when you need to convey information visually rather than through text and have that information be interactive on a web page or in your technical documentation. For example, take a look at the image below:
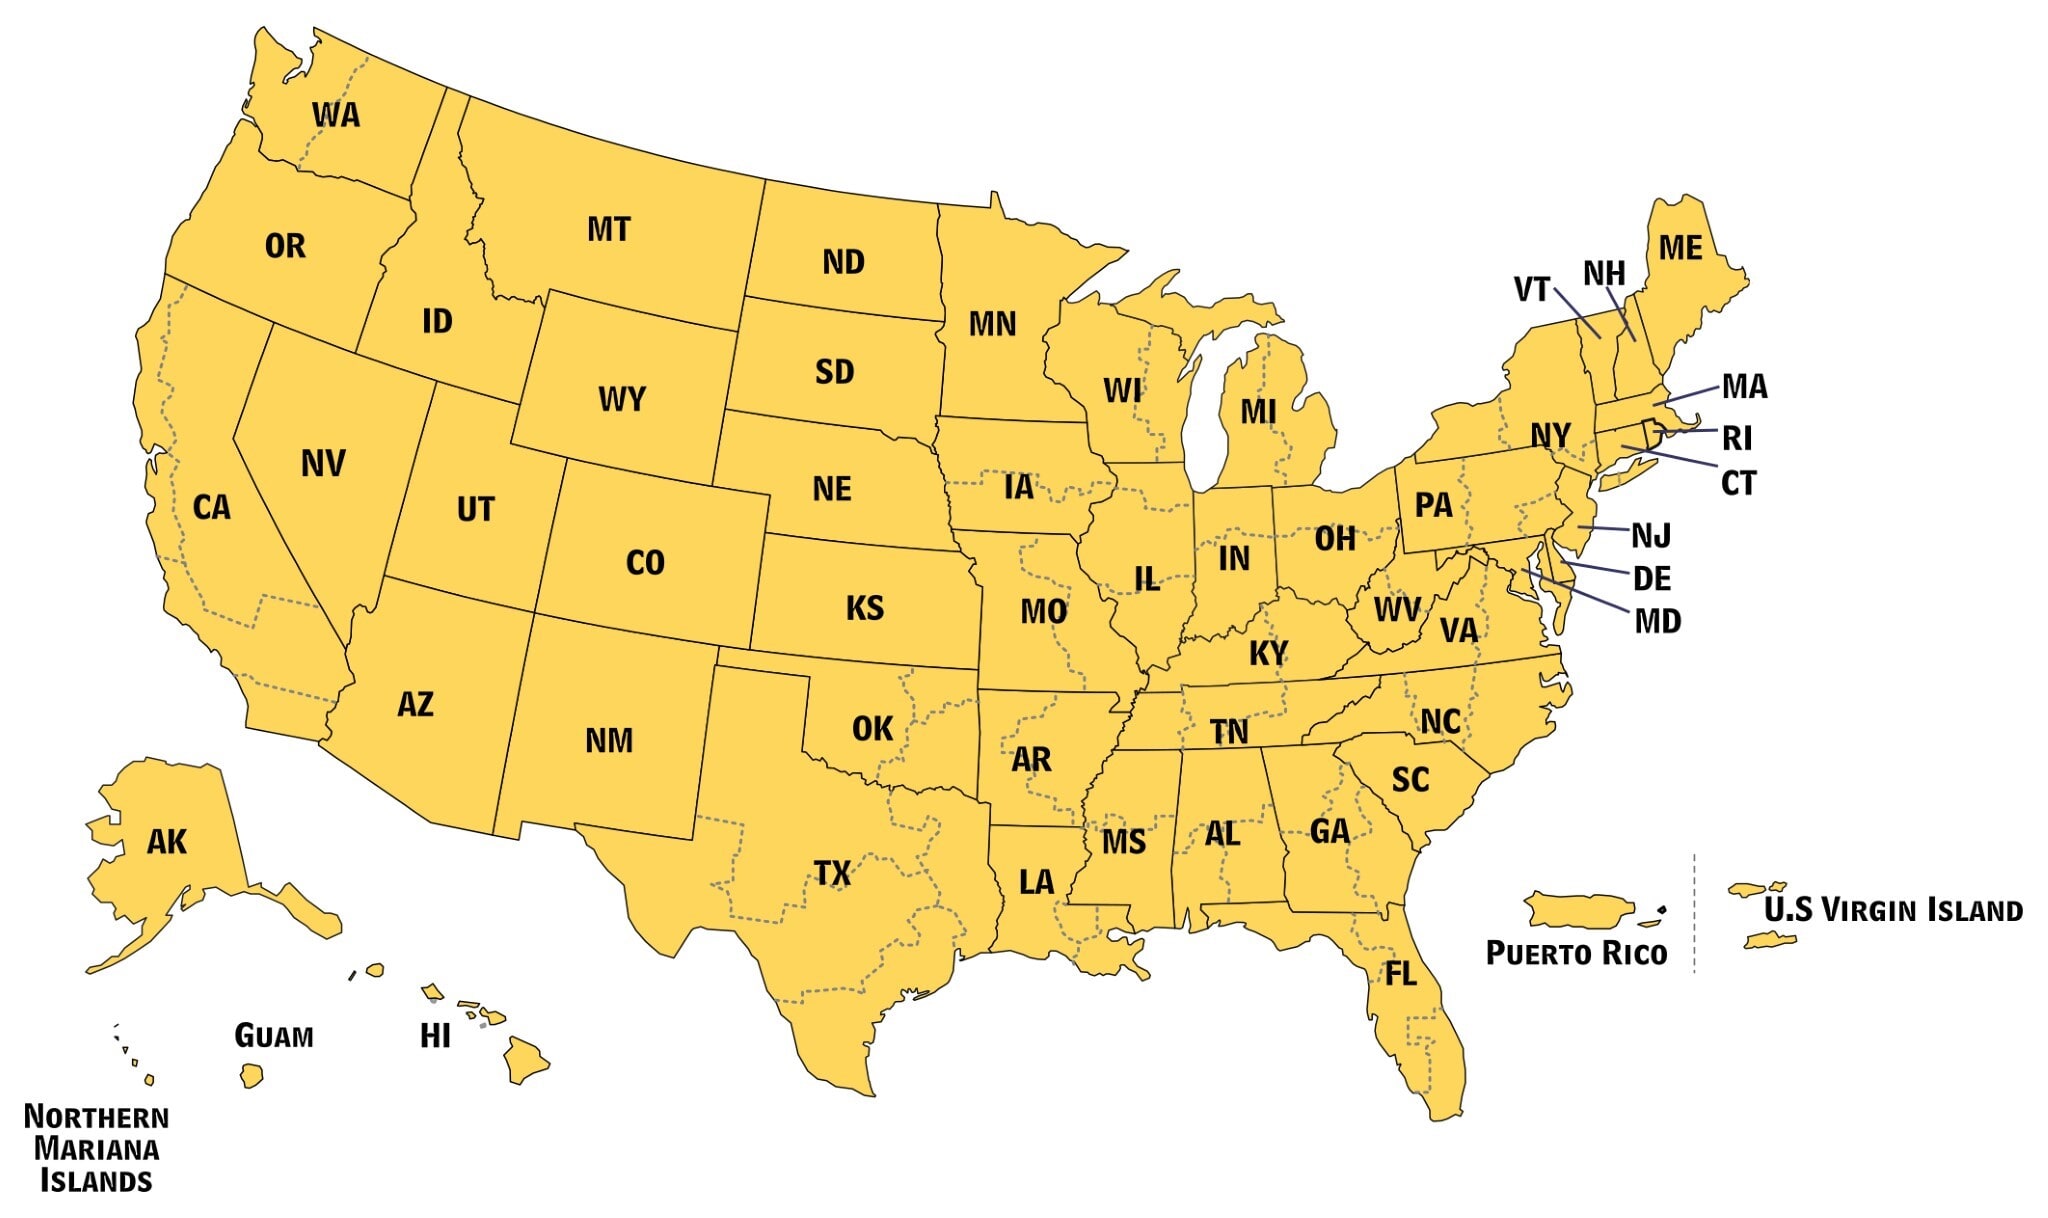
Let's say we wanted to have a web page that includes a responsive image map of the United States, and hyperlink each state to a different page. This would be normally very difficult to achieve, but it's a perfect use for image map coordinates. Flare makes it extremely easy to create image maps using its built-in responsive Image Map Editor.

Image maps, however, are not natively responsive. That means that if the image scale needs adjustments due to a browser's window being resized or the page being viewed on a mobile device, the image map and its clickable area will not scale down with the screen size. Fortunately, there is a jQuery plugin that can be easily implemented to resolve this issue.
Don’t know how to make an image map? Here’s a look at how to do so.
Creating the Image Map
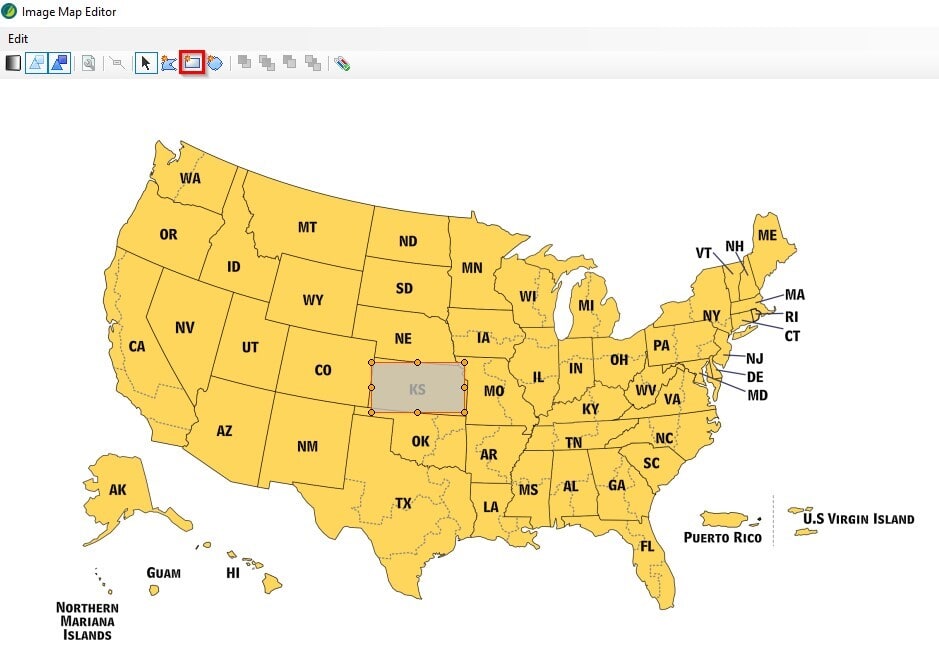
First, we'll add an image to a topic. Place your cursor where you want to insert the image to create a clickable region. Click Insert > Image to insert the desired image into the topic. Right-click the image and select Image Map to open the Image Map Editor.
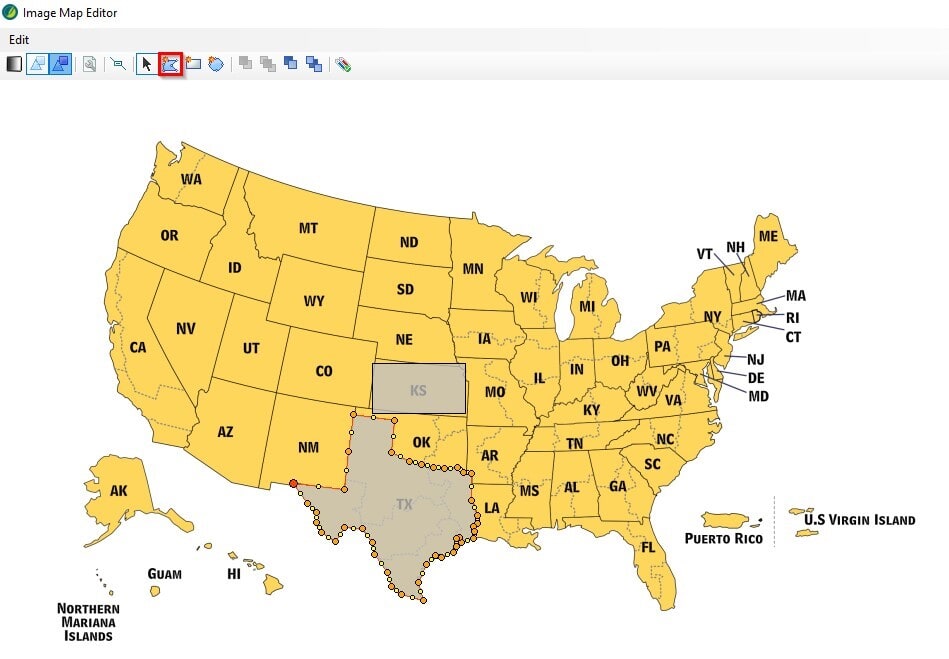
For more complex shapes, the Polygon mode can be used. Select the polygon tool and click to plot a coordinate. After the last point of the desired area has been plotted, right-click to create the shape. You can adjust specific coordinates by dragging any of the orange dots, adding points by clicking a yellow dot, or deleting a point by clicking a dot and selecting the Delete Point button in the toolbar.
After creating a shape, select it and enter a link in the Link Properties at the bottom to create a hyperlink out of that shape.
Making Images Responsive
Of course, it doesn't make much sense to have responsive image maps if our images themselves are not responsive within these clickable maps. So, how to make responsive images? If they are not already, here's how you can do so:
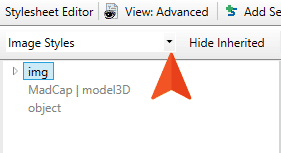
- Open your stylesheet in the Stylesheet EditorTip: In the Advanced Stylesheet Editor, use the filter to get to your image elements (or ‘hotspots’):
- Select the img element
- Expand the Unclassified property and set the max-width to 100%
Implementing the jQuery Plugin
Now that we’ve got our image map, it’s time to make it responsive. The Responsive Image Maps jQuery Plugin can be downloaded from the following GitHub repository by selecting Clone or download > Download ZIP.
Once the zip archive has finished downloading, extract its
contents to a folder. Then, open your Flare project and create a new folder for the script files:
- Open the Content Explorer
- Right-click the Resources folder and select New > Folder
- Name the new folder Scripts
- Open the jQuery-rwdImageMaps-master folder you extracted from the zip archive and copy the jquery.rwdImageMaps.min.js file
- Right-click on the Scripts folder and choose Open Folder in Windows
- Paste the jquery.rwdImageMaps.min.js file into the Scripts folder of the Flare project in Windows Explorer.
Tip: You can keep this new Scripts folder in the root Content folder, or drag into the Resources folder and keep it there.
After this is done, a reference to this script file will need to be added in each topic. The easiest way to do this is through the master page. The following steps should be done for any master page that is applied to a topic which contains an image map:
- Go to Resources > MasterPages. Open the master page and switch to the Text Editor
- Inside the <head> tag, add a <script> tag with the relative path to the jquery.rwdImageMaps.min.js file as the value of the src attribute, for example:
<script src="../Scripts/jquery.rwdImageMaps.min.js"></script>- Just before the closing </body> tag, add the following:
<script>$('img[usemap]').rwdImageMaps();</script>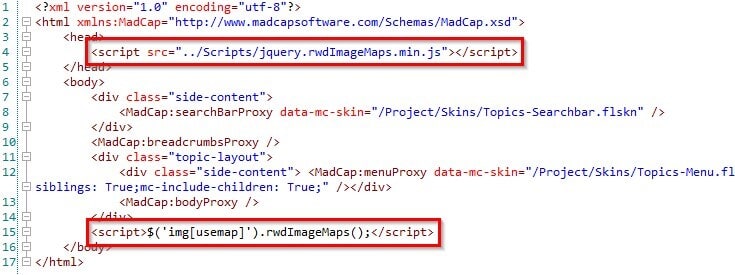
And you’re done! Rebuild your HTML5 output, and you’ll notice that your clickable image map is now fully responsive. If you have used responsive image maps in creative ways to expand the functionality of your MadCap Flare output, let us know in the comments below!
Editor’s Note: Originally published on September 2, 2019, refreshed on July 6, 2021, and refreshed again on May 4, 2022.


