


Hi! I’m Kelly and this is the fifth edition of my Flare 101 series. In my last post, I told you how to add topics to your Flare project. In this post, I’ll tell you what a TOC is, why you need one, and how to make it.
First and foremost, TOC = Table of Contents. I have to admit that I was a bit stumped by the concept of the TOC as it applies to print in Flare at first. Everybody knows what a Table of Contents in print is (just open a book!), but in Flare, a TOC is more than just a page telling readers what’s in your published output.
When creating print-based output, you should think of the TOC as a way to indicate which of your topics you want in the output and in what order. It’s more like an outline in Flare until it's converted to a true TOC in the print output.
Now for online output, creating a TOC in Flare will create an actual, visible, useable Table of Contents that looks just like the one you created in the project. Your users can click on it to navigate from topic to topic.
In most cases, Flare gives you an initial TOC as part of your project to make things easy, but adding a TOC to your project is pretty easy, too.
- Select the Project ribbon. In the Content section select New>Table of Contents.
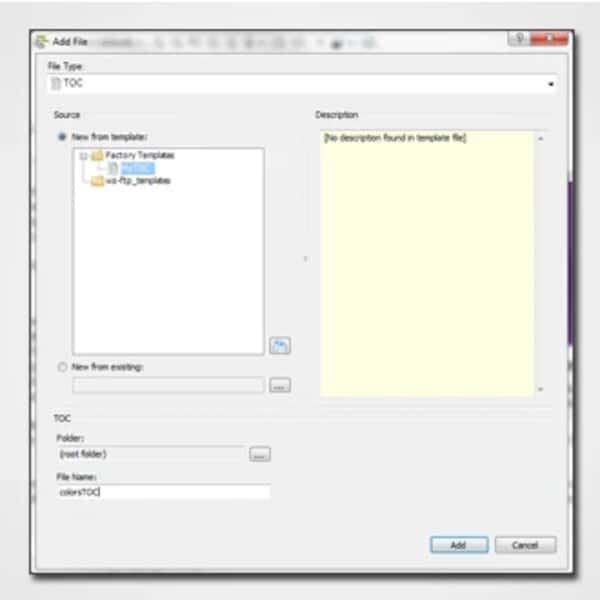
- In the File Type field at the top, make sure TOC is selected.
- In the Source area select one of these:
- New from template: If you want to use a factory template provided by Flare (and I’m new at this, so I do!), expand the Factory Templates folder and click on a template file. If you want to use your own customized template file, expand the folder it’s in and click on the file.
- New from existing: This lets you choose an existing file of the same type—that you've already created and stored somewhere—as a starting point for your new file. Click the browse button, use the Open File dialog to find a file, and double-click it. In the File Name field, type a new name for the TOC.
- Click Add.
- Click OK. The TOC is added to the TOCs folder in the Project Organizer. The TOC Editor opens to the right, with the page for the new TOC shown along with some starter TOC books and entries added for you.
- Save it!
OK, so now that you have a TOC, what goes in there?
- Books These are "folders" that can link to topics, files, movies, whatever. Whether or not you use books is up to you-- they're totally optional.
- Topics These would be the topics you created in your project that you want to show up in the output.
- Links You can send users to a website, another TOC, or even another Help System.
There are several ways to place content into your TOC, but for now let's keep it simple. Dragging and dropping files from the content explorer right into your TOC is the easiest way to fill it with content, but you can also create a new book or page (by clicking these buttons in your TOC editor ), right-click it, and link it to a topic.
So which comes first, the TOC or the rest of the project?
That’s totally up to you. I like to make a TOC at when I’m nearing the end of my project so I can organize everything I’ve written, but MadCap suggests that you create your TOC first so that you can organize your project as you write. Do whatever suits you best, and it’ll work out beautifully either way.
Now go write!
Hey, Kelly! I want to know more!
- Here's a link to the Tables of Contents topic in Flare's online help.
I have questions!
- Visit the MadCap forums or the Users of MadCap Flare LinkedIn group and you will find lots of smart people who are happy to help.