


Reading code that is formatted and color coded looks better and is easier to read. Jenny Watson wrote a blog post a while back on the topic, which you can find here: Coloring code in Flare with Prettify.
We have taken what Jenny wrote and expanded on it a bit to give you a step-by-step process to get this to work in any topic with code samples in your project. Thanks for giving us a head start on this one, Jenny.
Note: This only works in HTML5, WebHelp, WebHelp Mobile, CHM, and DotNet outputs. Also be very careful with the typed code as the script is very case sensitive.
- Download the Prettify tar file from Google and unzip it (Winzip or WinRAR should work).
- Copy the files from the distrib/google-code-prettify folder.
- In your Flare project, paste the files into the Resources folder (in this example we created a prettify subfolder under Resources).
- Create a 1×1 transparent .png named onLoad.png and copy it to the prettify folder. If you don’t want to create one, download this one, unzip it and copy it the prettify folder that you created in step #3.
- Open the Styelsheet that you are using in your project and either copy the contents of the prettify.css into it or link to it. To link to it:
- If you you are using a Master Page in your project for your outputs open it in your editor, if not create one and add it to your ‘online’ targets that you want Prettify to work with.
- Create a Master Page
- Go to the Project ribbon
- Click the “New” button
- Select Master Page as the File Type
- Name it “prettify” and click Add
- Open the Target that you want to use
- Go to the Advanced Tab
- Select the Master Page that you want to use or the one that you just created (in this example select “prettify“)
- Create a Master Page
- In the Master Page editor, add the onLoad.png that was created or downloaded earlier. We would suggest adding it to the very bottom of the Master Page so that it doesn’t affect an content and Save it.
- Open the Master Page in the text editor and add:
- Open the topic that you want the code to be in and type it in.
- Save All
- Open the topic in the text editor and wrap the code in a styled <pre> tag: <pre class=”prettyprint”>
- Save All
- Since the “code” is wrapped in a pre tag you can now insert spaces to indent the lines of code. This can be done in the text editor or in the regular topic editor.
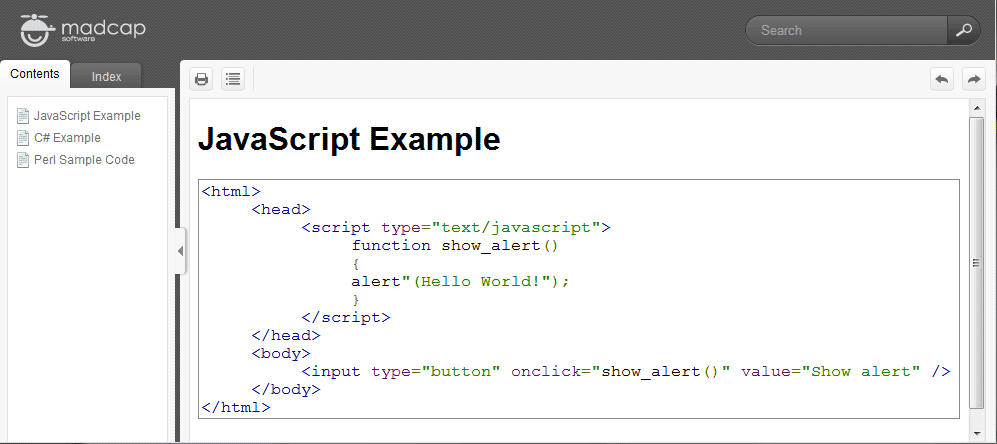
You should now be able to generate your online outputs and see the code samples formatted and in color.
If you want to see the sample project that we put together for this, download it, unzip it and open it in Flare V8 (it is a Flare V8 Project so it cannot be opened in older versions).
More information about Prettify and supported settings can be found here: https://code.google.com/archive/p/google-code-prettify