


This guest post was written by Jay Slagle and is part three of a four-part MadCap Flare CSS series.
Jay is an independent consultant and certified MadCap Software Advanced Developer who is passionate about using CSS to enhance the power of MadCap Flare. After discovering MadCap Software tools over a decade ago while working as a technical writer in Seattle, he has designed and implemented Flare projects for clients in government, law, education, healthcare, and technology. When he’s not occupied with all things Flare, Jay writes fiction under the pen name JB Strand.
In the previous article of this series, I showed you how to add font files to your MadCap Flare project so that your HTML outputs looked the same across all devices. Generating a PDF through Flare eliminates a lot of that work because it automatically embeds the fonts in the .pdf file. In this article, the third of four, I’ll show you how to install custom typefaces so that they can be used in PDFs and the Flare GUI. I’ll also demonstrate how CSS variables make it easy to specify different typefaces for HTML and PDF outputs.
Installing Font Files
If you are using a custom typeface, you should install the font files on your Flare machine for two reasons:
- Fonts must be installed on the Windows operating system to be used by the Adobe Acrobat distiller when generating a PDF
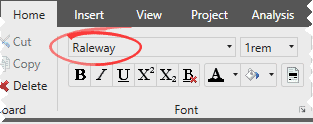
- Fonts need be installed if you want the Flare GUI to reflect the typographical look and feel of the outputs. Although the font drop-down on the Home ribbon indicates the typeface specified in the stylesheet, you will not see that typeface rendered in the XML editor until you install the font.
Tip: If the font isn’t installed, you will still be able to use the GUI editor. Flare will simply substitute an installed font when you edit a topic in the XML editor.
Installing Fonts on Windows
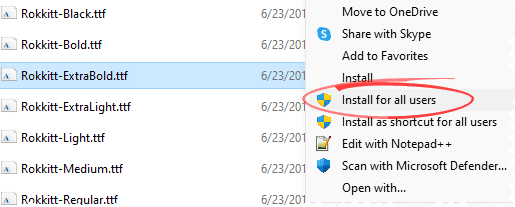
To install a font face, right-click the .ttf or .otf file and select the option to install the font for all users (whenever possible). Repeat this for all font weights you want to use. Here is an example using a font called Rokkitt:
Note: Restart Flare after installing a new font face.
Testing PDF Outputs for Custom Fonts
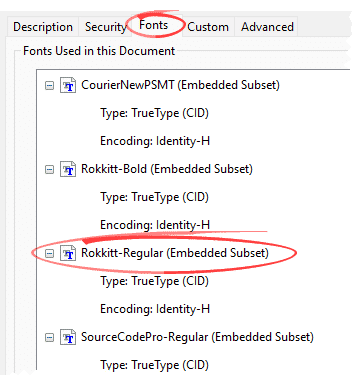
Once you have generated the PDF output, open it in Adobe Acrobat Reader, go to the Fonts tab of the file properties (File > Properties), and check that your print font faces are included in the PDF output:
Testing HTML Outputs for Custom Fonts
After you have installed a font, It’s easy to get fooled by an HTML output. Suppose that the stylesheet syntax that points the browser to the font file in your HTML output contains an error. The output will still look fine on your Flare machine because the browser will be able to locate the font installed on Windows. You’ll notice the problem only on another machine where the font isn’t installed, so be sure to test the output with other devices.
Fonts for HTML and PDF
When you use different fonts for HTML and PDF, the structure of the stylesheet makes a big difference with how easy your setup is to manage. I’ll demonstrate this using the Raleway font for HTML:
font-family: Raleway, sans-serif;
For PDF I use the Rokkitt serif font, which is also a free Google font:
font-family: Rokkitt, serif;
Variables for Font Families
Because the print section of your stylesheet inherits the HTML font-family values automatically, you need to override font-family for elements in the print section. Using CSS variables makes this a lot easier. In the default :root section, specify the HTML fonts:
:root
{
--FontHeading: 'Raleway', sans-serif;
--FontText: 'Raleway', sans-serif;
--FontCode: 'Source Code Pro', monospace;
}
Even when using the same typeface for body text and headings, I like to define separate variables for the two to maximize flexibility. Branding standards can change, after all. In the sample above I also define a variable for a code typeface. Including a generic font-family value such as sans-serif or monospace tells the browser to use its standard typeface of that kind if the first font family is not available for some reason.
Default Font for the <body> Tag
In CSS, you do not have to define the font family for every element you use. Because all HTML elements in your topic files inherit settings from the body tag, you can use body to define the primary font using a variable:
body
{
font-family: var(--FontText);
}
Alternate Typefaces
Because all elements in the topic will now use “FontText” by default, you need to assign the heading or code font to elements as needed. You can do this for each element case-by-case:
pre
{
font-family: var(--FontCode);
}
Or, when setting up the stylesheet through a text editor, you can use a CSS shortcut like the following, though you’d still need to set other values such as the font size separately for each element:
h1,
h2,
h3,
h4,
h5,
h6
{
font-family: var(--FontHeading);
}
Print Typefaces
The print section of the stylesheet can have its own :root element where you can change the font-family variables to use the print fonts:
:root
{
--FontText: 'Rokkitt', serif;
--FontCode: 'Courier New', monospace;
}
Because I haven’t changed the heading font here, the print output will still use Raleway for the heading elements. Changing the variable values in :root may be all you need to do to switch to a different print font, as long as your default stylesheet section consistently uses variables when assigning font-family values.
Font Families in Span Styles
There is another issue that requires attention with print styles, however. In my previous article, I showed how to define spans for semi-bold and extra bold weights. As long as a span does not specify a font-family name, you can apply it to any paragraph that uses any typeface. But if a span in the default section specifies a font name, you may need to override that name in the print section.
In the following, I change the semi-bold (600) and extra bold (800) span styles to use the corresponding variant of the Rokkitt typeface rather than Raleway:
span.SemiBold
{
font-family: 'Rokkitt SemiBold';
}
span.SemiBoldItalic
{
font-family: 'Rokkitt SemiBold';
}
span.ExtraBold
{
font-family: 'Rokkitt ExtraBold';
}
span.ExtraBoldItalic
{
font-family: 'Rokkitt ExtraBold';
}
No Italic, No Problem
You may recall that the Raleway typeface had italic versions for all the bold weights. This is not the case with Rokkitt, as with a number of other typefaces. In this case, you specify the bold weight face and leave the browser or PDF distiller to generate the italic version. Technically, the result is known as an oblique style rather than a true italic, but it will work fine.
Bold Span Examples
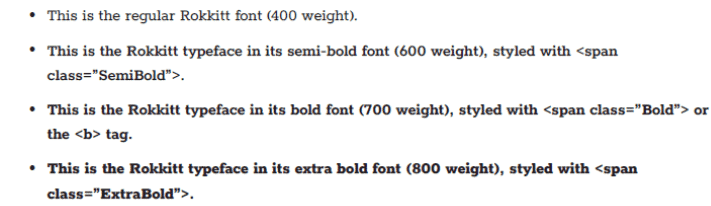
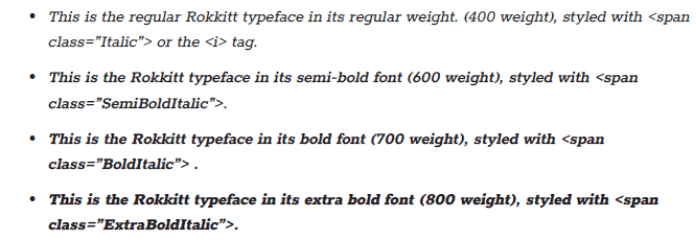
In case you were wondering, here’s how my print typeface Rokkitt looks in its various weights and styles:
Bold Styles
Bold Italic Styles
Summary
Installing custom typefaces on Windows is necessary to generate PDFs or to render the font faces in the Flare GUI. To make it easier to switch between fonts in HTML and PDF outputs, use CSS variables to define your font families. In the next (and last) article, I’ll expand on these ideas to show you how to use variables to manage text sizing values for HTML and PDF.