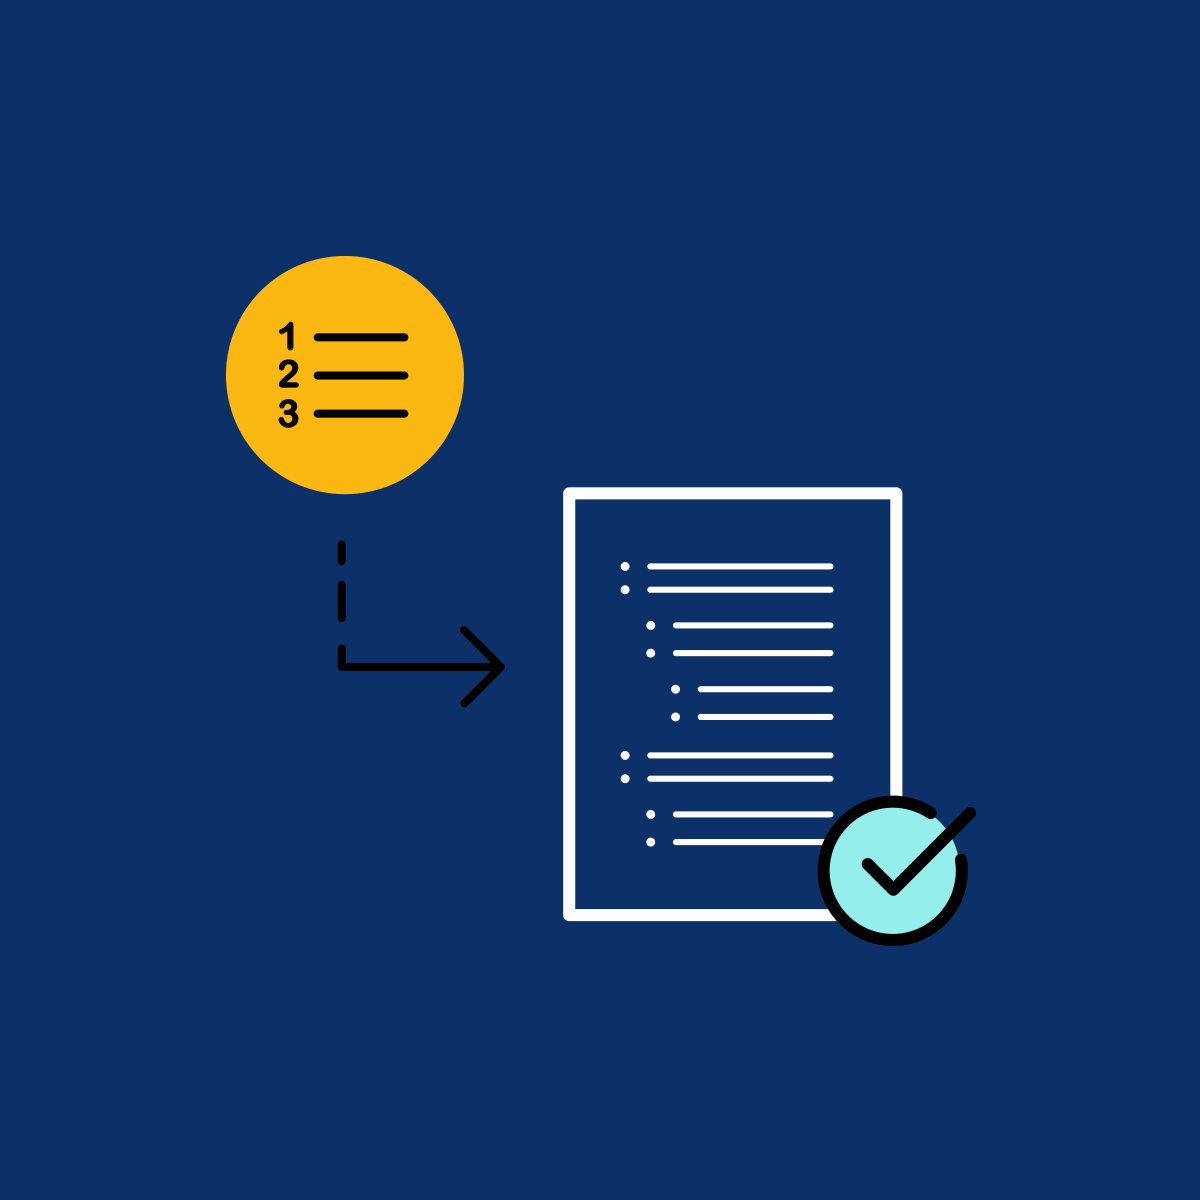

In my previous post, I explained how to achieve legal numbering using auto-numbering functionality in MadCap Flare. But what if you don’t want to use legal-style numbering? In this post, I explain how to create your own custom numbering sequences and how to nest numbering sequences.
How to Create Custom Numbering Sequences
If you would prefer to use your own custom numbering scheme, such as roman numerals or letters, you can edit the codes for auto-numbering.
Roman Numerals
If you wish to use using roman numerals in your documentation, you can change the code to {i} (for a lower case roman numeral) or {I} (for an upper case roman numeral).
Alphabet
If you wish to use letters of the alphabet in your documentation you can change the code to {a} (for a lowercase letter) or {A} (for an uppercase letter).
You can change the presentation of the numbering by laying the sequence codes out the way you want. For example:
First paragraph style: {n=1} {a=1})
Follow on paragraph style: {n} {a+})
Would display like this:
1 a)
1 b)
1 c)
Or you might prefer this:
{A}: {r=1}
{A}: {r+}
Which would display as:
A: i
A: ii
A: iii
Using the auto-numbering codes you can achieve any numbering style you want and have total control over the indent and offset position of the number. And as an added benefit, it displays correctly in the editing screen as you create your document.
Nesting Numbered Sequences
To indicate that you are using a different number sequence, add a letter of the alphabet and a colon in front of your codes. Avoid using any that are currently in use, which can be seen by reading down the list of commands in the auto-numbering dialog box.
Create a new style for your numbered list and set your indent and offset to suit your needs. For the first style add code similar to this:
B:{r=1}This selects roman numerals and sets the numbering to start at 1.
You will need to add the mc-next-class information to your stylesheet if you want the class to automatically change from the first paragraph style to the following style when you press Enter.
Now create your second style for the following paragraphs and set the codes as follows:
B:{r+}If you require paragraphs without a number, you will need to set up a style for that as well. Use the following code:
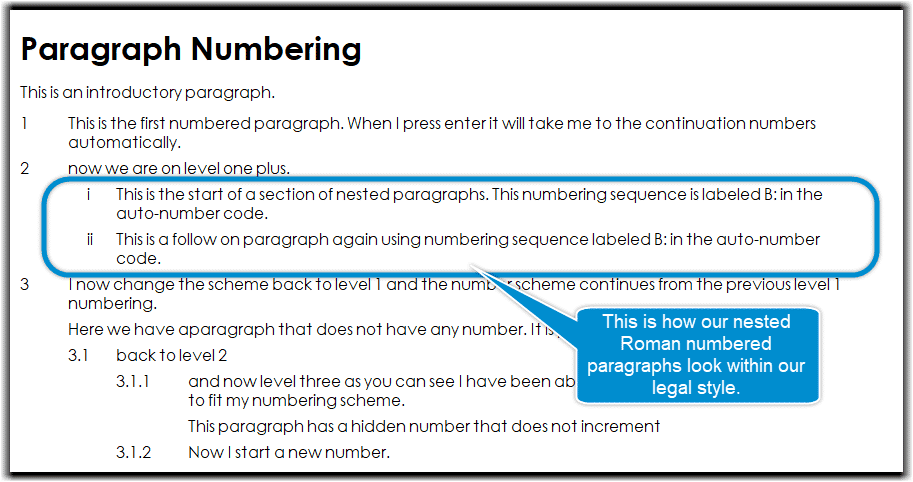
B:{ }The screenshot below shows an example of nested paragraphs:
Examples:
Here are a couple of CSS examples that demonstrate how to create a nested numbered sequence of your own. For your first numbered paragraph, use the following:
p.Numroman2First
{
 mc-auto-number-position: outside-head;
 margin-left: 1in;
 margin-right: 1in;
 margin-top: 6pt;
 margin-bottom: 6pt;
 mc-auto-number-offset: 0.30in;
 mc-next-class: Numroman2Plus;
 mc-auto-number-format: 'B:{r=1}';
}
For subsequent paragraphs:
p.Numroman2Plus
{
 mc-auto-number-position: outside-head;
 margin-left: 1.00in;
 margin-right: 1in;
 margin-top: 6pt;
 margin-bottom: 6pt;
 mc-auto-number-offset: 0.3in;
 mc-auto-number-format: 'B:{r+1}';
}
For paragraphs that do not need a number:
p.Numroman2UnNum
{
 mc-auto-number-position: outside-head;
 margin-left: 1.00in;
 margin-right: 1in;
 margin-top: 6pt;
 margin-bottom: 6pt;
 mc-auto-number-offset: 0.3in;
 mc-auto-number-format: 'B:{}';
}
You can define several paragraph styles for nesting. However, I would recommend that you avoid using the same letter for each set of styles, as you may end up with broken numbering in your documentation. If you want to use four or five different nesting styles for numbering, use different letters for each one.
A tip on navigating your styles
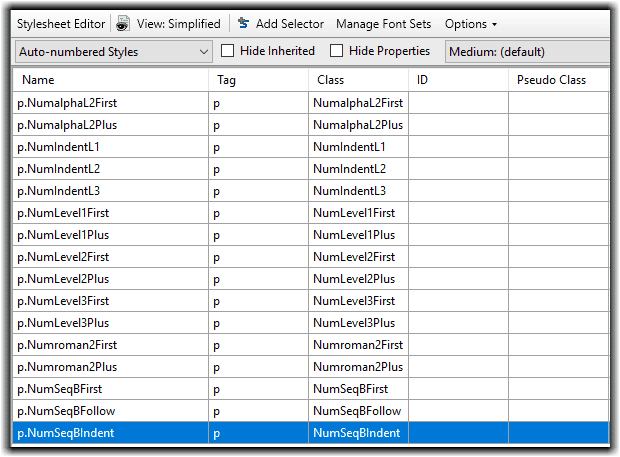
Here is a screenshot of my auto-numbered styles:
Over time (and a lot of numbering styles) my list has grown, making it difficult to select from the context menu. When working with many styles, I like to open the Styles window on the right-hand side of the screen, where you can click on the style you wish to use. The advantage of using this method is that you can scroll up and down the styles in the window, while you are not able to scroll the styles in the context menu.
You can open the Styles panel by selecting Style Window on the Home tab of the ribbon.

In the styles list, naming is key to the position of your style in the list. I have named my styles to ensure the most commonly used styles appear at the top of the list. This means that I can easily change them using the context menu. I choose other styles from the Styles pane on the right-hand side of the screen.
Numbering in Tables
You can also use custom autonumbering to number inside tables. Here we have an example of a custom numbering style that you could use in tables:
p.NumTab1
 {
 mc-auto-number-position: outside-head;
 margin-top: 0;
 margin-bottom: 0;
 margin-left: 0.5in;
 mc-auto-number-format: 'C:{n+}';
 mc-auto-number-offset: 0.3in;
 }
This produces a simple numbered list where the number definition is C:{n+}. Because the example above uses C:, this number sequence is totally separate to my main paragraph number sequence. Whenever I select this style, numbering will carry on from where you left off without affecting any other numbering you are using in the topic.
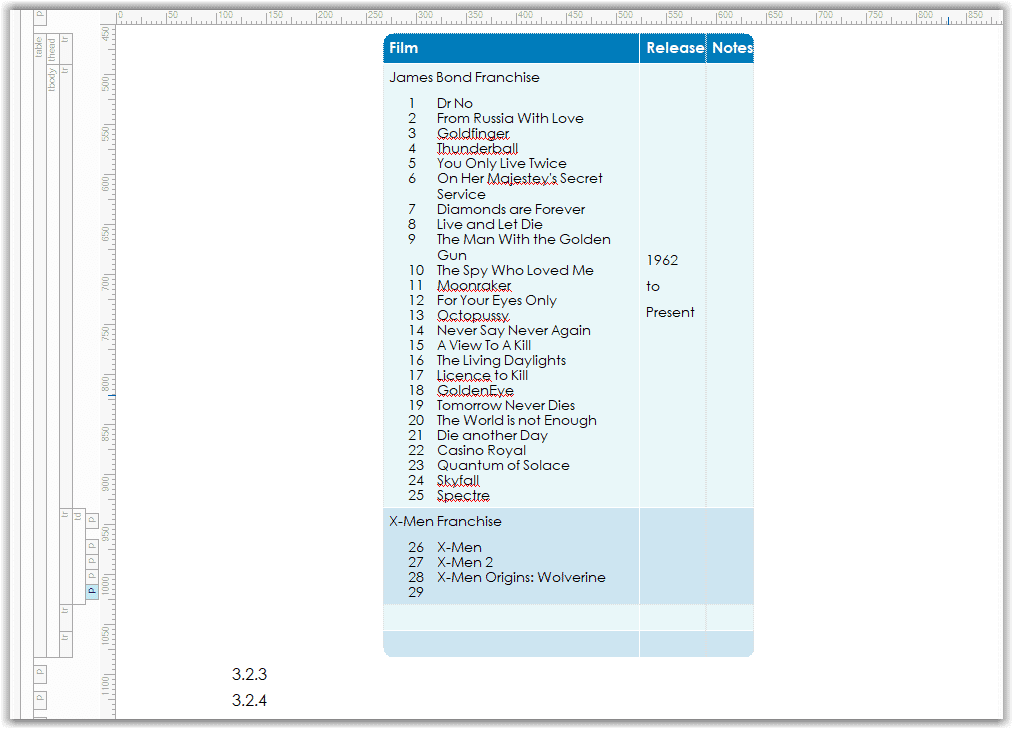
This provides you with a continuous numbered list, even though the list in split into different table cells.
What if I want to restart numbering?
If you want to restart numbering you will need to have two styles that allow you to define the first numbered item in the list and then the numbers that follow from that. You will also need to add any other format changes such as spacing and indents.
This is the same process we have been using throughout this blog only we are using D: to separate this sequence from any other numbering in the documentation.
I renamed NumTab1 to Numtab2 and then added a new NumTab1 style. Here is the sample CSS for my table numbering:
p.NumTab1
 {
 mc-auto-number-position: outside-head;
 margin-top: 0;
 margin-bottom: 0;
 margin-left: 0.5in;
 mc-auto-number-format: 'D:{n=1}';
 mc-auto-number-offset: 0.3in;
 mc-next-class: NumTab2;
 }
 p.NumTab2
 {
 mc-auto-number-position: outside-head;
 margin-top: 0;
 margin-bottom: 0;
 margin-left: 0.5in;
 mc-auto-number-format: 'D:{n+}';
 mc-auto-number-offset: 0.3in;
 }
With this set up, we can start our numbering with the p.NumTab1. When we press Enter to add the second item in our list, the style will change to our second style because we have the mc-next-classNumTab2; line in our CSS stylesheet. Remember, if you need to include paragraphs without a number, you should create a style to allow for this.
p.NumTabUnNum
 {
 mc-auto-number-position: outside-head;
 margin-left: 1.00in;
 margin-right: 1in;
 margin-top: 6pt;
 margin-bottom: 6pt;
 mc-auto-number-offset: 0.3in;
 mc-auto-number-format: 'D:{}';
 }
With these styles set up you can restart numbering at 1 in your table by selecting your NumTab1 style.
Conclusion
By following the tips in this series, you can get a firm grasp of your paragraphs and lists, and enjoy the level of control that auto numbering offers.
In Part 3 of this blog series I will be writing about using Chapter and Section Numbering to produce books and long documents. I will also be looking at auto numbering for images, tables, and anything else you would like to number in your project.