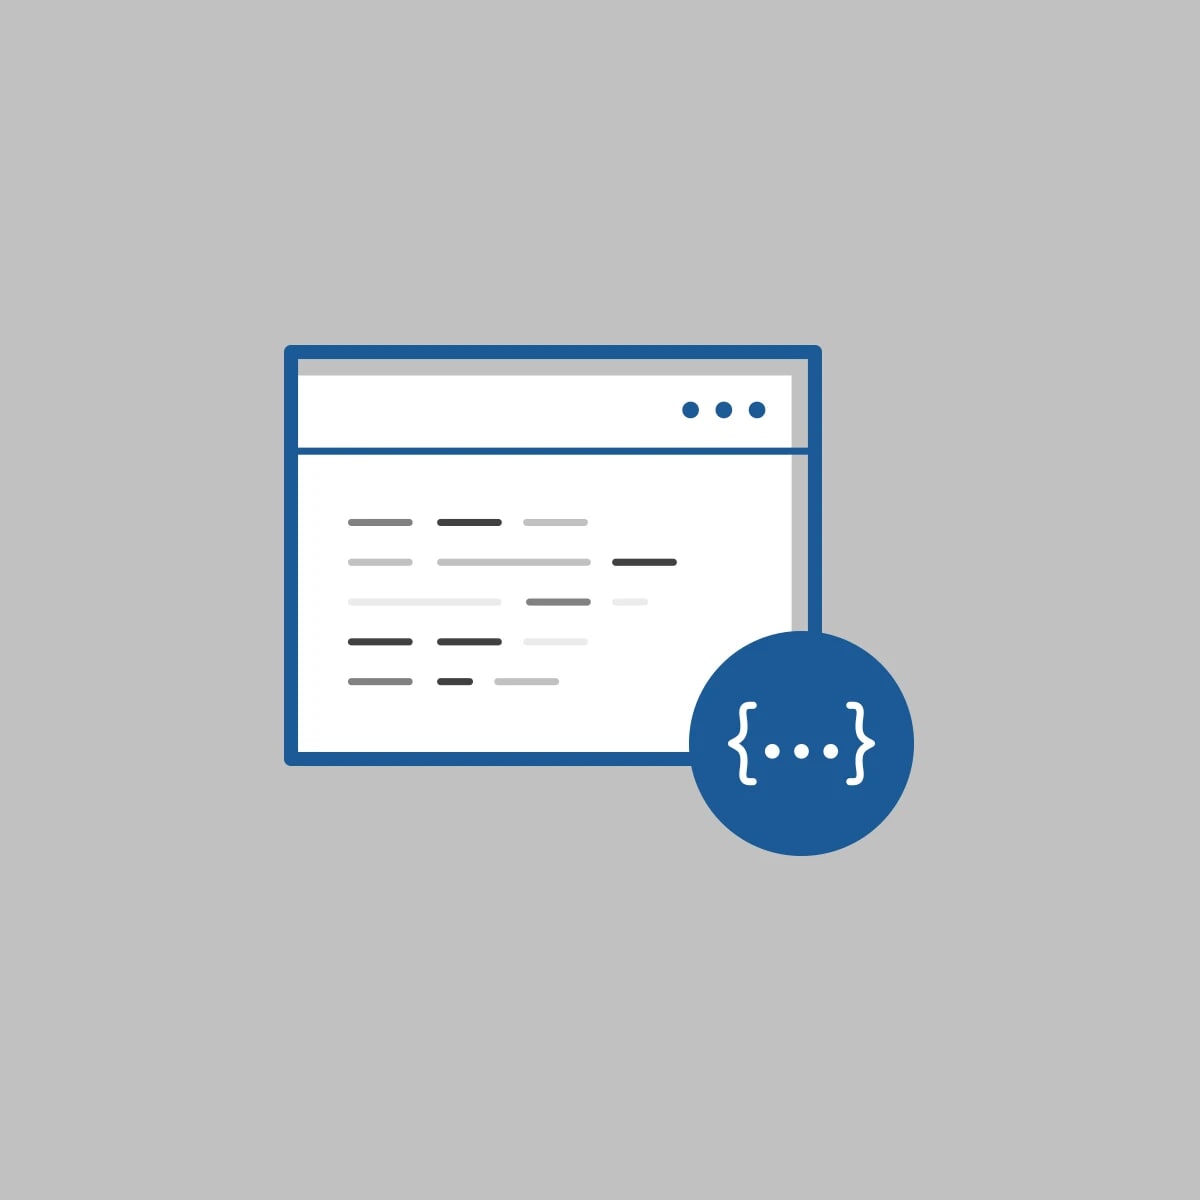

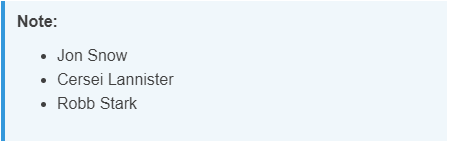
Looking for a way to indicate important pieces of information within your documentation? Creating styled boxes are a great way to call out notes, draw attention to warning signs, or even highlight tips and examples throughout your content. In today’s blog, we’ll cover the steps needed to master CSS boxes within MadCap Flare. Here’s an example of how they look:

You can either copy the styles and paste them into your stylesheet or you can download the Flare project by clicking here. This post focuses primarily on the “Note” style, but if you wanted to see how I created the other styles in the example above, take a peek at the Flare project.
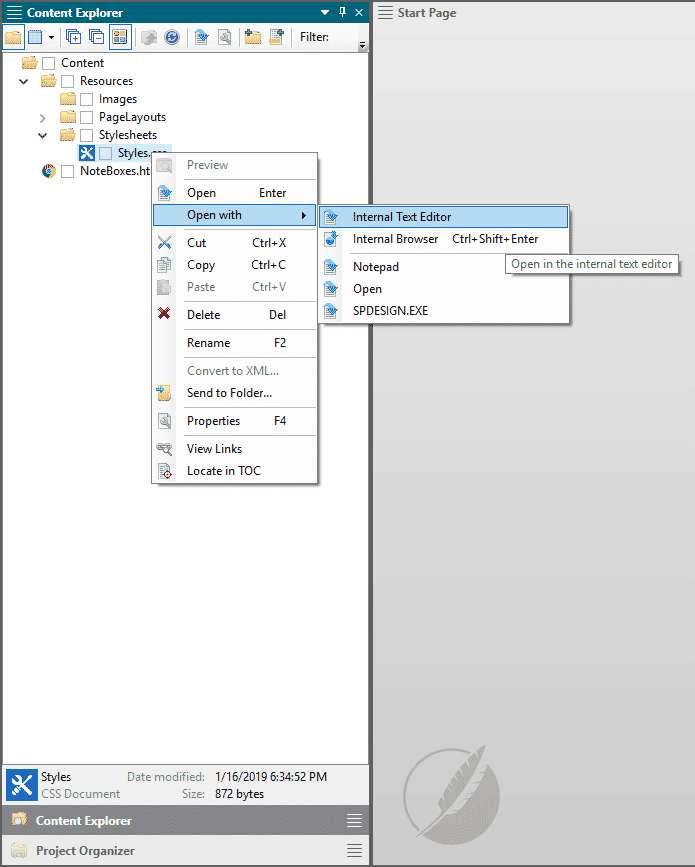
Copying Styles to your Stylesheet via Internal Text Editor
If you will be copying and pasting these styles in your stylesheet, you will need to open it in the Internal Text Editor view.
- Right-click your stylesheet > go to Open with > Internal Text Editor.
- This will open up your stylesheet in the Text Editor view.
- Copy the code sample.
- Paste it at the bottom of your stylesheet.
Create Style Boxes using Paragraph Styles
While a div or table may seem necessary for creating styled boxes, you can actually use a single paragraph style instead. Using a paragraph style is great when your note will be a single sentence or a paragraph. Once the style is created, you can quickly apply the style to any of your paragraph elements. There are two different styles discussed here; the biggest difference between the two is that there is an image for one and an auto-number for the other. Feel free to tweak the look and feel to customize the way you want.
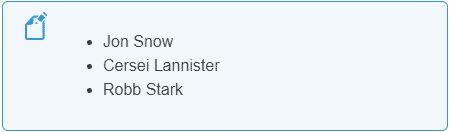
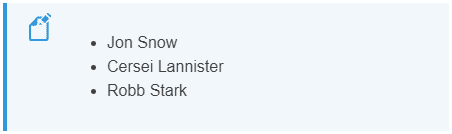
Styled Boxes with an Image

p.note
{
     -moz-border-radius: 6px;
     -webkit-border-radius: 6px;
     background-color: #f0f7fb;
     background-image: url(../Images/icons/Pencil-48.png);
     background-position: 9px 0px;
     background-repeat: no-repeat;
     border: solid 1px #3498db;
     border-radius: 6px;
     line-height: 18px;
     overflow: hidden;
     padding: 15px 60px;
}
p.noteAlt
{
     background-color: #f0f7fb;
     background-image: url(../Images/icons/Pencil-48.png);
     background-position: 9px 0px;
     background-repeat: no-repeat;
     border-left: solid 4px #3498db;
     line-height: 18px;
     overflow: hidden;
     padding: 15px 60px;
}
Take a look at the “background-image” style property - do you notice that the path leads to an image? If you copy these styles directly into your stylesheet, the image will not appear. Make sure that you correct this path to point to your own image. If you would like to use the image I used, either download the example Flare project or save the images below:
However, you can use any image that you want! For example, the images used in this example were created at https://flaticons.net/.
Styled Boxes Using Auto-Numbers
p.note
{
     -moz-border-radius: 6px;
     -webkit-border-radius: 6px;
     background-color: #f0f7fb;
     border: solid 1px #3498db;
     border-radius: 6px;
     line-height: 18px;
     mc-auto-number-format: '{b}Note: {/b}';
     overflow: hidden;
     padding: 12px;
}
p.noteAlt
{
background-color: #f0f7fb;
border-left: solid 4px #3498db;
line-height: 18px;
mc-auto-number-format: '{b}Note: {/b}';
overflow: hidden;
padding: 12px;
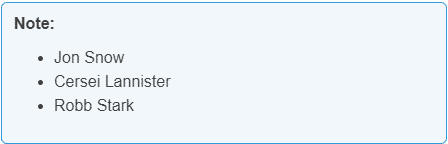
}If you do not want to use an image for your note boxes, you can use an auto-number to make the style display text (Ex: Note, Tip, Example, Warning, etc.). The property that controls this is the “mc-auto-number-format” property. Notice the mc-auto-number-format in the code sample above says {b}Note: {/b}. The {b} in the property is used to bold text. If you’d like to apply formatting to the auto-number text you can add similar formatting tags within the property.
Apply the Paragraph Style
Once you’ve created these styles in your stylesheet you will want to apply them to your paragraphs.
- Open a topic in the Topic Editor.
- Type a new paragraph or select a paragraph where you want to apply the “Note” style.
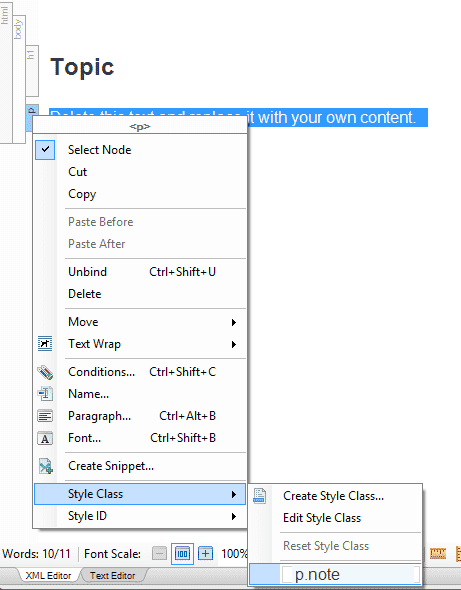
- Right-click the block bar and select the p.note style:
Alternatively, you can use the Style Window (Home Ribbon > Style Window in Flare) to quickly apply styles.
If you have multiple lines of text that you need to insert into a paragraph, you can hold Shift + Press Enter to have multiple lines within a single paragraph item. However, if you need to add a list or if you need to add multiple paragraph elements in a box, you should also add a div in your stylesheet.
Using Divs for Styled Boxes
A div is a container element that groups other elements together. By using CSS you can apply style properties to the div. In other words, we are putting our paragraphs, lists, images, etc. in a box and using CSS to style the box.
Styled Divs with an Image
div.note
{
     -moz-border-radius: 6px;
     -webkit-border-radius: 6px;
     background-color: #f0f7fb;
     background-image: url(../Images/icons/Pencil-48.png);
     background-position: 9px 0px;
     background-repeat: no-repeat;
     border: solid 1px #3498db;
     border-radius: 6px;
     line-height: 18px;
     overflow: hidden;
     padding: 15px 60px;
}
div.noteAlt
{
     background-color: #f0f7fb;
     background-image: url(../Images/icons/Pencil-48.png);
     background-position: 9px 0px;
     background-repeat: no-repeat;
     border-left: solid 4px #3498db;
     line-height: 18px;
     overflow: hidden;
     padding: 15px 60px;
}
Styled Divs with an Auto-number
div.note
{
     -moz-border-radius: 6px;
     -webkit-border-radius: 6px;
     background-color: #f0f7fb;
     border: solid 1px #3498db;
     border-radius: 6px;
     line-height: 18px;
     mc-auto-number-format: '{b}Note: {/b}';
     overflow: hidden;
     padding: 12px;
}
div.noteAlt
{
     background-color: #f0f7fb;
     border-left: solid 4px #3498db;
     line-height: 18px;
     mc-auto-number-format: '{b}Note: {/b}';
     overflow: hidden;
     padding: 12px;
}
Once you’ve created these divs in your stylesheet, you will need to apply them to elements in Flare.
Applying a Div Style
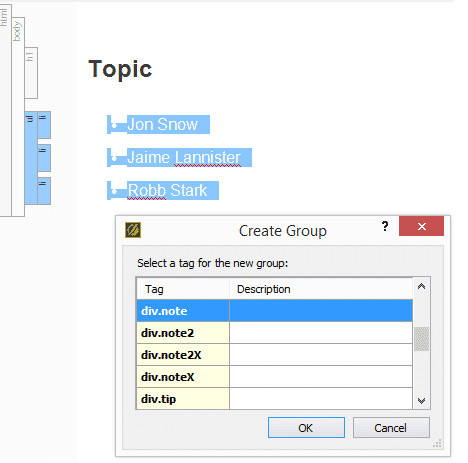
- Multi-select the elements you want to group together by Shift+Clicking or highlighting the content.
- Go to the Home Ribbon > Select the Group button.
- In the Group window, select the div you created in your stylesheet.
Note: Instead of hitting the group button, you can instead press the Tab key as a keyboard shortcut.
Alternatively, if you do not want to click through these dialogs, you can use a snippet to insert formatted content.
Bonus Tip: Using a Snippet to Quickly Insert Formatted Content
If you plan to frequently use divs for notes and do not want to have to apply divs every time, you can use a snippet to quickly insert pre-formatted content.
- Create a snippet. (File > New > File Type: Snippet)
- In the snippet, apply the styled div to the single paragraph.
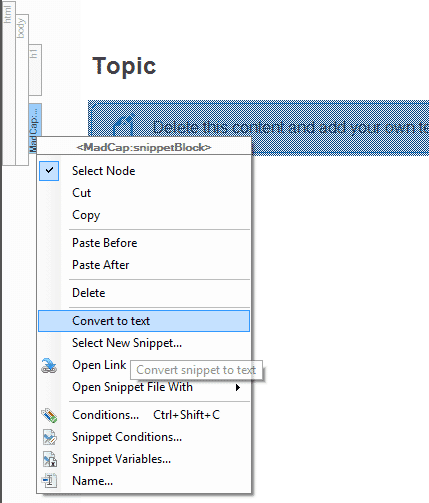
- Open a topic.
- Insert the newly created snippet.
- Since the snippet is linked to the snippet we need to break the link to make this editable. Right-click the snippet block on the left-hand side and select Convert Snippet to Text.
- Add your note information.
Now you have some cool styled boxes for your documentation. Feel free to try it out and write in the comments below on what you’ve created with styled boxes.
To download the sample Flare project, click here.
New to MadCap Flare? Start a free 30-day trial, which comes with free inquiries to our Platinum Level technical support. If you have any questions on how to customize your documentation, a technical support team member is ready to assist you.

Editor's Note: Originally published on August 17, 2017.