
In my recent MadCap Flare-user webinar, Getting Started with Madcap Flare Part 5: Generating Print Output, on October 22, 2015 I discussed how to automatically add a TOC, index, and/or glossary to a print output like PDF. I also noted that the automatic method offers fewer options than manual addition of these components. In response, several people asked for a description of the manual method. That’s the subject of this blog post.
Creating a print TOC/index/glossary manually is a two-part process. Part 1 is to create a topic based on the TOC, index, or glossary template rather than the basic NewTopic template. Part 2 is to add that new topic in the appropriate position in the “real” TOC. Here’s how to do it.
Part 1 – Create and Set Up the Special Topic
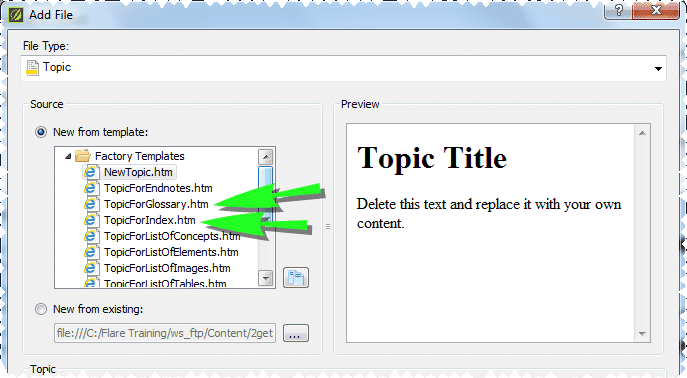
1. Create the topic like any other topic but select the appropriate template in the Source group’s New from Template list – TopicforTOC, TopicforIndex, or TopicforGlossary, instead of the usual NewTopic. (Flare lists the templates alphabetically so TopicforTOC is at the bottom of the list.) We’ll use an index topic as an example.
2. Call the file name something like printIndex to make it easy to spot in a list of topics. Call the 1st Heading something like Index. The resulting topic looks like this.
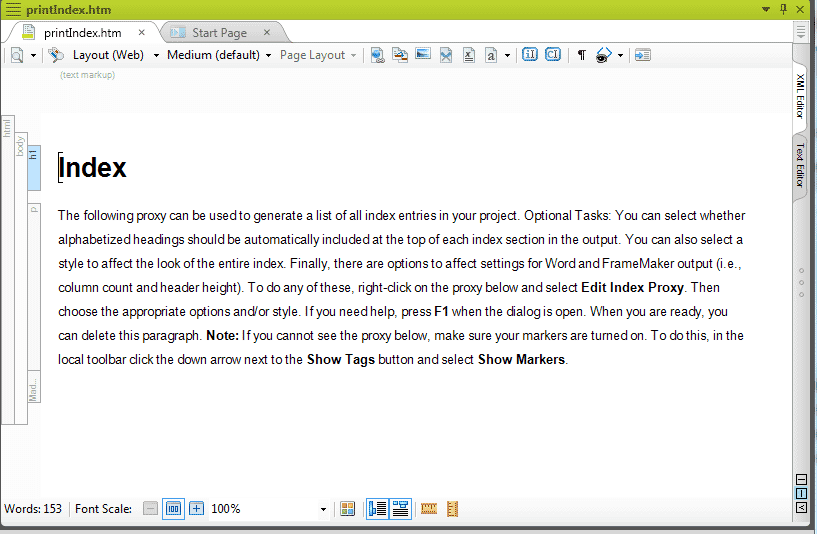
3. Delete the first paragraph, which is simply a set of instructions. The meat is in the proxy below the first paragraph. To see it, select Show Markers from the Show Tags icon pulldown. The screen now looks like this, after deleting the instructional paragraph.
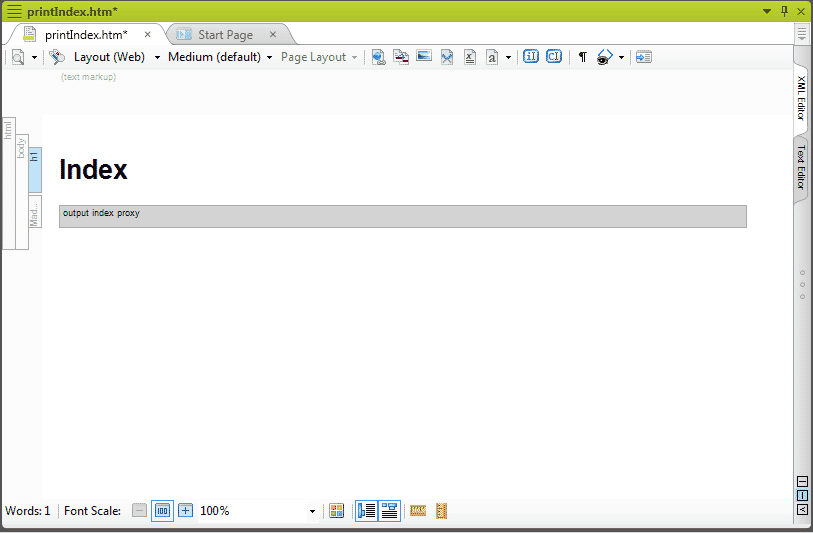
4. Right-click on the proxy and select Edit <name of proxy>. This opens the Edit Proxy dialog box for the selected proxy, such as this one for the Index Proxy.
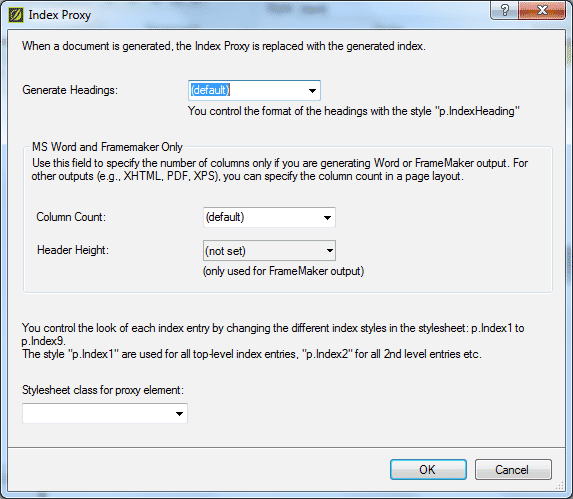
5. You can now customize the proxy. Note two specific points about the proxy options:
- The Column Count feature only works if you’re generating Word or FrameMaker.
- You can apply a stylesheet class for a proxy element – e.g. this proxy is very customizable.
6. Click OK when you finish tailoring the proxy. Now for step 2.
Step 2 – Add the New Topic to the “Real” TOC
You now have to add the proxy topics to the real table of contents. This seems counterintuitive in some cases because you might be adding a TOC proxy topic to a TOC, but the “real” TOC is a list of topics and one of those topics has to contain the TOC or index or glossary proxy in order to be printable.
1. First open the TOC that you want to use as the printable TOC, such as this simple one.
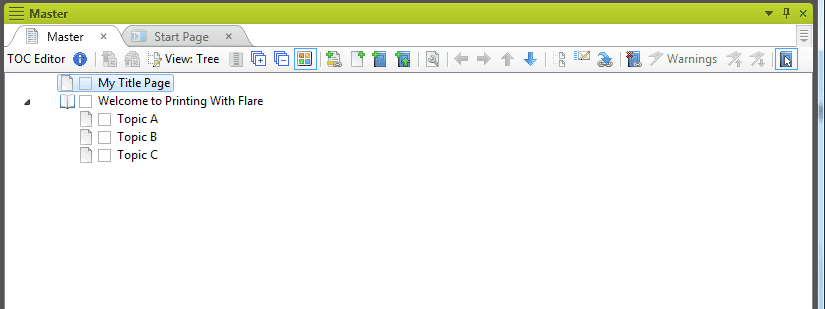
*Note that there’s nothing in this TOC that “says” insert an index or TOC.
2. Now drag the index proxy topic to the logical place for an index, the bottom of the TOC. Like this.
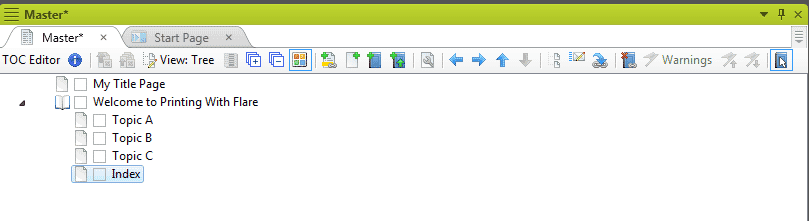
If you were creating a TOC proxy, you’d add the topic to the TOC just after the My Title Page entry. For a glossary, you’d add it just above the Index entry.
That’s it. When you generate your print output, it will have a TOC just after the title page, a glossary at the end of the document, and an index after the glossary.
Summary
If you’re okay with Flare’s defaults for a printable TOC, index, and glossary, automatic insertion is simple and quick. But if you want to customize those features, the manual method is the way to go. It seems counterintuitive to have to insert a TOC into a TOC but it works and, once you get used to it, the process makes sense. Good luck!